SECTION 3
"
User Interface Instructions
3-10
RT5900 SERIES Mobile Mount Radio Data Terminal
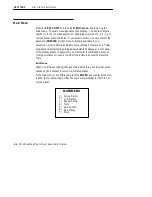
Barcode Parms
(continued)
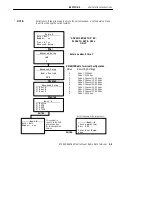
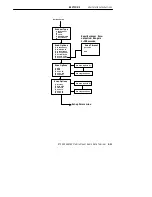
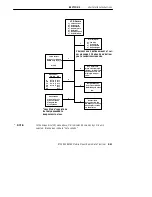
The Barcode Parms flowchart shows four screens (e.g., Scanner Type, Scan
Options, Scan Options [1], Scan Options [2], plus their option menus). You
must press the
ENTER
key to pass from Scanner Type to Scan options, and
again to pass from one scan options menu to the next. After you have made
all choices and options, press the
ENTER
key while in the Scan Options
menu to return to the Set Parameters parent menu.
Scanner Type
Lets you designate the type of scanner that is connected to the terminal.
With selection 1, “No Scanner,” you can verify or pre-set the various scan-
ner and barcode options, with the intent of connecting a scanner at a later
time. At that time, you must designate the scanner type so that the terminal
recognizes and responds to the scanner. Enter a number, 1 thru 5, then press
the
ENTER
key to go to the next menu.
Scan Options
Allows bar code industry standard options (Redundancy, Mod 10 Chk, Con-
catenate, etc.) to be enabled or disabled, and designates how the terminal
handles scanner-derived data (BC Type Char, Auto Tab Scan, and Auto En-
ter Scan). Settings for the data handling options will be specified by the
host programmer.
Within this menu, Scan Timeout (choice #7), allows you to specify the scan-
ner timeout period. You can select from 1--200 seconds. For instance,
shorten the timeout period when using a proximity scanner to reduce error
scans; when using a long-range scanner it may be helpful to extend the
timeout period to allow for more accurate scanner aiming.

