


37
I N S T A L L A T I O N
E N
5.4
Installation of the CAM and milling
machine software
▷
Insert the CAM software CD-ROM into the drive
of the PC.
The software to be installed is on the CD.
▷
Execute the
“
.exe
”
file and follow the directions
on the monitor.
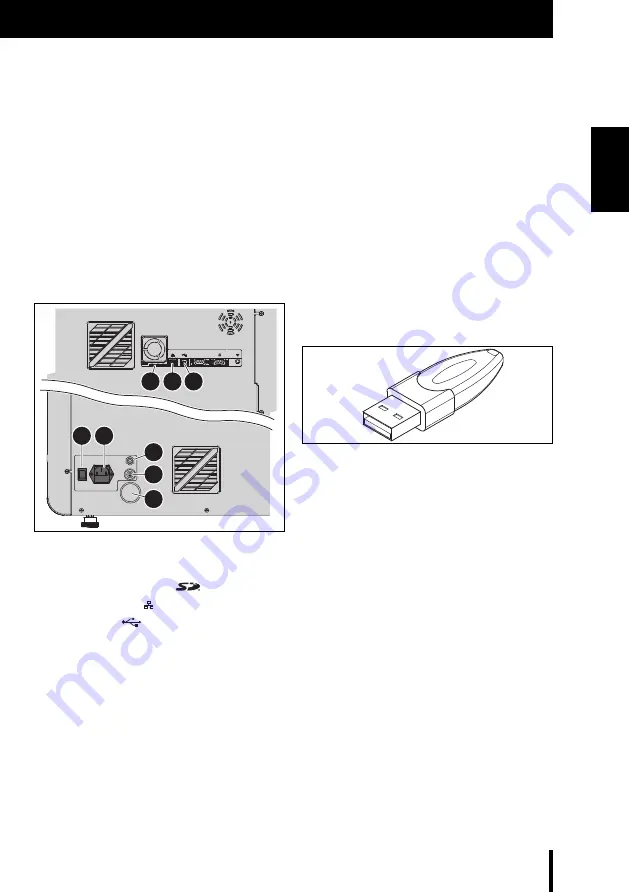
Connecting the interfaces
Fig. 6
Interfaces on the rear side of the milling
machine
1
Slot for SD memory card
2
Ethernet interface
3
USB data port
4
Compressed-air connection, milling spindle
5
Connection, C/L supply line
6
Connection, C/L drain
7
Power supply connection
8
Main switch
▷
Make sure that the main switch [8] of the milling
machine is in the 0 position.
▷
Check if the SD memory card is properly seated
in the slot [1] on the rear side of the milling
machine.
▷
Connect the mains cable to power supply con-
nection [7] of the milling machine as well as to a
mains socket outlet.
Connecting to the PC
▷
Connect a USB cable to the USB interface ([3] in
fig. 6) of the milling machine and to a free USB
port of the PC.
The maximum permitted length of the USB
cable is 5 m.
▷
Insert the CAM Dongle in a free USB port on the
rear side of the PC.
Fig. 7
CAM Dongle
8
7
4
5
6
1 2 3


