p. 31 / 39
Commands menu
The commands menu allows executing some occasional operations like
reading peaks resetting, counters clearing, alarms reset, etc.
If the Advanced level password has been entered, then the commands
me
n
u allows executing the automatic operations useful for the device
configuration.
The following table lists the functions available in the commands menu,
divided by the access level required.
COD. COMMAND
ACCESS
LEVEL
DESCRIPTION
C01
Reset partial Energy meter
Usr
Resets partial energy meter
C02
Reset CNTx counters
Usr
Reset programmable counters
CNTx
C03
Reset LIMx status
Usr
Reset status of latched LIMx
variables
C04
Reset max temperature
Adv
Reset maximum temperature peak
value
C05
Reset max overload
Adv
Reset maximum overload peak
value
C06
Reset step hour meter
Adv
Reset step operation hour meters
C07
Reset step switching counters
Adv
Reset step operation counters
C08
Step power restore
Adv
Reload originally programmed
power into step trimming
C09
Reset total Energy meter
Adv
Resets total energy meters
C10
TEST mode activation
Adv
Enables the TEST mode operation
for output operation verifying
C11
Event log reset
Adv
Clears the event history log
C12
Setup to default
Adv
Resets setup programming to
factory default
C13
Backup setup
Adv
Makes a backup copy of user
setup parameters settings
C14
Restore setup
Adv
Reloads setup parameters with the
backup of user settings.
Once the required command has been selected, press
to execute it.
The device will prompt for a confirmation. Pressing
a
gain, the
command will be executed.
To cancel the command execution press ◄.
To quit command menu press ◄.
Меню команд
Меню команд позволяет выполнять некоторые периодические операции, например,
сброс пиков показаний, очистка счетчиков, сброс аварийных сигналов и т.д.
При вводе пароля расширенного доступа в меню команд можно выполнять
автоматические операции, помогающие настраивать устройство.
В следующей таблице перечислены функции, доступные в меню команд в
зависимости от прав доступа.
КОД
КОМАНДА
УРОВЕНЬ
ДОСТУПА
ОПИСАНИЕ
C01
Reset partial Energy meter
Польз.
Частичный сброс счетчика
энергии
C02
Reset CNTx counters
Польз.
Сброс программируемых
счетчиков CNTx
C03
Reset LIMx status
Польз.
Сброс состояния
зафиксированных переменных
LIMx
C04
Reset max temperature
Расш.
Сброс пикового значения
максимальной температуры
C05
Reset max overload
Расш.
Сброс пикового значения
максимальной перегрузки
C06
Reset step hour meter
Расш.
Сброс счетчиков часов работы
ступеней
C07
Reset step switching counters
Расш.
Сброс счетчиков работы
ступеней
C08
Step power restore
Расш.
Перезагрузка первоначально
запрограммированной мощности
для усечения ступеней
C09
Reset total Energy meter
Расш.
Полный сброс счетчиков энергии
C10
TEST mode activation
Расш.
Включение режима TEST
(ПРОВЕРКА) для проверки
работы выходов
C11
Event log reset
Расш.
Очистка журнала регистрации
событий
C12
Setup to default
Расш.
Сброс программы настроек на
заводские настройки
C13
Backup setup
Расш.
Создание резервной копии
пользовательских параметров
настройки
C14
Restore setup
Расш.
Восстановление параметров
настройки из резервной копии.
После выбора необходимой команды нажмите
для ее выполнения. Устройство
запросит подтверждение. Нажмите
еще раз, и команда будет выполнена.
Чтобы отменить выполнение команды, нажмите ◄.
Для выхода из меню команд нажмите ◄.
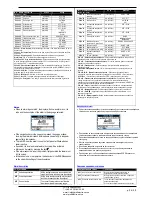
Installation
DCRG8 is designed for flush-mount installation. With proper mounting, it
guarantees IP54 front protection.
Insert the device into the panel hole, making sure that the gasket is
properly positioned between the panel and the device front frame.
Make sure the tongue of the custom label doesn't get trapped under the
gasket and break the seal. It should be positioned inside the board.
From inside the panel, for each four of the fixing clips, position the clip in
its square hole on the housing side,then move it backwards in order to
position the hook.
Установка
Устройство DCRG8 рассчитано на скрытый монтаж. При условии правильного
монтажа обеспечивается степень защиты IP54 с лицевой стороны.
Вставьте устройство в установочное отверстие, добавив прокладку между панелью и
монтажной рамой устройства.
Не допускайте попадания бирки под прокладку и нарушения плотности прилегания.
Она должна находиться внутри щита.
Снаружи панели поместите каждый из четырех фиксаторов в соответствующие
отверстия на стороне корпуса, после чего сдвиньте их назад для фиксации крючка.
Repeat the same operation for the four clips.
Tighten the fixing screw with a maximum torque of 0,5Nm.
In case it is necessary to dismount the system, repeat the steps in
opposite order.
For the electrical connection see the wiring diagrams in the dedicated
chapter and the requirements reported in the technical characteristics
table..
Повторите эту операцию для всех четырех фиксаторов.
Затяните винты с максимальным моментом 0,5 Нм.
Для демонтажа система процедуру выполняйте в обратном порядке.
Электрические подключения см. на электрической схеме в специальной главе, а
также соблюдайте требования в таблице технических характеристик.
ЧП
«
Профиэлектро
»
Т
. +380 44 361-62-55, 80
e-mail: [email protected]
www. profielectro.net.ua


