background image

Guidelines for trained service technicians

This section contains information for trained service technicians.

Inspecting for unsafe conditions

Use the information in this section to help you identify potential unsafe conditions in
an IBM product that you are working on. Each IBM product, as it was designed and
manufactured, has required safety items to protect users and service technicians
from injury. The information in this section addresses only those items. Use good
judgment to identify potential unsafe conditions that might be caused by non-IBM
alterations or attachment of non-IBM features or optional devices that are not
addressed in this section. If you identify an unsafe condition, you must determine
how serious the hazard is and whether you must correct the problem before you
work on the product.

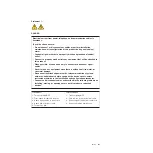
Consider the following conditions and the safety hazards that they present:

v

Electrical hazards, especially primary power. Primary voltage on the frame can
cause serious or fatal electrical shock.

v

Explosive hazards, such as a damaged CRT face or a bulging capacitor.

v

Mechanical hazards, such as loose or missing hardware.

To inspect the product for potential unsafe conditions, complete the following steps:

1. Make sure that the power is off and the power cord is disconnected.

2. Make sure that the exterior cover is not damaged, loose, or broken, and

observe any sharp edges.

3. Check the power cord:

v

Make sure that the third-wire ground connector is in good condition. Use a
meter to measure third-wire ground continuity for 0.1 ohm or less between
the external ground pin and the frame ground.

v

Make sure that the power cord is the correct type, as specified in “Power
cords” on page 40.

v

Make sure that the insulation is not frayed or worn.

4. Remove the cover.

5. Check for any obvious non-IBM alterations. Use good judgment as to the safety

of any non-IBM alterations.

6. Check inside the server for any obvious unsafe conditions, such as metal filings,

contamination, water or other liquid, or signs of fire or smoke damage.

7. Check for worn, frayed, or pinched cables.

8. Make sure that the power-supply cover fasteners (screws or rivets) have not

been removed or tampered with.

Guidelines for servicing electrical equipment

Observe the following guidelines when you service electrical equipment:

v

Check the area for electrical hazards such as moist floors, nongrounded power
extension cords, and missing safety grounds.

v

Use only approved tools and test equipment. Some hand tools have handles that
are covered with a soft material that does not provide insulation from live
electrical currents.

v

Regularly inspect and maintain your electrical hand tools for safe operational
condition. Do not use worn or broken tools or testers.

viii

IBM System x3610 Type 7942: Problem Determination and Service Guide

Содержание System x3610

Страница 1: ...IBM System x3610 Type 7942 Problem Determination and Service Guide...

Страница 2: ......

Страница 3: ...IBM System x3610 Type 7942 Problem Determination and Service Guide...

Страница 4: ...ices on page 115 and the Warranty and Support Information document on the IBM System x Documentation CD Fifth Edition March 2009 Copyright International Business Machines Corporation 2008 US Governmen...

Страница 5: ...er 15 Using the BIOS Setup Utility program 16 Using the ServerGuide Setup and Installation CD 19 Using the RAID configuration programs 21 Using the baseboard management controller 22 Configuring the G...

Страница 6: ...ot swap hard disk drive backplane 78 Removing the system board 80 Installing the system board 81 Chapter 5 Diagnostics 83 Diagnostic tools 83 POST 83 POST beep codes 83 Error logs 87 POST error codes...

Страница 7: ...Getting help and technical assistance 113 Before you call 113 Using the documentation 113 Getting help and information from the World Wide Web 114 Software service and support 114 Hardware service and...

Страница 8: ...vi IBM System x3610 Type 7942 Problem Determination and Service Guide...

Страница 9: ...tuotteen lue turvaohjeet kohdasta Safety Information Avant d installer ce produit lisez les consignes de s curit Vor der Installation dieses Produkts die Sicherheitshinweise lesen Prima di installare...

Страница 10: ...that the exterior cover is not damaged loose or broken and observe any sharp edges 3 Check the power cord v Make sure that the third wire ground connector is in good condition Use a meter to measure...

Страница 11: ...n the off position v Never assume that power has been disconnected from a circuit Check it to make sure that it has been disconnected v If you have to work on equipment that has exposed electrical cir...

Страница 12: ...y Information document For example if a caution statement is labeled Statement 1 translations for that caution statement are in the Safety Information document under Statement 1 Be sure to read all ca...

Страница 13: ...quipment when there is evidence of fire water or structural damage v Disconnect the attached power cords telecommunications systems networks and modems before you open the device covers unless instruc...

Страница 14: ...ttery replace it only with the same module type made by the same manufacturer The battery contains lithium and can explode if not properly used handled or disposed of Do not v Throw or immerse into wa...

Страница 15: ...e device v Use of controls or adjustments or performance of procedures other than those specified herein might result in hazardous radiation exposure DANGER Some laser products contain an embedded Cla...

Страница 16: ...ice and the power switch on the power supply do not turn off the electrical current supplied to the device The device also might have more than one power cord To remove all electrical current from the...

Страница 17: ...gy levels are present inside any component that has this label attached There are no serviceable parts inside these components If you suspect a problem with one of these parts contact a service techni...

Страница 18: ...e voltage is 240 V under any distribution fault condition Important This product is not suitable for use with visual display workplace devices according to Clause 2 of the German Ordinance for Work wi...

Страница 19: ...ion also comes with the server v Installation Guide This document is in Portable Document Format PDF on the IBM System x Documentation CD It contains instructions for setting up the server and basic i...

Страница 20: ...the corresponding statement in the Safety Information document The following notices and statements are used in this document v Note These notices provide important tips guidance or advice v Important...

Страница 21: ...atts 100 240 V ac v Minimum One v Maximum Two provide redundant power Size 2 U v Height 85 4 mm 3 36 in v Depth 705 mm 27 8 in v Width 443 6 mm 17 5 in v Weight approximately 21 09 kg 46 5 lb to 29 03...

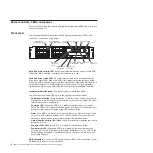
Страница 22: ...rols and LEDs The following controls and LEDs are on the operator information panel v Power control button Press this button to turn the server on and off manually A power control button shield comes...

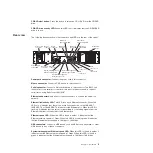
Страница 23: ...port to perform text console redirection and to redirect serial traffic using Serial over LAN SOL Ethernet connectors Use either of these connectors to connect the server to a network Ethernet link ac...

Страница 24: ...on the server Approximately 5 seconds after the server is connected to power the power control button becomes active and one or more fans might start running to provide cooling while the server is con...

Страница 25: ...e server will be turned off automatically v You can press the power control button to start an orderly shutdown of the operating system and turn off the server if your operating system supports this f...

Страница 26: ...ptional devices Microprocessor 2 connector Microprocessor 1 connector SAS channel B SAS channel A SATA 0 Battery connector lot 1 S PCI 33 MHz Slot 3 PCI Express x8 DIMM 6 DIMM 5 DIMM 4 DIMM 3 DIMM 2 D...

Страница 27: ...System board internal cable connectors The following illustration shows the internal connectors on the system board Chapter 1 Introduction 9...

Страница 28: ...illustration shows the external input output connectors on the system board Ethernet 2 USB 3 and 4 Ethernet 1 USB 1 and 2 System management Ethernet Serial video Mouse keyboard 10 IBM System x3610 Typ...

Страница 29: ...s the same as the power control button on the front of the server Depending on the state of the server press this button once to turn the server on or off or press the button for 4 seconds to force po...

Страница 30: ...ts are nearby The following illustration shows the light emitting diodes LEDs on the system board Power on LED BMC 1 2v power LED Microprocessor 1 power LED 5v standby power LED BMC DDRV power Platfor...

Страница 31: ...D The baseboard management controller BMC is receiving 1 2 v power The 1 2 v standby power rail is good a stable 1 2 v rail is available BMC power DDRV LED The BMC is receiving DDR power The 2 5 v sta...

Страница 32: ...14 IBM System x3610 Type 7942 Problem Determination and Service Guide...

Страница 33: ...ilities come with the server v IBM ServerGuide Setup and Installation CD The ServerGuide program provides software setup tools and installation tools that are designed for the server Use this CD durin...

Страница 34: ...hardware features v View and clear the error and event logs v Resolve configuration conflicts Starting the BIOS Setup Utility program To start the BIOS Setup Utility program complete the following st...

Страница 35: ...ddresses and subnet mask for the LAN configuration view or clear the BMC system event log specify whether the BMC resets the server or powers down the server in the event the operating system crashes...

Страница 36: ...nge and delete the user password if the system administrator has given the user that authority User password If a user password is set when you turn on the server the system startup will not be comple...

Страница 37: ...SW2 once 7 Install the cover 8 Turn on the server You can now start the BIOS Setup Utility program and either delete the old password or set a new user or supervisor password 9 Save the configuration...

Страница 38: ...requires a supported IBM server with an enabled startable bootable CD drive In addition to the ServerGuide Setup and Installation CD you must have your operating system CD to install the operating sy...

Страница 39: ...n and the installed hard disk drives 4 The ServerGuide program prompts you to insert your operating system CD and restart the server At this point the installation program for the operating system tak...

Страница 40: ...finished changing settings press Esc to exit the program select Save to save the settings that you have changed Using the LSI Logic MegaRAID Storage Manager program Use the LSI Logic MegaRAID Storage...

Страница 41: ...n the Firmware Update Successful message is displayed click Reboot 8 After the BMC has rebooted with the updated firmware log in to the BMC again to see the version number of the updated BMC firmware...

Страница 42: ...for SOL operation when you are using the Red Hat Enterprise Linux ES 4 operating system complete the following steps Note Hardware flow control prevents character loss during communication over a ser...

Страница 43: ...tty1 console ttyS0 19200n8 The following examples show the original content of the etc lilo conf file and the content of this file after modification Original etc lilo conf contents prompt timeout 50...

Страница 44: ...a LILO boot prompt is displayed instead of the graphical user interface Press Tab at this prompt to install all of the boot options that are listed To load the operating system in interactive mode ty...

Страница 45: ...e to rerun grub after making changes to this file NOTICE You have a boot partition This means that all kernel and initrd paths are relative to boot eg root hd0 0 kernel vmlinuz version ro root dev hda...

Страница 46: ...uz 2 4 9 e 12 ro root dev hda6 initrd initrd 2 4 9 e 12 img You must restart the Linux operating system after you complete these procedures for the changes to take effect and to enable SOL SUSE SLES 9...

Страница 47: ...boot message color white blue black light gray default 0 timeout 8 title linux kernel hd0 1 boot vmlinuz root dev hda2 acpi oldboot vga 791 1 initrd hd0 1 boot initrd title floppy root chainloader 1...

Страница 48: ...press Enter to display the current boot options for your server b In the Boot Entries section locate the boot entry ID for the section with an OS friendly name of Windows Server 2003 Standard Write d...

Страница 49: ...restart the Windows 2003 operating system after you complete this procedure for the changes to take effect and to enable SOL Installing the OSA SMBridge management utility program Important To obtain...

Страница 50: ...be logged in as a root user to perform these procedures 1 Go to http www ibm com systems support Download the utility program and create the OSA BMC Management Utility CD 2 Insert the OSA BMC Manageme...

Страница 51: ...type bmc_cfg and press Enter 3 Follow the instructions on the screen Using the baseboard management controller firmware update utility program Use the baseboard management controller firmware update...

Страница 52: ...figuring the Gigabit Ethernet controllers The Ethernet controllers are integrated on the system board They provide an interface for connecting to a 10 Mbps 100 Mbps or 1 Gbps network and provide full...

Страница 53: ...3 Under Popular links click Publications lookup 4 From the Product family menu select System x3610 and click Continue Chapter 2 Configuration information and instructions 35...

Страница 54: ...36 IBM System x3610 Type 7942 Problem Determination and Service Guide...

Страница 55: ...components are of three types v Tier 1 customer replaceable unit CRU Replacement of Tier 1 CRUs is your responsibility If IBM installs a Tier 1 CRU at your request you will be charged for the install...

Страница 56: ...FRU part number 1 Cover 44X1870 2 Air duct 44X1816 3 Adapter low profile varies 4 Memory registered DDR2 DIMM 512 GB varies 4 Memory registered DDR2 DIMM 1 GB 41Y2761 4 Memory registered DDR2 DIMM 2 G...

Страница 57: ...disk drive SAS or SATA varies 16 Filler panel hot swap hard disk drive bay 39M4375 17 SAS hot swap backplane 44X1799 18 Heat sink 44X1794 19 Air baffle insert part of 44X1816 Cable assembly front USB...

Страница 58: ...T three conductor cord a maximum of 15 feet in length and a parallel blade grounding type attachment plug rated 15 amperes 125 volts For units intended to be operated at 230 volts U S use Use a UL lis...

Страница 59: ...epal Pakistan Samoa South Africa Sri Lanka Swaziland Uganda 39M5151 Abu Dhabi Bahrain Botswana Brunei Darussalam Channel Islands China Hong Kong S A R Cyprus Dominica Gambia Ghana Grenada Iraq Ireland...

Страница 60: ...IBM power cord part number Used in these countries and regions 39M5068 Argentina Paraguay Uruguay 39M5226 India 39M5233 Brazil 42 IBM System x3610 Type 7942 Problem Determination and Service Guide...

Страница 61: ...that any known issues are addressed and that your server is ready to function at maximum levels of performance To download firmware updates for your server complete the following steps 1 Go to http ww...

Страница 62: ...he component v When you are finished working on the server reinstall all safety shields guards labels and ground wires v For a list of supported optional devices for the server see http www ibm com se...

Страница 63: ...e packages until you are ready to install them To reduce the possibility of damage from electrostatic discharge observe the following precautions v Limit your movement Movement can cause static electr...

Страница 64: ...ge 6 3 Loosen the rack release thumbscrews at the front of the server then pull the server out of the rack enclosure until both slide rails lock Note You can reach the cables on the back of the server...

Страница 65: ...e following steps 1 Read the safety information that begins on page vii and Installation guidelines on page 43 2 Turn off the server and peripheral devices and disconnect all power cords and external...

Страница 66: ...lots in the fan bracket assembly 2 Lower the rear of the air duct into the server Attention For proper cooling and airflow replace the air duct before you turn on the server Operating the server with...

Страница 67: ...adapter 5 Remove the screw that holds the adapter in the slot 6 Carefully grasp the adapter by its top edge or upper corners and pull the adapter from the PCI slot 7 If you are instructed to return th...

Страница 68: ...quired for the adapter 5 Install the cover see Installing the cover on page 46 6 Slide the server into the rack and tighten the rack release thumbscrews 7 Reconnect the external cables then reconnect...

Страница 69: ...ay complete the following steps Attention To maintain proper system cooling do not operate the server for more than 10 minutes without either a drive or a filler panel installed in each bay 1 Make sur...

Страница 70: ...return the DIMM follow all packaging instructions and use any packaging materials for shipping that are supplied to you Installing a memory module For information about the types of dual inline memory...

Страница 71: ...ta bits 64 bits plus 8 ECC bits Table 9 DIMM Configurations Configuration Channel 0 DIMM 6 Channel 1 DIMM 5 Channel 0 DIMM 4 Channel 1 DIMM 3 Channel 0 DIMM 2 Channel 1 DIMM 1 1 X X Dual rank Dual ran...

Страница 72: ...the air duct see Installing the air duct on page 48 7 Install the cover see Installing the cover on page 46 8 Slide the server into the rack and tighten the rack release thumbscrews 9 Reconnect the ex...

Страница 73: ...ly part of the way out of the bay 7 Release the release latch then support the power supply and pull it the rest of the way out of the bay 8 If you do not intend to install another power supply in the...

Страница 74: ...tached There are no serviceable parts inside these components If you suspect a problem with one of these parts contact a service technician Release latch Power supply Power supply filler Release lever...

Страница 75: ...t you must consider when replacing the battery v IBM has designed this product with your safety in mind The lithium battery must be handled correctly to avoid possible danger If you replace the batter...

Страница 76: ...he battery as required by local ordinances or regulations To remove the battery complete the following steps 1 Read the safety information that begins on page vii and Installation guidelines on page 4...

Страница 77: ...n released b Use your thumb and index finger to lift the battery from the socket 10 Dispose of the battery as required by local ordinances or regulations See Battery return program on page 118 for mor...

Страница 78: ...information To install the replacement battery complete the following steps 1 Follow any special handling and installation instructions that come with the replacement battery 2 Insert the new battery...

Страница 79: ...your server The illustrations in this document might differ slightly from your hardware Removing a fan Attention To ensure proper server operation if a fan fails replace it as soon as possible To rep...

Страница 80: ...of the server and rotate the assembly toward the inside of the server 6 Pull the assembly away from the front of the server and lift it out of the server 7 If you are instructed to return the operato...

Страница 81: ...ront USB connectors The front USB connectors are on top of the DVD drive cage assembly To remove the front USB connectors complete the following steps 1 Read the safety information that begins on page...

Страница 82: ...hat secure the front USB connectors to the DVD drive cage assembly 3 Place the cables through the clips that are on top of the DVD drive cage assembly 4 Install the DVD drive cage assembly into the se...

Страница 83: ...t the power cord and all external cables 3 Remove the cover see Removing the cover on page 46 4 Disconnect the thermal sensor cable from the connector on the system board See System board internal cab...

Страница 84: ...t touch the front of the chassis c Use the cable ties in front of the fan bracket assembly to secure the thermal cable d Thread the connector end of the cable through the opening in the fan wall 3 Con...

Страница 85: ...fan on page 61 and Installing a fan on page 61 To remove the fan bracket assembly complete the following steps Fan bracket Fan 1 Read the safety information that begins on page vii and Installation gu...

Страница 86: ...er cords and turn on the peripheral devices and the server 7 Check the system error LED and the fan error LED on the operator information panel Table 10 Fan error LED System error LED Meaning On Any c...

Страница 87: ...n compromise the thermal grease and the microprocessor socket v Dropping the microprocessor during installation or removal can damage the contacts v Do not touch the microprocessor contacts handle the...

Страница 88: ...le and cannot be used in the same server For example if the server has a dual core microprocessor you cannot install a quad core microprocessor as the second microprocessor Use the BIOS Setup Utility...

Страница 89: ...ion might be different and might affect conductivity To install a new or replacement microprocessor complete the following steps The following illustration shows how to install microprocessor 2 on the...

Страница 90: ...t use excessive force when you press the microprocessor into the socket v Make sure that the microprocessor is oriented and aligned and positioned in the socket before you try to close the lever Notch...

Страница 91: ...mal grease side down Heat sink Microprocessor c Press down firmly on the heat sink until it is seated securely d Tighten the screws that secure the heat sink to the system board 8 Replace the air duct...

Страница 92: ...to disconnect the cables for the operator information panel and front Ethernet connectors from the system board 5 Remove the two screws that secure the drive enclosure to the chassis 6 Slide the drive...

Страница 93: ...Replace the two screws that secure the drive cage enclosure to the chassis 5 Reconnect the cables that you disconnected in Removing a DVD drive on page 74 Be sure to connect the SATA cable to the SAT...

Страница 94: ...kplane cables then disconnect all power backplane cables from the system board and other components 6 Remove the system board see Removing the system board on page 80 7 Remove the screws that secure t...

Страница 95: ...the hard disk drive backplane P5 to J19 power for the right side of the hard disk drive backplane Optical drive CD DVD drive P7 to rear of CD DVD drive Be sure to route and secure the cables using th...

Страница 96: ...If you are instructed to return the backplane follow all packaging instructions and use any packaging materials for shipping that are supplied to you Installing the hot swap hard disk drive backplane...

Страница 97: ...for the locations of the SAS channel A and SAS channel B connectors on the system board 6 Connect the SAS CH A cable connector to the SAS CHA connector on the system board Connect the SAS CH B cable c...

Страница 98: ...e all adapters and place them on a static protective surface for reinstallation Important Note which DIMMs are in which connectors before you remove the DIMMs You must install them in the same configu...

Страница 99: ...ve pressure 2 When you replace the system board you must either update the server with the latest firmware or restore the pre existing firmware that the customer provides on a diskette or CD image To...

Страница 100: ...tighten the rack release thumbscrews 11 Reconnect the external cables then reconnect the power cords and turn on the peripheral devices and the server Important Either update the server with the late...

Страница 101: ...on the System Diagnostics CD See Diagnostic programs and messages on page 105 for more information POST When you turn on the server it performs a series of tests to check the operation of the server c...

Страница 102: ...Reseat the DIMMs 2 Replace the following components one at a time in the order shown restarting the server each time a DIMMs b Trained service technician only System board Trained service technician o...

Страница 103: ...ice technician only Microprocessor 2 if installed v Trained service technician only Microprocessor 1 v Trained service technician only System board 6 beeps Keyboard controller failed Controller 8042 G...

Страница 104: ...rained service technician Beep code Description Action 1 long beep and 3 short beeps repeated endlessly Bad memory module or multi bit ECC was found 1 Make sure that the memory modules in the server a...

Страница 105: ...BMC system event log so that you can find current errors more easily You can view the contents of the event log and the BMC system event log from the BIOS Setup Utility program When you are troublesh...

Страница 106: ...detected problems v Follow the suggested actions in the order in which they are listed in the Action column until the problem is solved v See Chapter 3 Parts listing Type 7942 server on page 37 to det...

Страница 107: ...ror 1 Reseat the keyboard cable in the keyboard connector 2 Make sure that the keyboard and mouse cables are not reversed 3 Replace the following components one at a time in the order shown restarting...

Страница 108: ...time a Trained service technician only Microprocessor b Trained service technician only System board 5120 BIOS checksum error detected 1 Start the BIOS Setup Utility program select Exit select Load De...

Страница 109: ...running the diagnostic programs you must determine whether the failing server is part of a shared hard disk drive cluster two or more servers sharing external storage devices If it is part of a cluste...

Страница 110: ...ve failed Replace the fan bracket assembly v If the system error LED is flashing and the fan error LED is off check the LEDs on the system board see System board LEDs on page 12 An error LED amber tha...

Страница 111: ...tly 4 Reinstall the new software or new device CD DVD drive problems v Follow the suggested actions in the order in which they are listed in the Action column until the problem is solved v See Chapter...

Страница 112: ...e part is a CRU replace it If the part is a FRU the part must be replaced by a trained service technician Hard disk drive problems v Follow the suggested actions in the order in which they are listed...

Страница 113: ...on page 87 3 See Solving undetermined problems on page 110 The server resets restarts occasionally 1 If the reset occurs during POST and the BMC watchdog timer is enabled click Advanced IPMI Configura...

Страница 114: ...e keyboard and mouse cables are not reversed v The server and the monitor are turned on 3 Reseat the keyboard cable 4 Replace the following components one at a time in the order shown restarting the s...

Страница 115: ...owing components one at a time in the order shown restarting the server each time a Keyboard b Only if the problem occurred with a front USB connector Internal USB cable c Trained service technician o...

Страница 116: ...it detected a problem Use the BIOS Setup Utility program to view and enable installed DIMMs 2 Check the POST error log for memory error messages 3 Run memory diagnostics see Running the diagnostic pr...

Страница 117: ...nician only Replace the microprocessors 5 Trained service technician only Replace the system board Monitor problems Some IBM monitors have their own self tests If you suspect a problem with your monit...

Страница 118: ...en goes blank when you start some application programs 1 Make sure that v The application program is not setting a display mode that is higher than the capability of the monitor v You installed the ne...

Страница 119: ...e field replaceable units FRU v If an action step is preceded by Trained service technician only that step must be performed only by a trained service technician Symptom Action An IBM optional device...

Страница 120: ...n panel assembly cable c Reconnect the power cords d Press the power control button to restart the server If the button does not work replace the operator information panel assembly 3 If you just inst...

Страница 121: ...one at a time in the order shown restarting the server each time a Serial cable b Failing serial device c Trained service technician only System board ServerGuide problems v Follow the suggested actio...

Страница 122: ...erver on page 37 to determine which components are customer replaceable units CRU and which components are field replaceable units FRU v If an action step is preceded by Trained service technician onl...

Страница 123: ...System board Video problems See Monitor problems on page 99 Diagnostic programs and messages The diagnostic programs are the primary method of testing the major components of the server As you run th...

Страница 124: ...keys To view server configuration information such as system configuration memory contents interrupt request IRQ use direct memory access DMA use device drivers and so on select Hardware Info from the...

Страница 125: ...code update from the World Wide Web complete the following steps Note Changes are made periodically to the IBM Web site The actual procedure might vary slightly from what is described in this document...

Страница 126: ...m configuration replace the components in the minimum configuration one at a time until the problem is isolated Power supply LEDs The following minimum configuration is required for the power supply s...

Страница 127: ...le Try the following procedures v Make sure that the correct device drivers which come with the server are installed and that they are at the latest level v Make sure that the Ethernet cable is instal...

Страница 128: ...each time v Any external devices v Surge suppressor device on the server v Modem printer mouse and non IBM devices v Each adapter v Hard disk drives v Memory modules The minimum configuration requirem...

Страница 129: ...ions and levels 6 Have the same diagnostics code version 7 Have the same configuration options set in the system 8 Have the same setup for the operation system control files Comparing the configuratio...

Страница 130: ...purposes consider them identical only if all the following factors are exactly the same in all the servers v Machine type and model v BIOS level v Memory amount type and configuration v Adapters and...

Страница 131: ...e drivers or to submit a request for information You can solve many problems without outside assistance by following the troubleshooting procedures that IBM provides in the online help or in the docum...

Страница 132: ...e supported by Support Line in your country or region see http www ibm com services sl products For more information about Support Line and other IBM services see http www ibm com services or see http...

Страница 133: ...LUDING BUT NOT LIMITED TO THE IMPLIED WARRANTIES OF NON INFRINGEMENT MERCHANTABILITY OR FITNESS FOR A PARTICULAR PURPOSE Some states do not allow disclaimer of express or implied warranties in certain...

Страница 134: ...t Inc in the United States and other countries Other company product or service names may be trademarks or service marks of others Important notes Processor speed indicates the internal clock speed of...

Страница 135: ...om ibm recycle us index shtml and http www ibm com ibm environment products index shtml Esta unidad debe reciclarse o desecharse de acuerdo con lo establecido en la normativa nacional o local aplicabl...

Страница 136: ...ial effects of EEE on the environment and human health due to the potential presence of hazardous substances in EEE For proper collection and treatment contact your local IBM representative Battery re...

Страница 137: ...are labeled to indicate that they are to be collected separately and recycled at end of life The label on the battery may also include a chemical symbol for the metal concerned in the battery Pb for...

Страница 138: ...Chinese Class A warning statement 120 IBM System x3610 Type 7942 Problem Determination and Service Guide...

Страница 139: ...forming 92 clear CMOS 18 clear CMOS switch 19 command line interface commands identify 34 power 34 sel 34 command line interface continued commands continued sysinfo 34 for remote management 33 config...

Страница 140: ...g hard disk drive backplane 77 microprocessor 70 operator information panel assembly 61 system board 80 G getting help 113 H hard disk drive installing 51 problems 94 removing 50 hard disk drive activ...

Страница 141: ...ions 3 power supply status LED 6 power supply installing 55 power control button 4 power control button shield 4 power cord connector 5 power on LED rear 4 power on password See user password problem...

Страница 142: ...S 9 system error LED 4 T telephone numbers 114 temperature 3 test log viewing 106 thermal material heat sink 73 tools diagnostic 83 trademarks 115 turning off the server 6 turning on the server 6 U un...

Страница 143: ......

Страница 144: ...Part Number 49Y0084 Printed in USA 1P P N 49Y0084...

Отзывы: