Attention:
Drives are fragile. Handle with care.
9.
Remove the drive from the static-protective package and place it on an ESD mat.
Installing a disk drive in the 5148-21L, 5148-22L, 8247-21L, 8247-22L, 8284-21A, or 8284-22A system with
the power turned off:
Learn how to install a disk drive in a system, with the system power turned off.
To install a disk drive in a system, complete the following steps:
1.
Ensure that you have the electrostatic discharge (ESD) wrist strap on and that the ESD clip is
connected to an unpainted metal surface. If not, do so now.
2.
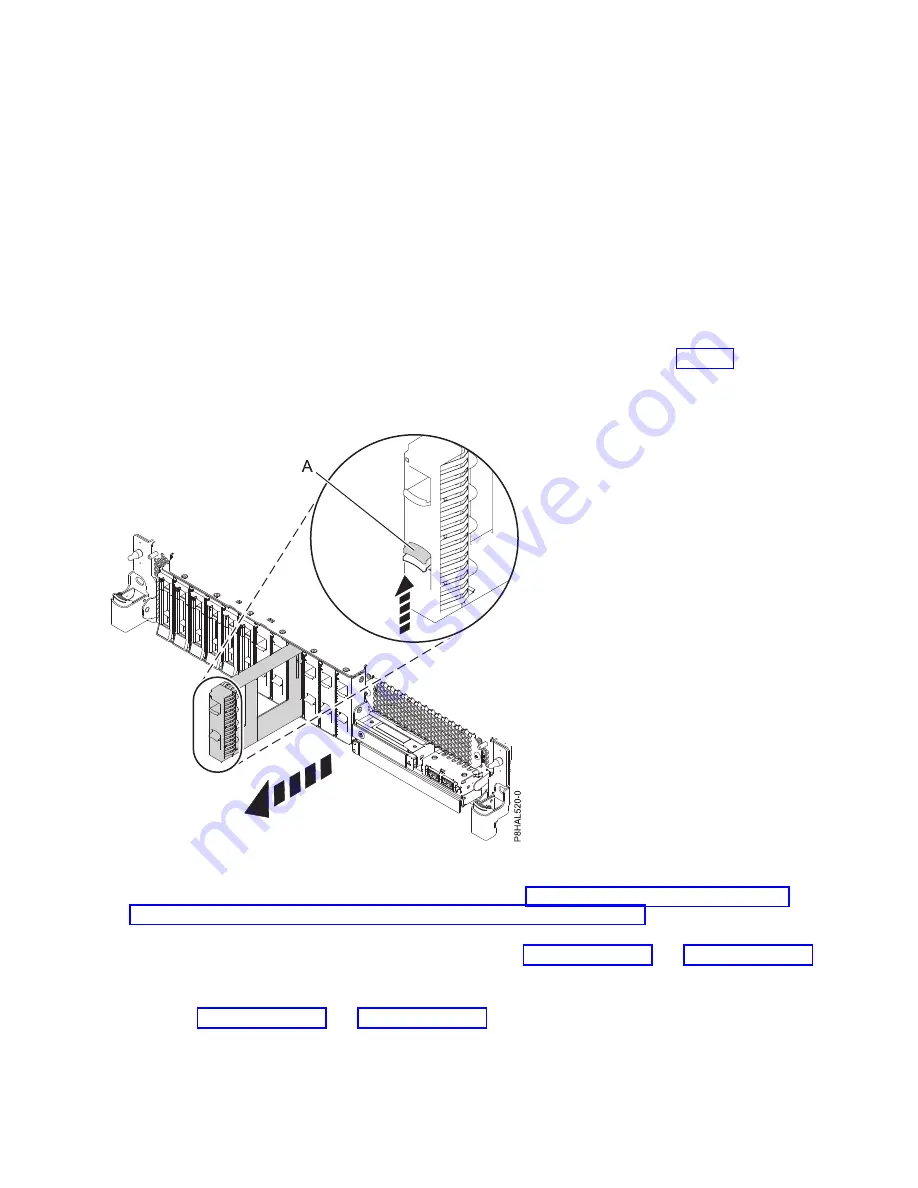
If the slot you want to use contains a drive filler, remove the drive filler from the slot.
To remove a filler from a base function system, complete the following steps:
a.
Push the lock (A) on the handle of the filler in the direction that is shown in Figure 3.
b.
Hold the handle and pull out the filler from the slot.
For instructions to remove a filler from other systems, see “Removing a disk drive filler from the
5148-21L, 5148-22L, 8247-21L, 8247-22L, 8284-21A, or 8284-22A” on page 97.
3.
Unlock the drive bay handle (A) by pressing it and pulling it out toward you. If the handle is not all
the way out, the drive does not slide into the system. See Figure 4 on page 6 and Figure 5 on page 6.
4.
Hold the drive by the top and bottom edges as you position the drive, and insert it into the drive slot.
5.
Slide the drive all the way into the system, and push the drive bay handle (A) in until it locks, as
shown in Figure 4 on page 6 and Figure 5 on page 6.
Important:
Ensure that the drive is fully seated and is all the way into the system.
Figure 3. Removing a disk drive filler from a base function system
Disk drives or solid-state drives
5
Содержание Power System 5148-22L
Страница 2: ......
Страница 18: ...xvi Disk drives or solid state drives...
Страница 202: ...184 Disk drives or solid state drives...
Страница 203: ......
Страница 204: ...IBM...


