


Completing the installation
After working with options, you need to reinstall any removed parts, replace
the cover, and reconnect any cables, including power cords and
communication cables. Also, depending on the option installed, you might
need to update information in the Configuration/Setup Utility program.
The following list is a quick reference to these procedures:
“Replacing the cover and connecting the cables”
“Updating the computer configuration” on page 83
Replacing the cover and connecting the cables
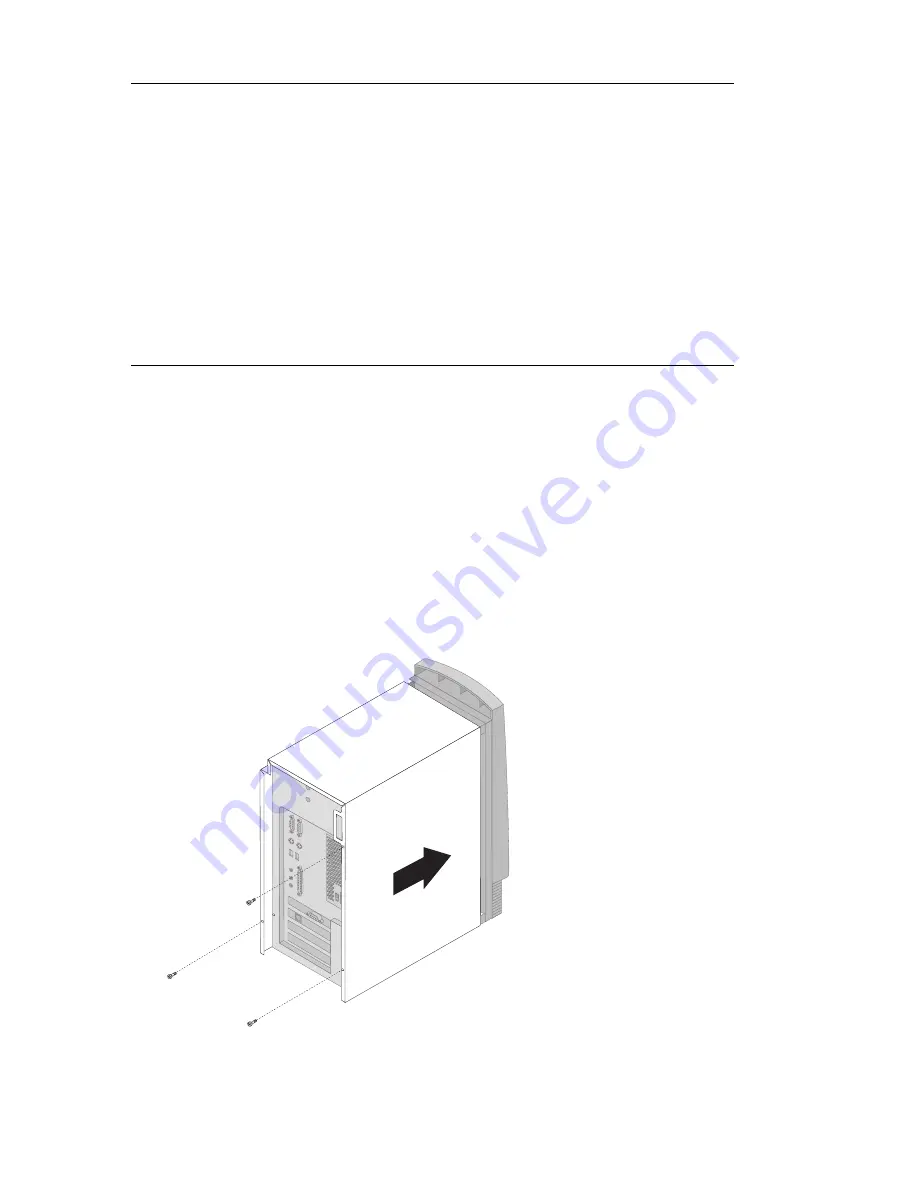
To replace the cover and connect cables to your computer:
1. Ensure that all components have been reassembled correctly and that
no tools or loose screws are left inside your computer.
2. Clear any cables that might impede the replacement of the cover.
3. Position the cover over the chassis as shown and slide forward. You
might need to lift the front of the cover slightly to align it properly.
4. Insert the three thumbscrews into the holes in the cover and the chassis
and tighten.
5. Reconnect the external cables and cords to the computer.
82
Aptiva Reference Guide
Содержание Aptiva 2198
Страница 1: ...Aptiva Reference Guide...
Страница 2: ......
Страница 3: ...Aptiva Reference Guide IBM...
Страница 8: ...vi Aptiva Reference Guide...
Страница 44: ...22 Aptiva Reference Guide...
Страница 60: ...38 Aptiva Reference Guide...
Страница 74: ...52 Aptiva Reference Guide...
Страница 78: ...56 Aptiva Reference Guide...
Страница 84: ...4 Pivot the power supply toward the opened side slightly 62 Aptiva Reference Guide...
Страница 108: ...86 Aptiva Reference Guide...
Страница 114: ...92 Aptiva Reference Guide...
Страница 154: ...132 Aptiva Reference Guide...
Страница 158: ...136 Aptiva Reference Guide...
Страница 178: ...156 Aptiva Reference Guide...
Страница 185: ......
Страница 186: ...IBM Part Number 09N8732 Printed in U S A December 1999 9N8732...


