4
HT130003 / HT130042
HT130030 / HT130043
User Manual
CorTemp
®
Data Recorder v4.3
9001 Series
III. CorTemp
®
Data Recorder – Standard Menu
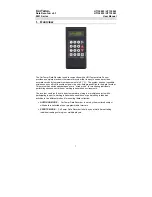
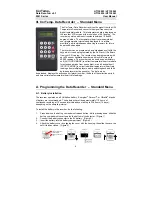
The CorTemp
®
Data Recorder receives the signal from the HQI
Temperature Sensor and converts the signal frequency into
digital temperature data. This temperature data is displayed on
the recorder LCD screen with a resolution of 0.01 degree. The
recorder operates within environments between 10 and 50
degrees Celsius. The temperature / heart rate is sampled at
user programmable intervals and displayed for real time
monitoring, while simultaneously saving to memory for future
download and analysis.
The recorder can be programmed as a standalone unit with the
keypad, or it can be programmed by the CorTrack
®
II Software
from your PC / Laptop. The recorder can be programmed with
up to 99 sensor calibration numbers and record / store up to
25,000 readings. The recorder can be used as an ambulatory
unit
(AUTO RUN MODE)
to collect temperature / heart rate data
for extended periods from one subject, or as a handheld unit
(SPORTS MODE)
to collect individual temperature / heart rate
readings from multiple players, easily switching back and forth
between players (active sensors). The data, when
downloaded, displays the active sensor (player) number, the date of the collection period,
and time correlated temperature / heart rate readings.
A. Programming the Data Recorder – Standard Menu
A.1. Battery Installation
The recorder operates on a 9V alkaline battery. Energizer
®
, Duracell
®
, or Ultralife
®
brands
of battery are recommended. The battery will provide approximately 110 hours of
continuous recording at 10 second intervals and can last up to 336 hours (14 days),
depending on the sampling interval.
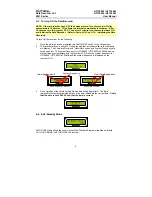
To install the battery in the recorder, do the following:
1.
Press down on the battery compartment release button; while pressing down, slide the
battery compartment cover towards the bottom of the detector. (Figure 1)
2.
Connect the battery connector to the 9V battery. (Figure 2)
3.
Insert the battery into the battery compartment. (Figure 3)
4.
Attach the battery cover by aligning the cover with the housing, then slide the cover up
until it latches closed. (Figure 4)
Figure 2
Figure 3
Figure 1
Figure 4
Back View
Battery Compartment
Cover
Battery Compartment
Release Button


