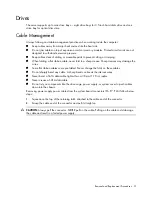


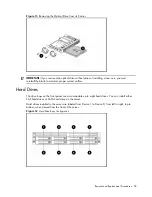


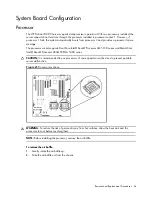


Removal and Replacement Procedures 45
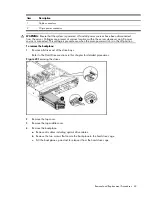
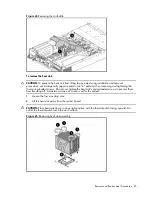
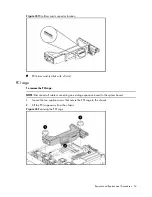
Figure 24
Removing the Air Baffle
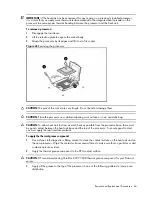
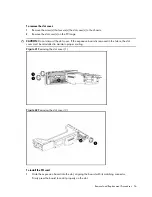
To remove the heat sink:
CAUTION:
To prevent the heat sink from tilting to one side during installation and removal
procedures, use a diagonally opposite pattern (an “X” pattern) when loosening and tightening the
four spring-loaded screws. Do not over tighten the heat sink’s spring-loaded screws to prevent them
from breaking off. A maximum torque of 4 in-Ib is set for the system.
1.
Loosen the four mounting pins.
2.
Lift the heat sink away from the system board.
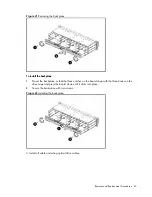
CAUTION:
Place heat sink down in an upright position with the thermal patch facing upward. Do
not let the thermal patch touch the work surface.
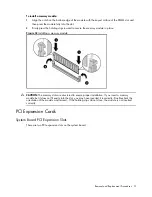
Figure 25
Removing heat sink assembly
Содержание ProLiant DL180 G
Страница 1: ...HP ProLiant DL180 Server Maintenance and Service Guide Part number 448409 001 First edition July 2007 ...
Страница 12: ...Customer self repair 12 ...
Страница 13: ...Customer self repair 13 ...
Страница 14: ...Customer self repair 14 ...
Страница 15: ...Customer self repair 15 ...
Страница 19: ...Illustrated parts catalog 19 ...
Страница 79: ...Diagnostic tools and Setup Utilities 79 Main Menu Figure 67 Main menu of the BIOS Setup Utility ...
Страница 82: ...Diagnostic tools and Setup Utilities 82 ...
Страница 83: ...Diagnostic tools and Setup Utilities 83 Security Menu Figure 71 Security menu of the BIOS Setup Utility 1 ...
Страница 84: ...Diagnostic tools and Setup Utilities 84 Figure 72 Security menu of the BIOS Setup Utility 2 ...


