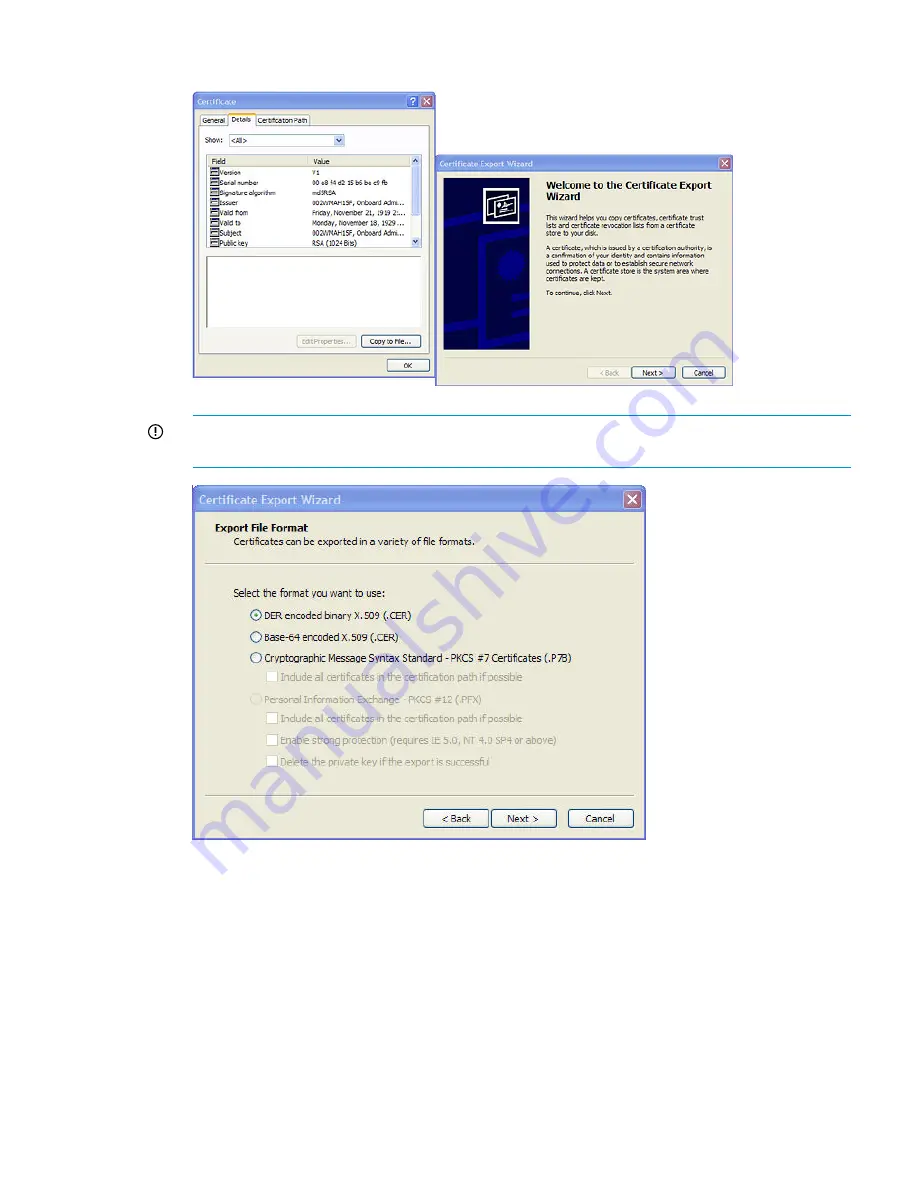
4.
Click the
Details
tab, and then click the
Copy to File...
button.
5.
IMPORTANT:
Select
Base-64 encoded x.509 (.CER)
from the list of export options. Click the
Next
button.
6.
Provide a name and location for the file (c:\dccert.cer) and click the
Finish
button to complete
the wizard.
7.
Locate the exported certificate file in Internet Explorer and rename it with a .txt extension
(dccert.txt). Open the file in notepad and copy the entire contents to the clipboard. The following
is an example of the certificate file contents:
-----BEGIN CERTIFICATE-----
MIIFxDCCBKygAwIBAgIKJWUSwAAAAAAAAjANBgkqhkiG9w0BAQUFADBVMRMwEQYK
CZImiZPyLGQBGRYDY29tMRIwEAYKCZImiZPyLGQBGRYCaHAxFzAVBgoJkiaJk/Is
ZAEZFgdhdGxkZW1vMREwDwYDVQQDEwh3aW5kb3pDQTAeFw0wNjA4MjIyMDIzMTFa
Fw0wNzA4MjIyMDIzMTFaMCAxHjAcBgNVBAMTFXdpbmRvei5hdGxkZW1vLmhwLmNv
bTCBnzANBgkqhkiG9w0BAQEFAAOBjQAwgYkCgYEAy4zeh3iXydUAWKVHIDsxLJ6B
aRuVT9ZhkL5NQHIDeRjumsgc/jHSERDmHuyoY/qbF7JMhJ9Lh9QQHUg8QfEYsC1y
Uploading the DC certificate (optional) 177


