Operating Instructions
Art.: 80180203 en
Read carefully prior to starting up!
Keep operating instructions in a safe place!
10/2012
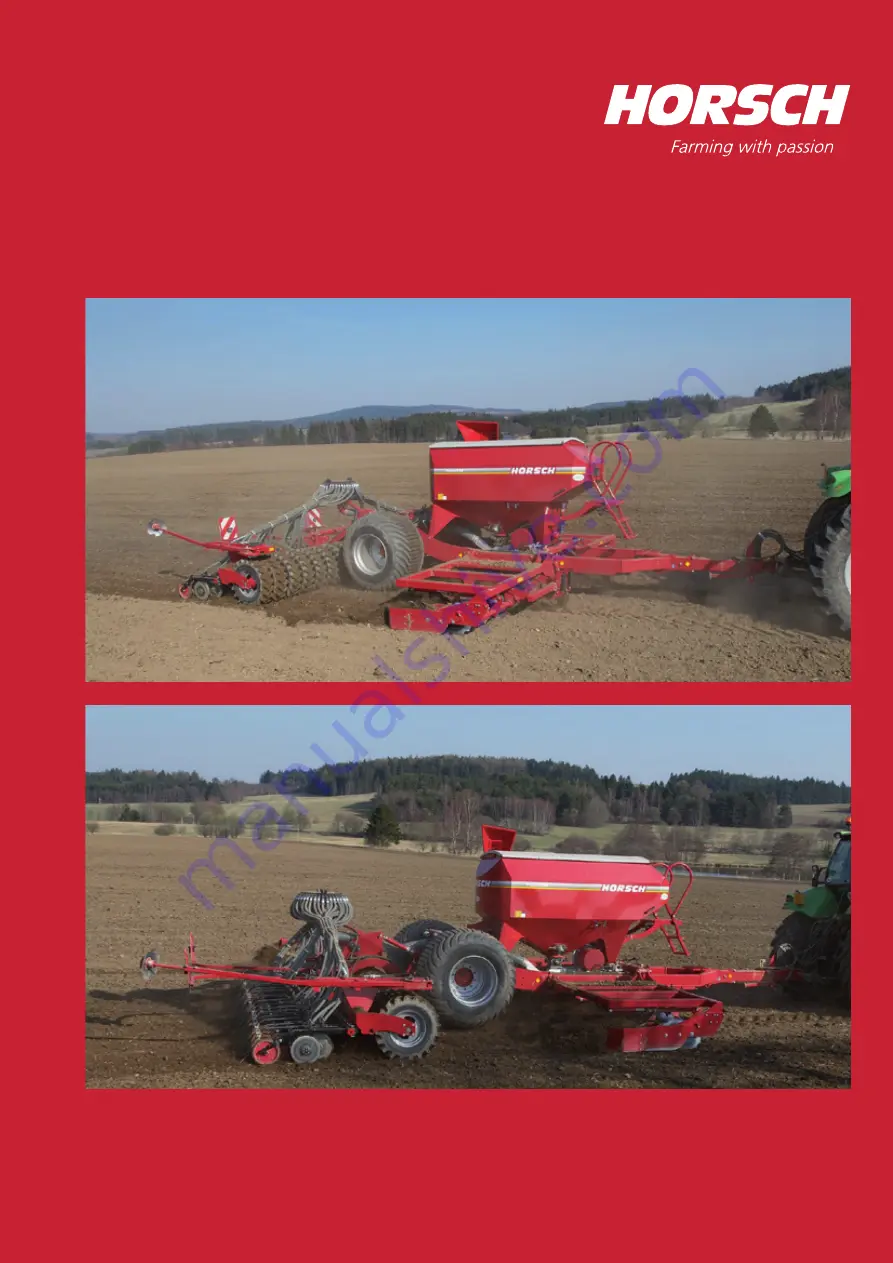
Pronto 6 AS
Страница 1: ...Operating Instructions Art 80180203 en Read carefully prior to starting up Keep operating instructions in a safe place 10 2012 Pronto 6 AS...
Страница 2: ......
Страница 3: ...tive 2006 42 EC The following harmonised standards and technical specifications were applied for correct interpre tation of the safety and health requirements specified in the EC Directive EN ISO 1210...
Страница 4: ......
Страница 5: ...ty claim will only be valid if this form has been fully completed signed and returned to HORSCH Maschinen GmbH or has been given to the Service Technician immediately after first instruction Place dat...
Страница 6: ......
Страница 7: ...machine Serial number Machine type Year of construction Initial installation Fittings Publication date of Operation Manual 10 2012 Latest change Address of Retailer Name Road Town City Tel Customer No...
Страница 8: ...21 Folding unfolding the machine 21 Parking the machine 23 Operation 24 Pneumatics Pronto AS 24 Fan 24 Fan direct drive 24 Table of fan rotation speeds 25 Fan with PTO shaft driven pump 26 Re tighteni...
Страница 9: ...ow 55 Harrow in front of packer 56 CrossBar 56 Fertiliser equipment PPF 57 Adjusting the fan air flow 57 Sowing without fertiliser 58 Micro granulate facility 59 Maize distributor 60 Filling auger 61...
Страница 10: ...are of your machine After this you should return the machine registration form to HORSCH This confirms your formal acceptance receipt of the machine The warranty period starts with the date of deliver...
Страница 11: ...ansport is deemed improper HORSCH will not assume liability whatsoever for damage resulting from unintended use The risk will be borne solely by the user The respective accident prevention regulations...
Страница 12: ...Onlythosepersonswhohavebeenauthorisedand instructed by the operator may operate the ma chine Operators must be at least 16 years of age The operator must hold a valid driving licence He is responsibl...
Страница 13: ...adhere to the operating instructions before starting up the machine 00380055 Switch the engine off and pull out the key before starting maintenance and repair work 00380294 Do not climb on rotatable...
Страница 14: ...s in the rotating auger 00380163 1 1 2A08343 150 x 80 mm 00380577 5 mm 2010 11 25 schwarz CX4 do Auftrag Ma stab Erstelldatum Farben Prog Version Bearbeiter Artikel Format Freigabe gepr Sachb gepr ft...
Страница 15: ...e coulter pressure The pressure is indicated by the pressure gauge Vorlage Zeichnungsnummer Maschine Zeichnung Maschine 00380943 00380943 0 I Block the hydraulic system when sowing without granular fe...
Страница 16: ...auger on and off Reversing the hopper volume for seed and ferti liser with a ratio of 40 and 60 to 60 and 40 Valve position when using both tanks for seed Ensure leak tightness of seed hopper and the...
Страница 17: ...Datum Entw Dateiname Zeichnungsnummer 00110681 7 00110682 00110684 00110686 00110687 ed Nov06 Datum Entw Dateiname Zeichnungsnummer 00110681 7 00110682 00110684 00110686 00110687 00110687 ed Nov06 Da...
Страница 18: ...ning and protective equip ment and check the function Do not exceed the permissible axle loads tyre carrying capacities and total weights in order to ensure sufficient steering and braking capabilitie...
Страница 19: ...de pressurised The hydraulic system is under high pressure Check all lines hoses and screwed con nections regularly for leaks and any visible external damage Only use appropriate aids when checking fo...
Страница 20: ...nsure that regular tests and inspections are always carried out to schedule as specified in the operating instructions Prior to performing maintenance and servicing work ensure that the machine is pos...
Страница 21: ...lters 20 Coulter spacing 300 mm Coulter pressure of PPF coulter up to 200 kg Tractor power required Tractor power 130 180 kW Hydraulic pressure 180 bar 1 x double acting Hydr block 1 x double acting C...
Страница 22: ...erladema e H he 3 025 m Breite 3 000 m L nge 10 520 m L nge min 9 42m Spuranzeiger Beleuchtung demontiert oder 8 52m ohne Fronpacker Zugdeichsel eingeschoben Tramsport 2 5m 1 SW und As trennen 2 R der...
Страница 23: ...ame Zeichnungsnummer ichnung 23652900 1 1 2 2 13 14 3 6 3 6 8 5 R L K K H H HK SK R2 L2 L1 R1 HZ SZ H S 3 3 11 11 1 2 4 4 7 7 9 9 11 12 15 16 17 17 18 19 19 20 20 22 3 26 21 21 23 24 1 2 25 14 Pressur...
Страница 24: ...d from the low loader without having to install the basic equip ment beforehand The other hydraulic functions like Folding or Bout markers can only be operated after the basic equipment has been insta...
Страница 25: ...bout markers is half the machine width plus half the coulter spac ing measured from the centre of the outermost coulter E g 600 cm 2 300 cm 300 cm 7 5 cm 307 50 cm On the Pronto 6 AS the bout markers...
Страница 26: ...and needs to be in good working order Connect the plug of the machine lighting equipment to the tractor Check lighting equipment and warning decals for function and cleanliness Hitching up the machine...
Страница 27: ...is enabled when de energized and disabled when energized The functions Fold and Bout Markers are switched on with electricity and locked when de energized In case of a power failure the bout markers a...
Страница 28: ...he control unit under pressure so that the pressure accumulator in the folding hydraulics is preloaded with min 80 bar Safety catch on drill Access steps twin hopper In unfolding folding operation bot...
Страница 29: ...ose their tensioning force Empty the seed hopper Clean the metering unit Close the hopper cover Keep electrical and electronic components for the drill controls in dry rooms Equipment with pneumatic b...
Страница 30: ...consists of a fan one Venturi area per metering unit and one or two distributors Machines equipped for solid fertiliser have an other distributor in the rear hopper Fan The fans are directly hydrauli...
Страница 31: ...regular intervals when working on large areas Machine Fan drive Small seed Grain kg Fertiliser kg Rotary speed Direct PTO 150 150 100 200 200 rpm Pronto 6 AS 2700 3200 4000 Pronto 6 AS PPF 2500 32001...
Страница 32: ...ing the fan speed With the engine running switch on the PTO shaft and run the tractor engine with the speed used for drilling Set the desired fan speed by the setscrew on the flow control valve In ord...
Страница 33: ...ed Fan grill soiled Oil cooler dirty Pressure relief valve set too low Reduce the load and check the oil level check pressure on fan Change oil and oil filter Clean fan protection grille Clean radiato...
Страница 34: ...shaft Conical clamp When re tightening the clamping screws atten tion must be paid to the following When tightening the screws particularly when re assembling the impeller creeps towards the housing...
Страница 35: ...g unit With the slider installed the seed can be distrib uted and the hopper completely filled Venturi type injector The single hopper design is equipped with an injection nozzle in the Venturi area I...
Страница 36: ...butor tower On all machines with a distributor tower the half width can be manually switched with the distributor cover Cover half width shut down manual Unscrew the distributor cover and reinsert it...
Страница 37: ...alf width shut down Seed flow monitoring is automatically switched off Twin hopper pneumatics On the Pronto 6 AS the twin hopper has a ca pacity of 5000 litres The hoppers are divided in the ratio 40...
Страница 38: ...Seed and fertiliser The twin hoppers can be used for the simultane ous output of seed and fertiliser In the PPF design this can take place separately from the seed with a dedicated distributor tower a...
Страница 39: ...60 40 Then calibrate both metering units see DrillManager instructions The desired seed quantity can alternatively also be manually distributed to the two metering units Hopper and pneumatics in G F...
Страница 40: ...wn Seed flow monitoring is automatically switched off Half width shut down manual For the half width shut down the valve on both Venturi areas can be manually switched to one side The seed and fertili...
Страница 41: ...l identification mark on the underside of the shaft which shows the position of the valves This enables checking the rotary motion of the valve and its end position If the tram line distribution box i...
Страница 42: ...e scraper is self adjusting The readjustment the effect and wear of the scrapers must be checked at regular intervals With wet or loose soils the pretension of the coul ter discs must not be too high...
Страница 43: ...s are fastened to the coulter arm with a serrated segment They guide the depth of the seed placement cover the seed with fine soil and press it down on the seed A scraper keeps the press wheels free o...
Страница 44: ...he seed coulter frame The tines can be adjusted in height and must be matched to soil conditions and harvest residues before work is started Harrow The harrow tines level the seedbed behind the seed c...
Страница 45: ...e sealed and distortion of the housing caused by screwing on must be avoided Metering unit The HORSCH metering unit consists of only a few individual parts and can be dismantled without tools Metering...
Страница 46: ...shaft Roller change Remove lock washer and washer Pull out the drive shaft and assemble the new roller The drive shaft requires axial clearance in the roller for self cleaning of the roller in the met...
Страница 47: ...ing housing The sealing lip must have full contact with the rotor and should be able to generate approx 1 mm pre tension Sealing lip The retaining plate for the sealing lip is asymmetrically divided W...
Страница 48: ...clearance should be as small as possible When checking against a light source the gap should just be visible On machines with double Venturi area and 2 seed boxes you may only use rotors with 2 cell...
Страница 49: ...Sticking cell discs can then also be cleaned in assembled condition The rape brushes should be disassembled when sowing normal seeds The housing holes must be closed Function test After installing a...
Страница 50: ...to match the different working widths and seed quantities Rotor 320 cm Rotor 170 cm not for double Venturi area Rotor 2 x 85 cm only for double Venturi area Coarse seeds For sowing coarse seed maize b...
Страница 51: ...t with Venturi type injector The metering units in machines with normal hop per and Venturi type injector are equipped with a V2A cover with machined recesses During operation the injector nozzle is e...
Страница 52: ...The bearings in the side cover in particular can be damaged or may become hard moving be cause of dressing dust If necessary keep bearings in stock and replace in due time Drive motor 1 Screws 2 Radi...
Страница 53: ...ect setting and to extend the top link in several stages until the required drilling depth is reached Calibration Perform calibration only when the machine has been lowered and is stationary Do not us...
Страница 54: ...the drilling depth With each alteration one must therefore check the drilling depth and the effect of the press rollers on consolidation and depth guidance Depth setting In order to enable depth setti...
Страница 55: ...es down to the front during drilling the depth can be limited with clips For road travel and in parking position the valve must be closed Drawbar hitching Adjusting the seed box After adjusting the de...
Страница 56: ...ficult conditions Turning When turning only reduce the tractor engine speed just before raising the drill so that the fan output does not drop too much and causes the hoses to block Raise the machine...
Страница 57: ...ght system work properly Is the wing hydraulics pre loaded with min 80 bar in working position Have the bout markers been set to the cor rect length Is the machine completely raised or do the tractor...
Страница 58: ...fan and coulters leak tight and firmly connected Are all openings on the hopper properly sealed Does air flow uniformly out of all coulters Has the air volume been set correctly on the fan Does the se...
Страница 59: ...essure adjustment The hydraulic coulter pressure adjustment is op erated from the tractor via a dedicated control unit Hydraulic coulter pressure adjustment Setting To adjust the seed placement extend...
Страница 60: ...usted in four stages and thereby press the coulter discs deeper into the ground Depending on the width of the tractor track you can install one or two adjustable disc pairs Track loosening tines In or...
Страница 61: ...subsequently mounted to the coulter brackets The coulter discs are hydraulically lifted and electrically activated by the tram line control system Pre emergence marker The cutting angle of the coulter...
Страница 62: ...ould be completely extended before starting work Harrow in front of packer The harrow in front of the packer levels the loos ened seedbed and distributes existing harvest residues Harrow in front of p...
Страница 63: ...ockage should occur in either of the systems and no seed or fertiliser should be blown out of the furrows or out of the grill The fertiliser placement must be checked before starting work and when pro...
Страница 64: ...chanical seal rings may stick together The mechanical seal rings will then rotate around the O ring and damage it Oil would run out and the bearing would be damaged after a short while Bearings must t...
Страница 65: ...ing cell and an electric drive Micro granulate tank The required air flow is taken from the fan air flow and routed back to the fan air flow just in front of the Venturi area together with the fertili...
Страница 66: ...with different row spacings can be mounted on the distributor tower Converting to maize drilling Remove the distributor cover Mount the maize distributor e g for 60 cm row spacing with double rows Rem...
Страница 67: ...d further Strictly switch off the tractor and the screw drive Loosen the screws and open the gate wider Retighten the screws Schieber Hydr Bef llschnecke hi DT 3 6 DC kfgb Filling funnel Filling auger...
Страница 68: ...with spring brake cylinders With the air reservoirs fully filled the brake can also be released manually and the drill can be moved without braking function However the machine must be hitched up bef...
Страница 69: ...ver until the brake is applied Then back it out until the wheel can be turned freely Brake cylinder End of the season For functional safety of the valves anti freeze agent should be mixed to the compr...
Страница 70: ...ump Manual brake releasing pump Emergency braking caused by the breakaway brake valve can also be released without the tractor Turn the spring cotter back to working position and operate the manual br...
Страница 71: ...o nents thoroughly Fertilisers are extremely aggressive and can cause corrosion Maintenance intervals The maintenance intervals are determined by many different factors For instance not only do the di...
Страница 72: ...ing cloths in pockets Dispose of oil impregnated footwear as spe cial waste Flush out any oil which has splashed into the eyes with clear water and consult a doctor if necessary Soak up spilt oil with...
Страница 73: ...oses chafing and blockage x Distribution head Check for tightness blockages x Distribution hose only double hopper Check flap position and tight fit of flap x Metering unit Roller and sealing lip Chec...
Страница 74: ...ver rubber elements Coulter disc friction ring bearings Spray bearing with penetrating oil e g WD 40 Piston rods on hydraulic cylinders Use penetrating oil or other means to protect piston rods agains...
Страница 75: ...ivot point bout marker Pivot and tumbler bearings for drawbar Lubrication points Articulated drawbar Wing cylinders and wing frames on the drill Wing cylinders and wing frames on seed wagon Packer bea...
Страница 76: ...70 Screw adjustment and bout marker disc Filling auger Fertiliser coulter Brake shaft Lift shaft and lift cylinder Upper link...
Страница 77: ...Notes...
Страница 78: ...PN 05951418 Ver 1 0 01 2012 HORSCH LLC Tel 701 532 1000 200 Knutson St Fax 701 532 1101 Mapleton ND 58059 USA Email info us horsch com...