


Section 6 – Scheduling Options
6-11
After entering Scheduling Menu Mode, press
[0]
until the “Timed Events ?” prompt appears.
PROMPT
EXPLANATION
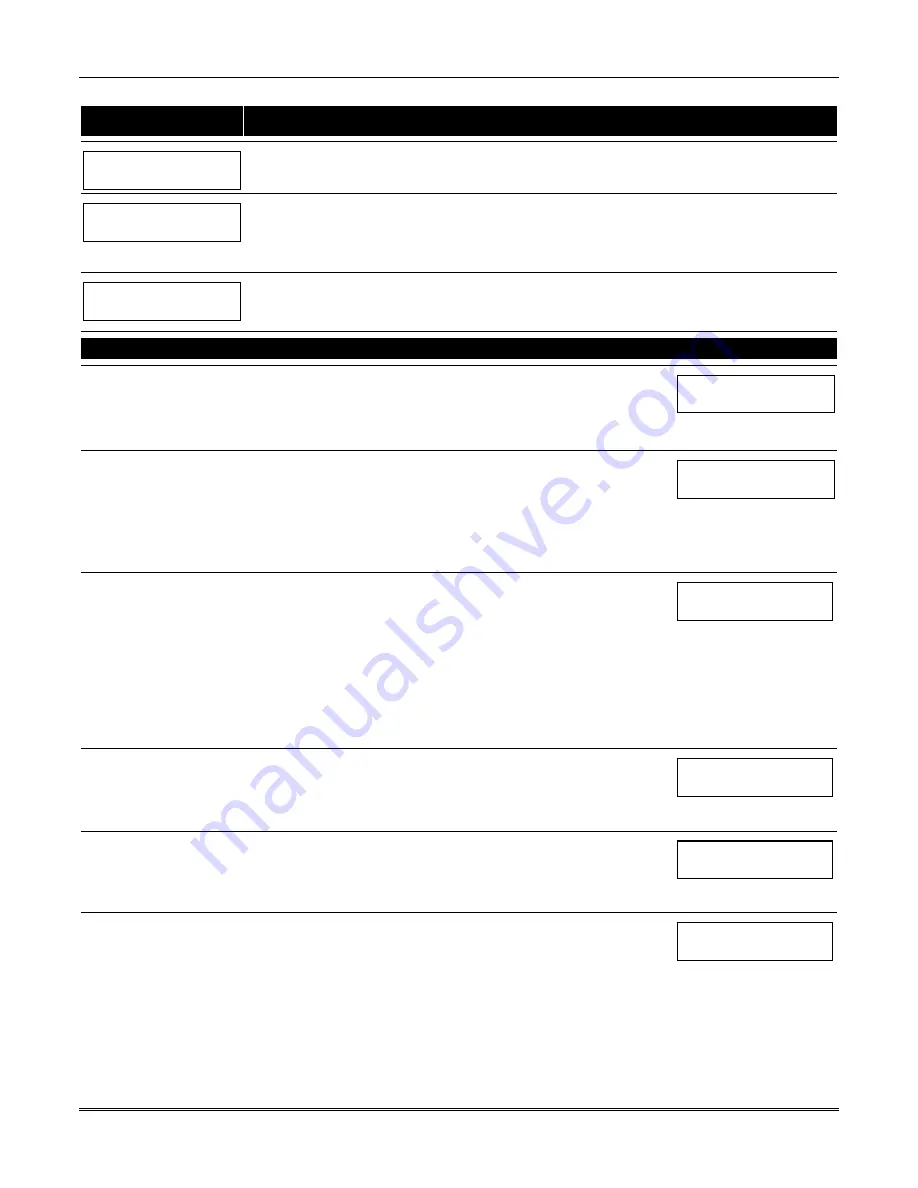
Timed Events ?
1 = YES 0 = NO
0
Enter
1
to program timed events.
TIMED EVENT # ?
01-20, 00=Quit 01
Enter the timed event number to be programmed
(01-20)
.
Press [
∗
].
The system then prompts the user to enter the desired action to be taken.
Enter
00
at the “TIMED EVENT #?” prompt to quit the timed event menus and display the “Quit ?” prompt.
01 ACTION ?
none 00
Enter the action code for this timed-event number from the list at the left. This could be an output command,
an arming command, or any other Time-Driven event.
Press [
∗
] to accept the entry. The prompt for the action specifier appears.
ACTION CODES
EXPLANATION
ACTION SPECIFIER
01=Relay On
02=Relay Off
03=Relay Close for 2 seconds
04=Relay Close XX minutes
05=Relay Close YY seconds
Actions 01-05
If you selected actions
01-05
, the prompt at the right appears. Enter the relay
number.
Press [
∗
] to accept entry. The “Time Window ?” prompt appears.
01 RELAY # ?
00
06=Relay Group On
07=Relay Group Off
08=Relay Group Close for 2
seconds
09=Relay Group Close XX
minutes
10=Relay Group Close YY
seconds
Actions 06-10
If you selected actions
06-10
, the prompt at the right appears. Enter the relay
group number.
Press [
∗
] to accept entry. The “Time Window ?” prompt appears.
01 RELAY GRP # ?
00
20=Arm-STAY
21=Arm AWAY
22=Disarm
23=Force Arm STAY
24=Force Arm AWAY
25=Arm INSTANT
26=Arm MAXIMUM
40=Enable Open Window by
Part.
41=Enable Close Window by
Part.
Actions 21-26 and 40-41
If you selected actions
21-26
or
40-41
, the prompt at the right appears. Enter
the partition to which the action applies. Enter
0
to select all partitions. Enter
a partition number again to deselect it.
Press [
∗
] to accept entry. The “Time Window ?” prompt appears.
PART? 12345678
HIT 0-8 X X
30=Auto bypass – Zone list
31=Auto unbypass – Zone list
Actions 30-31
If you selected actions
30-31
, the prompt at the right appears. Enter the zone
list number that contains the zones to be bypassed or unbypassed.
Press [
∗
] to accept entry. The “Time Window ?” prompt appears.
01 ZONE LIST ?
ENTER 01-15
01
42=Enable Access Window for
Access group(s)
Action 42
If you selected action
42
, the prompt at the right appears. Enter the group
number to which the time window will apply.
Press [
∗
] to accept entry. The “Time Window ?” prompt appears.
GROUP ? 12345678
HIT 0-8 X
55=Access Point Grant
56=Access Point Grant
w/Override
57=Access Point Protect
58=Access Point Bypass
59=Access Point Lock
60=Access Point Exit
Actions 55-60
If you selected actions
55-60
, the prompt at the right appears. Enter the
access point number.
Press [
∗
] to accept entry. The “Time Window ?” prompt appears.
01 ACCESS POINT #
000
Содержание VISTA-128BPT
Страница 2: ......
Страница 46: ......
Страница 56: ...VISTA 128BPT VISTA 250BPT Installation and Setup Guide 4 10 ...
Страница 88: ...V128BPT V250BPT Installation and Setup Guide 8 2 ...
Страница 104: ...VISTA 128BPT VISTA 250BPT Installation and Setup Guide C 2 ...
Страница 112: ...VISTA 128BPT VISTA 250BPT Installation and Setup Guide Glossary 6 ...
Страница 118: ...VISTA 128BPT VISTA 250BPT Installation and Setup Guide Index 6 ...
Страница 120: ...For the latest warranty information please go to www honeywell com security hsc resources wa ...
Страница 121: ...NOTES ...
Страница 122: ...NOTES ...
Страница 123: ...NOTES ...