22
4-6
6
7
5
8
9
10
2
3
1
4
11
Layout
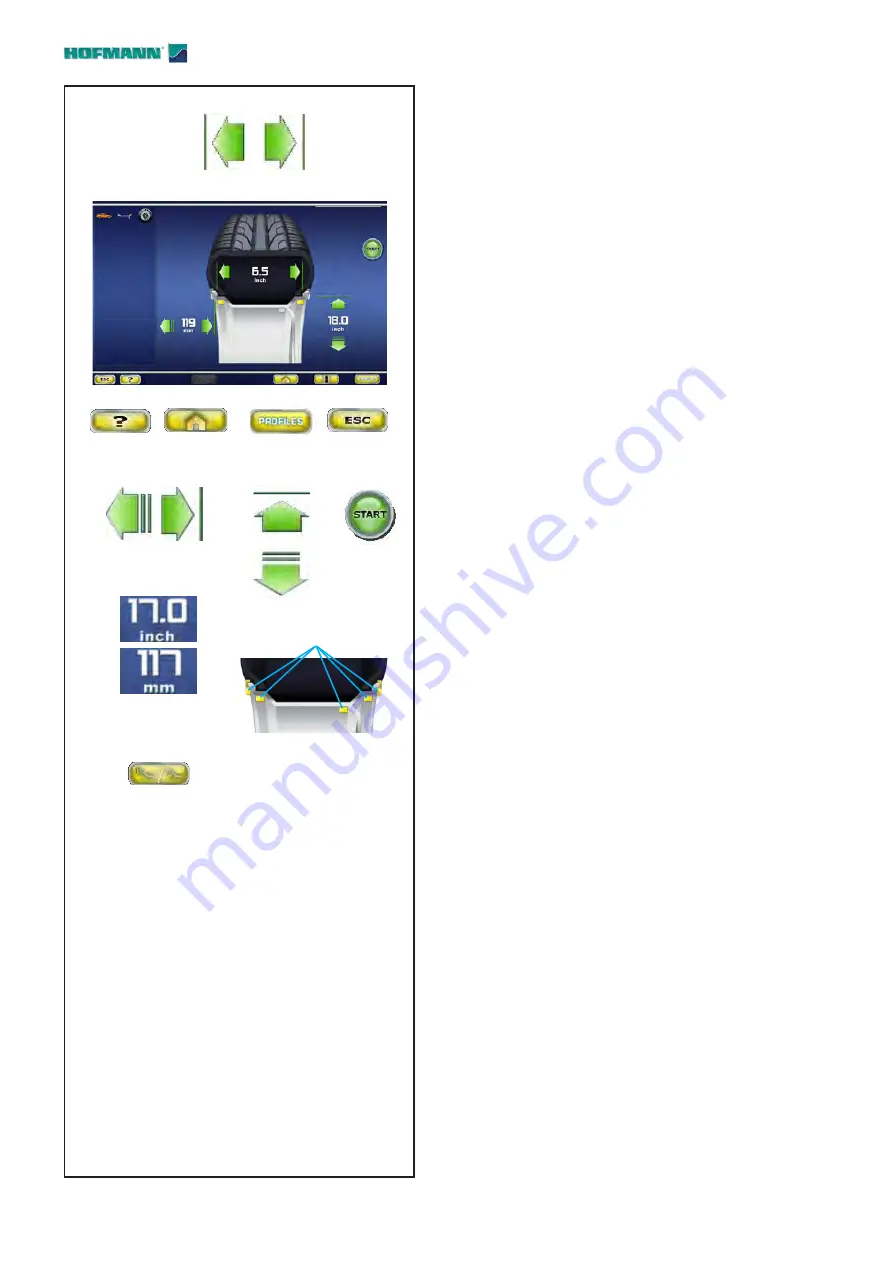
Fig. 4-6
RIM DATA ENTRY
Rim data entry Screen.
Open using
the
Manual Data Entry
key (
3
,
Fig. 4-5
).
Specific commands:
1 -
HELP key
- Selects HELP texts.
2 -
HOME key
- Returns you to the starting page
(
INTRO SCREEN
).
3 -
PROFILES
key -
Opens the WHEEL PROFILES screen page, for saving
or selecting wheels with pre-set dimensions
(
5.8.3
).
4 -
ESC key
-
-
Returns
5 -
DISTANCE key
- (
OFFSET
) - To change the value
press one of the arrows.
-
The right arrow increases the value.
-
The left arrow reduces the value.
6 -
WIDTH key
- For changing the rim nominal width
value set.
-
The right arrow increases the value.
-
The left arrow reduces the value.
7 -
DIAMETER keys
- For changing the rim nominal
diameter value set.
-
The upper arrow increases the value.
-
The lower arrow reduces the value.
8 -
START key
- Starts the measuring run.
9 -
“INCH / MM” key
- For selecting alternatively
inches or millimetres, press directly on one of the
measurements shown.
10 -
“ALU” keys
- For directly selecting the
positions
for application of weights on the rim
.
11 -
“TOGGLE” key
- For activating the “Easy Alu
Toggle” (
5.8.2
) option.
After a first selection the key
is no longer visible (
12
).
........ ..
Содержание Geodyna 8200 Series
Страница 188: ...188 Blank Page ...


