


108
....... ............... ........
5-47b
5-34
Operation
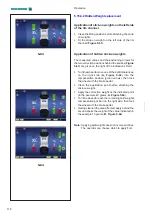
5.15.3 Alu 2P and Alu 3P weight application
modes:
5.15.3.1 Using the Laser Pointer
With the Laser Pointer mode active in Alu 2P and Alu
3P modes, the correction planes for stick-on weights
are accurately indicated by the laser pointer directly
on the rim (
Fig. 5-34
).
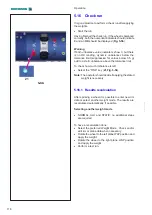
Note:
When the indication is given by the laser, the
weight must be fitted at the bottom of the rim at 5
o’clock, precisely where indicated by the pointer.
Weight application to the right of the laser dot (
Fig.
5-47a
).
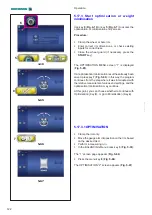
When a run is completed, the BALANCING
screen (
Fig. 5-47b
) shows the correction values
and the position of the weights to be applied.
To carry out corrections:
• Select a stick-on weight of the indicated size.
• Move the wheel until the correction position is reached
and the two green arrows light up.
• Before applying weights, press brake pedal to lock
the wheel in this position.
• Apply the counterweight and manually press stick-on
weight against rim (
Fig. 5-47
).
• Repeat this procedure to balance the other side of
the wheel.
....... ........
Содержание Geodyna 8200 Series
Страница 188: ...188 Blank Page ...


