75
Utilisation
Manuel d’Utilisation
Operator’s Manual
Operation
geodyna 980L
geodyna 980L
5.6
Procédure de calibration
Ce chapitre contient les procédures de calibration
accessibles à l’utilisateur.
5.6.1
Etalonnage par l’opérateur
Si plusieurs lancées de mesure sont nécessaires pour
équilibrer une roue parce que la grandeur et la position
des masses d’équilibrage doivent être corrigées plusieurs
fois, cela est très souvent dû à une insuffisance de
précision de mesure.
Dans ce cas, l’opérateur a la possibilité de rajuster la
machine.
Pour l’étalonnage, une masse–étalon (réf. EAM0005D40A)
est fournie avec la machine (gardée à droite à l’arrière sur
les compartiments à masses).
Un lancement de réglage il demande plus de temps
que d'un lancement normal.
Si une compensation électrique du balourd du moyen de
serrage a été effe
ctuée, elle sera annulée par l’étalonnage
par l’opérateur.
Important:
L’étalonnage doit se faire en utilisant le moyen de serrage
fourni avec la machine de nos usines.
Etalonnage
(Cod. C14)
•
Veiller à ce que pas de roue ou autres moyens de
serrage soit serré sur la machine.
•
Appuyer sur la touche
F
et de suite
C-Code
.
L'indication
de base “C 0” e
st alors affichée.
•
Selectionner le Code “C14” en appuyant sur le
touches
+
ou
-
.
•
Appuyer sur la touche
C-Code
.
L’affichage “1” apparaît alors.
•
Fermer le carter de roue, appuyer sur la touche
START
(si nécessaire) et effectuer la première lancée
d’étalonnage (lancée de mesure longue - détection
d’un éventuel balourd résiduel).
Pendant le premier lancée d’étalonnage, l’affichage “2”
apparaît.
•
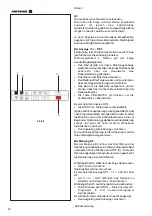
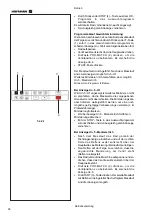
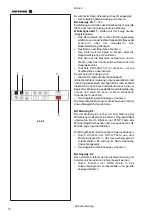
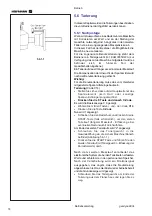
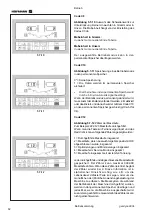
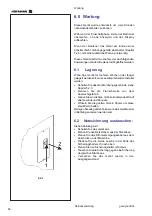
Visser alors la masse–étalon dans le trou taraudé
prévu à cet effet dans le corps de base du moyen de
serrage (Figure 5.6.1-1).
•
Appuyer sur la touche
START
et effectuer une
deuxième lancée d’étalonnage (avec la masse–étalon
- détermination des valeurs de correction).
L’unité électronique traite les données déterminées dans
les lancées d’étalonnage et les enregistre dans la
mémoire permanente. Le traitement terminé, un signal
mélodieux retentit et l’étalonnage est terminé. L'unité
est prête de nouveau à l'usage et l'indication de base
est affiche.
•
Une fois l’étalonnage achevé, dévisser la masse–
étalon du corps de base du moyen de serrage et la
replacer au bon endroit.
5.6
Calibration
This chapter describes the calibrations that can be
performed by the operator.
5.6.1
User calibration
If a number of different measuring runs have to be
performed to balance a wheel and the values and
positions of the weights have to be changed, it generally
means that measuring is not precise.
In this case the operator can recalibrate the machine.
To perform a so-called "User Calibration", the operator
should use the calibration weight (réf. EAM0005D40A)
supplied with the machine (situated at the back of the
weights shelf)
A calibration run usually lasts longer than a measuring
run.
Clamping element imbalance compensation is deleted
following a User Calibration.
Important:
Before performing a User Calibration ensure the
clamping device supplied by the manufacturer is fitted.
Calibration
(Cod. C14)
•
Make sure that only the clamping device is fitted to
the main shaft (no wheel or any other clamping
accessories).
•
Press F + C-Code.
The base C 0 value is displayed.
•
Use the + and - keys to select the
C14
Code.
•
Press the
C-Code
key.
Value 1 is displayed.
•
Close the wheel guard, press the START key (if
necessary) to perform the first calibration run (a
longer measuring run to detect any residual
imbalances).
At the end of the first calibration run value 2 is displayed.
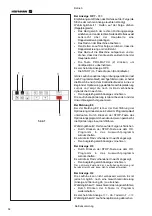
•
Screw the calibration weight into the threaded bore
on the machine flange (Figure 5.6.1-1).
•
Press the START key to perform the second
calibration run (with the calibration weight to detect
the adjustment values).
After the second measuring run, the electronic system
processes the values registered in the calibration runs
and saves them in the permanent memory. At the end
of the processing phase the machine sounds a three
tone beep to indicate that recalibration is complete.
The machine is now ready to use again and the base
value is displayed.
•
At the end of the calibration procedure unscrew the
calibration weight from the flange and put it back in
its place.
Содержание EEWBUS732A
Страница 102: ...102 geodyna 980L ...
Страница 117: ...117 geodyna980L ...
Страница 118: ...118 geodyna980L BLANK PAGE ...
Страница 119: ...119 geodyna980L BLANK PAGE ...

