71
Utilisation
Manuel d’Utilisation
Operator’s Manual
Operation
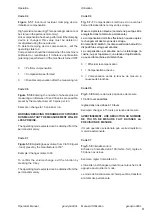
Sélection 3:
•
Afin de repasser du programme de minimisation au
programme d’équilibrage, appuyer sur la touche
STOP
(4).
Le balourd de la roue est alors affiché.
•
Effectuer l’équilibrage de la roue suivant les affichages.
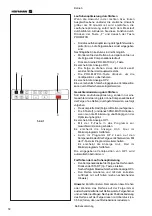
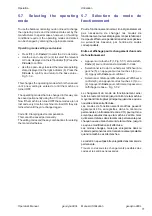
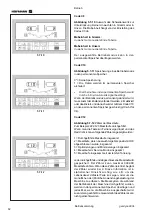
Affichage Un.7 - ===
Recommandation de tourner la roue sur la jante (les
traits de l’affichage droit restent allumés).
Sélection 1:
Tourner le pneu sur la jante
(programme normal)
•
Orienter la roue suivant l’indicateur de direction à
droite
et tracer un repère double exactement
perpendiculairement à et au–dessus de l’arbre
principal du côté droit du pneu.
•
Enlever la roue de la machine.
•
Tourner le pneu sur la jante et le tourner jusqu’à ce
que le repère double coïncide avec la valve.
•
Serrer l’ensemble pneu/jante sur la machine et le
tourner jusqu’à ce que la valve soit exactement
perpendiculaire à et au–dessus de l’arbre principal.
•
Appuyer sur la touche
PRO-MATCH
(2) pour entrer
la position de la valve.
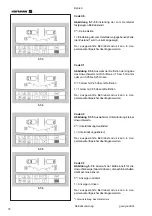
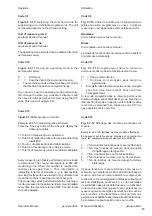
L’affichage UN.8 apparaît alors.
•
Appuyer sur la touche
START
(lancée de contrôle).
Si la minimisation a été correctement effectuée suivant
la séquence de programme, la machine repasse, après
la lancée de contrôle, au mode d’équilibrage qui était
sélectionné avant l’initialisation de la lancée de
minimisation et le balourd dynamique resté dans la roue
est affiché.
•
Effectuer l’équilibrage de la roue suivant les affichages.
L’optimisation est ainsi achevée et l’équilibrage de la
roue effectué.
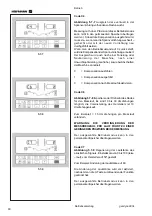
Affichage du code d’erreur E9
Si E9 est affiché, c’est qu’il y a eu au moins une erreur
relative à la séquence de programme lors de la
procédure de minimisation. Quitter le programme de
minimisation en appuyant sur la touche
STOP
(4)
et,
si cela est souhaité, relancer la minimisation.
Sélection 2: Ne pas
tourner le pneu sur la jante
•
Afin de repasser du programme de minimisation au
programme d’équilibrage, appuyer sur la touche
STOP
(4).
Le balourd de la roue est alors affiché.
•
Effectuer l’équilibrage de la roue suivant les affichages.
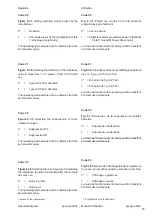
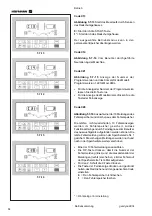
Affichage H0
L’état optimal de minimisation est déjà atteint et ne
peut pas être amélioré.
•
Appuyer sur la touche
STOP
(4)
pour repasser au
programme d’équilibrage.
•
To return to === - Un.7 (turning over the tyre) press
the
F
key (1) again.
Option 3:
- Press the
STOP
key (4) to exit the minimisation
program and return to the balancing program
The imbalance on the wheel is shown on the readout.
- Balance the wheel according to the readings.
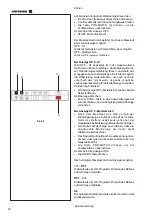
Reading Un.7 - ===
Readjust tyre on the rim (the right display bars light up
permanently).
Option 1:
Readjust the tyre on the rim
(normal program)
- Readjust the wheel according to the right direction
indicator and make a double mark on the right side of
the tyre exactly perpendicular to and above the main
shaft.
- Remove the wheel from the machine.
- Readjust the tyre on the rim until the double mark
coincides with the valve.
- Clamp the wheel on the balancer and readjust it so
that the valve is exactly perpendicular to and above the
main shaft.
- Press the
PRO-MATCH
key (2) to acquire the valve
position.
Reading Un.8 appears.
- Press the
START
key (3) (check run).
If weight minimisation was carried out correctly
(according to the program cycle), the machine
automatically returns to the type of weight positioning
previously selected and indicates the residual dynamic
imbalance on the wheel.
- Balance the wheel according to the readings.
Both weight minimisation and balancing are
accomplished.
Message E9
Message E9 means that at least one error occurred
during the minimisation cycle. Press the
STOP
key
(4) to exit the minimisation program and repeat
minimisation if necessary.
Option 2: Do not
readjust the tyre on the rim
- Press the
STOP
key (4) to exit the minimisation
program and return to the balancing program
The imbalance on the wheel is shown on the readout.
- Balance the wheel according to the readings.
Reading H0
The optimum minimisation condition has been achieved
and cannot be improved.
- Press the
STOP
key (4) to return to the balancing
program and continue according to the readings.
Содержание EEWBUS732A
Страница 102: ...102 geodyna 980L ...
Страница 117: ...117 geodyna980L ...
Страница 118: ...118 geodyna980L BLANK PAGE ...
Страница 119: ...119 geodyna980L BLANK PAGE ...

