background image

121 

Copyright © 2011-2019 by Highly Reliable Systems, Inc.  All rights reserved. 


files or file system structures. 


Non-Destructive Read/Write


Tests the disk by sequentially reading blocks on the disk, writing test data to the block, checking 
that the data was written successfully, and then restoring the original data to the block. If bad 
blocks are found, see above.NOTE: The device should be connected to a UPS or data may be lost 
due to power failure. 


Destructive Read/Write


Tests the disk by sequentially writing test patterns to each disk block and checking that the data 
was written successfully. The last pattern written is 0's that should trigger the bad block 
relocation or remapping feature of the hard disk so this may correct some or all of any bad blocks 
on the disk. A follow up test can be used to see if bad blocks have been fixed. NOTE: THIS 
WILL OVERWRITE THE EXISTING DATA ON THE DISK. 


Maximum bad blocks to find


The disk check will stop when this number of bad blocks has been found. If set to 0, the entire 
disk will be checked. It is often useful to set this to 1 since even 1 bad block means the disk is 
having problems and there is little reason to continue checking. Small numbers of bad blocks 
may be corrected by triggering the disks bad block relocation or remapping feature by erasing the 
disk or running a Destructive Read/Write disk check on the disk. 


Erase Disk


Begin/End


Erases the first and last 100MB of the disk. This can be useful to remove bad partion tables or 
raid meta data. NOTE: THIS WILL OVERWRITE THE EXISTING DATA ON THE DISK. 


Entire Disk


Erases the entire disk. This can be useful to cause the disk to relocate or remap bad blocks on the 
disk. Note: this is not a secure erase, it simply writes 0's to every block on the disk. NOTE: THIS 
WILL OVERWRITE THE EXISTING DATA ON THE DISK. 


Reset Permissions


Permissions Only


Resets permissions to allow read, write and delete by any user. 


Permissions and Ownership


Resets permissions as above and sets ownership to the user defined in 'Windows Networking'. 


Action URL's and Programs


The following URL's and programs can be used to to perform actions on this disk from a remote 
computer. Right click on the URL and select 'Copy link address' and use that to create a shortcut on 
your desktop or download the VBScript program to your desktop. 


Safely Remove


URL and program download to safely remove the disk. 

Содержание High-Rely NetSwap

Страница 1: ...1 Copyright 2011 2019 by Highly Reliable Systems Inc All rights reserved High Rely NetSwap NetSwap Plus RAIDFrame Plus Backup System User Manual V2 16...

Страница 2: ...e problems For example XP machines without appropriate Service Packs cannot properly recognize drives above 137GB While it may appear to work the drive will corrupt data when it fills above that level...

Страница 3: ...o in this document may be either trademarks and or registered trademarks of the respective owners The publisher and the author make no claim to these trademarks While every precaution has been taken i...

Страница 4: ...gacy 15 2 2 4 Mini Chassis 16 3 NetSwap RAIDFrame Plus Administration 17 3 1 Quick Setup 18 3 2 Disk Preparation 21 3 2 1 Formatting Disks 21 3 2 2 Sharing Disks 22 3 2 3 Creating RAID Disks NetSwap R...

Страница 5: ...OS 108 3 4 6 System Menu 108 3 4 6 1 Reboot Device 108 3 4 6 2 Shutdown Device 109 3 4 6 3 Check for Updates 109 3 4 6 4 Update Device 110 3 4 7 Disk Properties 111 3 4 7 1 Format 117 3 4 7 2 Disk To...

Страница 6: ...ernet X 162 7 2 Configure Date Time 163 7 2 1 NTP 165 7 2 2 Windows Server 165 7 2 3 Manual 166 7 3 Restore Default Settings 167 7 4 Reboot 167 7 5 Shutdown 168 8 Remote Monitoring and Management RMM...

Страница 7: ...etworking SMB CIFS and NFS networking turned on at once for each disk The NetSwap RAIDFrame Plus s internal NetSwap 200 series only and removable drive s are available as a simple Windows network shar...

Страница 8: ...the devices are as follows 2 1 1 Desktop Chassis legacy 3 1 2 7 4 5 6 Illustration 1 Desktop Chassis Front Panel 1 Power Alarm Indicator 2 Power Button 3 Removable Drive Bay 4 Clear Alarm Button 5 Di...

Страница 9: ...Chassis Front Panel 1 Removable Bay 1 2 Removable Bay 2 3 Removable Bay 3 4 Removable Bay 4 5 Power Alarm Indicator 6 USB Port 7 Power Switch 8 Bay 1 Status Indicator 9 Bay 2 Status Indicator 10 Bay 3...

Страница 10: ...3 4U 8 Bay Rackmount Chassis Front View 1 Removable Bay 1 2 Removable Bay 2 3 Removable Bay 3 4 Removable Bay 4 5 Removable Bay 5 6 Removable Bay 6 7 Removable Bay 7 8 Removable Bay 8 9 Removable Boot...

Страница 11: ...4U RAIDFrame Rackmount Chassis Front View 1 Removable RAIDPac Bay 1 2 Removable RAIDPac Bay 2 3 Removable RAIDPac Bay 3 4 Removable RAIDPac Bay 4 5 Removable Boot Disk Bay 6 Power Alarm Indicator 7 Po...

Страница 12: ...vable Drive Bay 1 4 Removable Drive Bay 2 5 Removable Boot Disk Bay 6 Bay 1 Status Indicator 7 Bay 2 Status Indicator 8 USB 3 0 USB C Ports 9 Drive Activity Indicator Amber 10 Drive Activity Indicator...

Страница 13: ...the device does not power down automatically after pressing the power button the device can be forced to power down by pressing and holding the power button until the device powers off You can also p...

Страница 14: ...ion 7 2U Chassis Back View 2 or 4 Bay 1 Power Receptacle 110 220 Volts Some power supplies are auto switch and some are not check power supply before connecting power 2 PS 2 Keyboard Mouse 3 10 100 10...

Страница 15: ...mount Chassis Back View 8 Bay or RAIDFrame 1 PS 2 Keyboard Mouse 2 10 100 1000 MB Ethernet Port 3 USB Ports 4 DVI VGA Video Connectors 5 10 Gb Ethernet optional 6 eSATA Ports optional 7 Power Receptac...

Страница 16: ...s Inc All rights reserved 2 2 4 Mini Chassis Illustration 9 2 Bay Mini 1 Power Receptacle Auto switch 110 220 Volts 2 Video Connectors 3 Gigabit Ethernet Port 4 USB 3 0 Ports 5 PCIE Expansion Slot Not...

Страница 17: ...can be used to locate the NetSwap on your network To connect to the NetSwap RAIDFrame Plus either use the NetSwap Locator skip to step 3 or browse to 192 168 1 50 1 If you are currently using a differ...

Страница 18: ...s for IP address Netmask Gateway and DNS and click the Save button After changing the network settings you may need to reconfigure your configuring machine s network adapter back to it s previous IP t...

Страница 19: ...om the command line on Windows using the command net use drive NetSwap RAIDFrame Plus ip or hostname share name for example net use x 192 168 1 50 Backup password user bill You may want to verify that...

Страница 20: ...g via NAS server share we assume that the client s backup software supports and internally retains storing NTFS and SHARE level permissions If you copy files directly to NetSwap RAIDFrame Plus drive u...

Страница 21: ...ears and prepares the disk for use but also records meta data to the disk so the NetSwap RAIDFrame Plus can recognize the disk when it is inserted later To format a disk click the Format button in the...

Страница 22: ...are Mode on the disk Properties screen To access the disk properties click the Properties button on the Disks menu option as shown below Disk Properties Button Illustration 15 Disk Properties Button F...

Страница 23: ...reate a RAID disk click the Create RAID Disk button on the Disks menu as shown below Create RAID Button Illustration 16 Create RAID Disk Button Once the RAID disk is created it must be formatted If cr...

Страница 24: ...eating a RAID 1 disk this master setting is only used for Scheduled Mirroring To preserve data create the RAID 1 disk with a single disk as described above 3 3 Replication NetSwap RAIDFrame Plus Only...

Страница 25: ...wall is configured correctly to allow outbound traffic from the NetSwap being replicated from and the correct ports are forwarded to the NetSwap that is being replicated to By default if the replicati...

Страница 26: ...2011 2019 by Highly Reliable Systems Inc All rights reserved Illustration 19 Replication Job Source Select the Local Disk as the Source Type and select a disk and folder to be replicated and click the...

Страница 27: ...o allow creation of a new Remote Location Illustration 21 Remote Location Enter a name the hostname or IP address of the remote NetSwap the TCP IP port select None for the the encryption level and cli...

Страница 28: ...To retrieve the Targets shared by the remote NetSwap and fill in the Target drop down click the Get Targets button Next enter the username and password for the selected Target Click the Test button to...

Страница 29: ...every hour Click Finish the save the new Job Now the Job will be displayed on the Jobs page and will show that it is Ready and has never been run Illustration 24 Replication Jobs To run the Job immedi...

Страница 30: ...emote NetSwap Service and copy the data onto the remote NetSwap Service rather than waiting for the Replication Job to send the data across the network There are several ways to create a seed disk on...

Страница 31: ...p and insert the disk Select the desired Target from the Replication Targets screen and click Seed In Fill in the name and select desired options and click Finish This will create a Replication Seed I...

Страница 32: ...eed Click the Make Seed button for the disk to be used as the seed in our case DISK 2249 Once confirmed this will remove the disk from the RAID 1 Disk and mark it as a seed disk Once completed remove...

Страница 33: ...able Systems Inc All rights reserved Illustration 27 Seed RAID Disk In the image above from the remote NetSwap we see our seed disk installed the internal disk and we have no RAID 1 Disks Click the Se...

Страница 34: ...is in a degraded state since only one disk is active At this point the RAID 1 Disk has been seeded with the data and is immediately ready for replication to and a Replication Target can be created on...

Страница 35: ...019 by Highly Reliable Systems Inc All rights reserved Illustration 29 RAID Properties From the RAID Properties screen click the Add Disk button Illustration 30 Add Disk Select the internal disk and c...

Страница 36: ...ng such as when incremental backups are run on a continuous basis such as hourly so that the integrity of the data is maintained Disk snapshots require that extra disk space be allocated to store all...

Страница 37: ...37 Copyright 2011 2019 by Highly Reliable Systems Inc All rights reserved Illustration 32 Replication Job Snapshot Storage Selection...

Страница 38: ...38 Copyright 2011 2019 by Highly Reliable Systems Inc All rights reserved Header Help Form Area 3 4 Administration Reference 3 4 1 Page Layout Menu Illustration 33 Form Layout...

Страница 39: ...ically updates every 10 seconds Illustration 34 Status Basic Information Hostname The current hostname as defined in Network Settings Date Time Current date and time Uptime Current system uptime i e t...

Страница 40: ...Settings A section for each Ethernet port where X will be 0 1 2 etc MAC Address Hardware MAC address for Ethernet port Connected Yes or no Speed Ethernet connection speed in MB s IP Mode Either DHCP...

Страница 41: ...ace and file system type will also be displayed Status Displays whether or not the disk is installed whether or not it is shared and if it is formatted If the disk is being formatted the format progre...

Страница 42: ...message describing what the task is doing Work Completed Percentage of work completed State Task state Options are Running Completed or Error 3 4 2 3 View Log Displays the last 200 lines of the curre...

Страница 43: ...t 2011 2019 by Highly Reliable Systems Inc All rights reserved 3 4 3 Settings Menu 3 4 3 1 Network Configure TCP IP network settings Illustration 37 Network Settings DHCP Illustration 38 Network Setti...

Страница 44: ...STATIC DHCP STATIC or DISABLED If STATIC is selected the Static IP Address Netmask Gateway DNS1 and DNS2 will be used to configure the network If DHCP STATIC is selected the Static IP Address Netmask...

Страница 45: ...assigned automatically MTU MTU is the maximum transmission unit or maximum size of a packet or frame on the network Valid values are from 1500 to 7200 bytes MTU set larger than 1500 bytes is often ref...

Страница 46: ...DNS host Last Update Date and time of the last update Server Hostname or IP of the server that accepts the dynamic DNS IP address updates Protocol Select the dynamic DNS protocol This is only display...

Страница 47: ...equired to authenticate the update on the dynamic DNS service Confirm Password Reenter the password for verification Update Interval minutes The update interval time between updates in minutes Log All...

Страница 48: ...on the remote admin port Security HTTPS Enable or disable the HTTPS user interface on port 443 HTTP Server SSL Options Configures the SSL options for the HTTP server allowing specification of the SSL...

Страница 49: ...scan Disks Cause the device to rescan the attached disks attached Note this can take from 30 seconds to several minutes to complete and may take disks offline temporarily Physical Disks RAID Disks RAI...

Страница 50: ...View edit disk properties RAID Properties only on NetSwap RAIDFrame Plus View edit Mirror properties Format Format disk Only displayed if disk is not shared or part of a Mirror Disk Identify Identify...

Страница 51: ...d restarted with this disk as the master disk and any other disks already in the RAID will be added to the restarted mirror disk and a rebuild will start copying the data from the seed disk to the oth...

Страница 52: ...not connect more than one computer to a given iSCSI target Data corruption can occur If two or more computers need to access a disk shared iSCSI attach the disk to one computer and share the disk from...

Страница 53: ...ease check the iSCSI spec Here is an example iqn 2003 12 com high rely 6143ec4a 3984 4aed baa9 9fc2e50984b2 disk0 Leave Target Name blank to use the default Target Name With iSCSI Name Type Free Form...

Страница 54: ...c All rights reserved Open iSCSI Initiator Targets tab Select the target showing status of Reconnecting Select Details button place check mark in box for Identifier Select Log Off Select OK on all scr...

Страница 55: ...king Setting User Illustration 47 Windows Networking Settings Active Directory Connection Information Hostname Displays the current hostname as defined in Network settings Make sure this machine name...

Страница 56: ...d set the NetSwap RAIDFrame Plus DNS to your Domain DNS probably the Domain Controller and set Date Time update method to NTP and set the NTP server to your Domain Controller If the date time on the D...

Страница 57: ...write access when connected to the device Read Write Users Groups Specific users and or groups that will have read and write access when connected to the device Leave blank to allow all allowed users...

Страница 58: ...Realm Realm examples MYDOMAIN LOCAL or MYDOMAIN EXAMPLE COM Domain Domain name example MYDOMAIN Domain Controller Hostname or IP of Domain Controller This is optional and generally not needed Administ...

Страница 59: ...ative Credentials Username Username of domain user with authority to remove computers from a domain Password Password for user on domain Testing the Connection Please note that a disk formatted before...

Страница 60: ...drive NetSwap RAIDFrame Plus ip address or hostname share name for example net use x 192 168 1 50 Backup password user bill Persistent Yes Note that this maps the drive letter X to the NetSwap RAIDFra...

Страница 61: ...Menu 3 4 3 7 NFS Configure the NFS settings Illustration 53 NFS Settings Connection Information Hostname Displays the current hostname as defined in Network settings Sharing Enable Advanced Sharing T...

Страница 62: ...re allows any computer to connect example com allows any computer in the example com domain 2 IP address followed by an optional netmask as address netmask The netmask may be specified specified in do...

Страница 63: ...TP Relay Port The port on the Relay host to use to send email leave blank for the default of 25 Enable TLS Enable TLS Transport Layer Security to provide encrypted communication to the Relay host SMTP...

Страница 64: ...y server if necessary Mute Alarm If checked the audible alarm will be muted The alarm light will still blink when the alarm is triggered however This option is only available on the G2 models of the N...

Страница 65: ...never a disk is faulty Alert on RAID Disk Degraded Alert whenever a RAID disk becomes degraded Alert on RAID Disk Active Alert whenever a RAID disk becomes active Alert on RAID Disk Inactive Alert whe...

Страница 66: ...ART status of Failing The disk has failed and should be replaced Alert on Replication Job Started Alert whenever a replication job is started Alert on Replication Job Completed Alert whenever a replic...

Страница 67: ...time If Update Method is NTP and NTP servers are defined the NetSwap RAIDFrame Plus will automatically update the current date and time to the date and time supplied by the configured servers If Upda...

Страница 68: ...mode the date and time will be updated from the specified Windows server In Manual mode the date and time will not be automatically updated NTP Server 1 The hostname or ip of the primary NTP Network T...

Страница 69: ...Dashboard is a RMM tool designed specifically to monitor local and remote NetSwap devices and is available for free as a download from the high rely com website Illustration 59 Dashboard Registration...

Страница 70: ...ation to a file Illustration 60 Export Configuration Once you click on this option you will be prompted to select a folder in which to save the configuration file Select a folder and click Ok to downl...

Страница 71: ...30 seconds depending what changes are made If the IP address is changed you will need to connect to the NetSwap RAIDFrame Plus on the new IP address 3 4 3 14 Restore Default Configuration This option...

Страница 72: ...device Note ports 12000 12100 are reserved for internal use Advanced Options Global Advanced Rsync options These are the default Rsync options used for replication jobs that do not define their own l...

Страница 73: ...ns are Ready if the job is ready and scheduled to run Running if the job is currently running and Disabled if the schedule for the job has been disabled Last Result Result of last run Options are Succ...

Страница 74: ...ation Job Refresh Refresh the jobs New Edit Replication Job Use the Previous and Next buttons to move backwards and forwards through the wizard sections Use the Finish button to save the Replication J...

Страница 75: ...ver SSL FTP Replicate to or from an FTP server File Transfer Protocol Supports secure transfers over SSL SFTP Replicate to or from am SFTP server Secure File Transfer Protocol over SSH Source Illustra...

Страница 76: ...disk being replicated or create a Snapshot Reserve that is equal in size to half the capacity of the disk The Snapshot Storage disk may either be an entire disk that is not shared or a disk that has b...

Страница 77: ...ination Illustration 68 New Edit Replication Job Destination Destination Type Select the type of the destination Options are Local Disk and Remote Location For Local Disk Source Disk Select the disk f...

Страница 78: ...ts from the Remote Location Targets are defined on the remote device Username Enter the Username for the selected Target Click the Test button to test authentication with the Remote Location with the...

Страница 79: ...evel of compression Options are None and levels 1 9 The higher the level the more compression but slower speed Higher compression levels may speed up the job if the outbound bandwidth is low Lower com...

Страница 80: ...ly make changes to these values if you fully understand what you are doing or are directed to by High Rely Technical Support personnel Note not all options are available for all types of Remote Locati...

Страница 81: ...cked files will be stored on reduced redundancy storage Use server side encryption S3 only If checked files will be encrypted on the server Access Policy S3 only Select an access policy under which fi...

Страница 82: ...backup software can be configured to create full backups once a month and only do incrementals or differentials in between the full backups By limiting the maximum file size to something greater than...

Страница 83: ...s have an extension of spf so entering a pattern of spf will exclude all full backups from the transfer Pattern Syntax Patterns can contain all the normal characters that are allowed in filesystem pat...

Страница 84: ...starting on 07 16 12 at 17 15 Every n week s Select to schedule the job to be run every n weeks on specific days of the week at specific times starting on specific date For example every 1 week on Mo...

Страница 85: ...o move backwards and forwards through the wizard sections Use the Finish button to save the Replication Seed Job and close the wizard Use the Cancel button to close the window without saving Select Se...

Страница 86: ...86 Copyright 2011 2019 by Highly Reliable Systems Inc All rights reserved Source Disk Illustration 73 Seed In Job Source Disk Select the disk to seed from...

Страница 87: ...source job maximum file size filter If checked the maximum file size filter from the source job will be ignored Ignore source job exclude filter If checked the exclude filter from the source job will...

Страница 88: ...azon Tracking Number Tracking number of the package containing the disk if it has been shipped from Amazon Ship To Address Address to ship the disk to Packing List Form Link to the packing list form t...

Страница 89: ...right 2011 2019 by Highly Reliable Systems Inc All rights reserved Select Seed Type Illustration 75 Seed Out Job Seed Type Standard Seed Copy data to from seed disk Speed Seed Seed to from Mirror Disk...

Страница 90: ...90 Copyright 2011 2019 by Highly Reliable Systems Inc All rights reserved Destination Disk Illustration 76 Seed Out Job Destination Disk Select the disk to seed to...

Страница 91: ...source job maximum file size filter If checked the maximum file size filter from the source job will be ignored Ignore source job exclude filter If checked the exclude filter from the source job will...

Страница 92: ...disk if it has been shipped from Amazon Tracking Number Tracking number of the package containing the disk if it has been shipped from Amazon Ship To Address Address to ship the disk to Packing List F...

Страница 93: ...ration 78 Remote Locations Remote Location name Type Type of Remote Location Details Details of the Remote Location Action Buttons New Create a new Remote Location Delete Delete the selected Remote Lo...

Страница 94: ...omain name or IP of the Remote Location Port TCP IP port for of the Remote Location Note this port may need to be opened on your firewall or router Encryption Type Select the type of encryption to be...

Страница 95: ...ription Description of the Dropbox account Authorized This will display Yes of the NetSwap has been authorized to access the associated Dropbox account or No if not Authorize Now Clicking this button...

Страница 96: ...zation This gives the authorization that allows the NetSwap to access a Dropbox account Follow the steps in the window as shown above and copy paste the authorization code provided by Dropbox and clic...

Страница 97: ...s key id assigned by the service Secret Key Secret key assigned by the service Secure Mode encrypted If checked SSL will be used when accessing the service and transferring data Use sub domain or virt...

Страница 98: ...ve mode requires the FTP server to connect to the NetSwap on another port This is often blocked by a router or firewall and will require special rules to allow access In passive mode the NetSwap initi...

Страница 99: ...password 3 4 4 4 Targets View Edit the currently defined Targets A Target is a folder on this NetSwap device that is shared for use by a remote NetSwap device Prior to setting up a Replication Job on...

Страница 100: ...arget s Edit Edit the selected Target Refresh Refresh the Targets New Edit Target View Edit Target A Target defines a disk and folder on this device that will be shared with remote devices for replica...

Страница 101: ...ted disk for this Target 3 4 4 5 Amazon Import Export Jobs View Edit the currently defined Amazon Import Export jobs Illustration 87 Amazon Import Export Jobs Remote Location Select the remote locatio...

Страница 102: ...job s Edit Edit the selected job Refresh Refresh the jobs New Edit Amazon Import Export Job View Edit Amazon Import Export job Job Id Illustration 88 New Edit Amazon Export Job Job Id assigned by Ama...

Страница 103: ...ated by a character Service Level Level of shipping service Standard or Expedited Password Password used to encrypt the data on the disk Required for Export jobs Confirm Password Enter the password ag...

Страница 104: ...mentation for details 3 4 5 Virtualization Menu Select models only Experimental 3 4 5 1 Virtual Machines View edit virtual machines Name Illustration 89 Virtual Machines Virtual machine name If the vi...

Страница 105: ...nd Pauses the selected virtual machine s saves the state of the virtual machine s to disk and stops the virtual machine s Click Start to restore a virtual machine to it s previous state Reset Perform...

Страница 106: ...ve and can be started Inactive virtual machines cannot be started and will not start on system startup System Virtual CPU s Number of virtual CPU s to assign to this virtual machine RAM MB Amount of R...

Страница 107: ...ce The Xen PV drivers are available for installation by checking Attach VM Tools ISO Image Type Type of the disk image Options are RAW Disk to attach an entire disk RAW File to use a raw file on mount...

Страница 108: ...Install Utility OS This will install the optional Utility OS from the supplied USB key drive onto a reserved portion of the system boot disk The Utility OS is a preconfigured OS installation used to...

Страница 109: ...available on G2 models of the NetSwap RAIDFrame Plus 3 4 6 2 Shutdown Device This option will save all cached data and safely shutdown the device Illustration 93 Shutdown Click Confirm to confirm you...

Страница 110: ...utton will say Download and Install When pressed the device will directly download the update and install it If the device is not connected to the internet and cannot access the update server the butt...

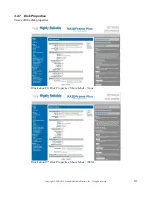
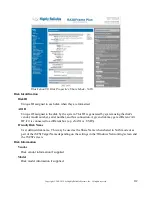
Страница 111: ...t 2011 2019 by Highly Reliable Systems Inc All rights reserved 3 4 7 Disk Properties View edit the disk properties Illustration 96 Disk Properties Share Mode None Illustration 97 Disk Properties Share...

Страница 112: ...em using the disk s vendor model number serial number and bus connection A given disk may get a different Alt ID if it is connected to a different bus e g eSATA vs USB3 Friendly Disk Name User defined...

Страница 113: ...and FAILING if the disk is failing Sharing Share Mode Mode in which to share the disk Options are None Not shared iSCSI Share as an iSCSI target NAS Share as Networked Attached Storage using Windows...

Страница 114: ...Access Control Use Individual Access Control Check to use individual Access Control or uncheck to use the global Access Control defined in Windows Networking Settings Only displays if Share Mode is N...

Страница 115: ...hecked Mount Settings Disk already contains encrypted data Check if the disk contains an encrypted volume To create an encrypted volume format the disk with encryption enabled Disk already contains en...

Страница 116: ...ed Safe copy using temporary files If checked when copying copy to a temporary file first and then rename to the destination file This prevents incomplete or corrupt files in the case where the sync t...

Страница 117: ...e Configure the mirror schedule for this disk Only applicable to the RAIDFrame Plus models 3 4 7 1 Format Format and Partition Removable Drive All disks must be formatted by the NetSwap RAIDFrame Plus...

Страница 118: ...yte or 10 21 bytes Some OS s cannot read the GPT partition table or drives greater than 2TB and must use the MBR format Encryption Settings TrueCrypt compatible Encrypt Data Check this box to create a...

Страница 119: ...be written to each block on the disk File System Settings File System Type The file system to used to format the drive Options are EXT4 NTFS and None Formatting EXT4 takes approximately 2 seconds per...

Страница 120: ...el number serial number and bus connection A given disk may get a different Alt ID if it is connected to a different bus e g eSATA vs USB3 Friendly Disk Name User defined disk name This may be used as...

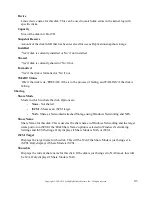
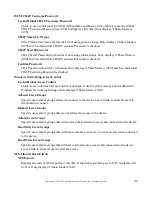
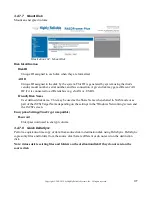
Страница 121: ...bad block means the disk is having problems and there is little reason to continue checking Small numbers of bad blocks may be corrected by triggering the disks bad block relocation or remapping feat...

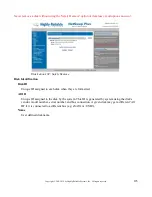
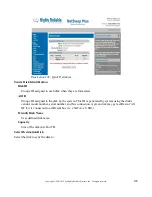
Страница 122: ...ved the drive and need to use the drive without physically removing and inserting the drive Illustration 101 Share Disk Identification Disk ID Unique ID assigned to each disk when they are formatted A...

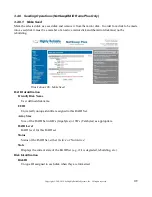
Страница 123: ...on 102 Safely Remove Disk Identification Disk ID Unique ID assigned to each disk when they are formatted Alt ID Unique ID assigned to the disk by the system This ID is generated by system using the di...

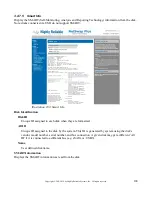
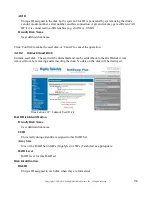
Страница 124: ...n 103 Smart Info Disk Identification Disk ID Unique ID assigned to each disk when they are formatted Alt ID Unique ID assigned to the disk by the system This ID is generated by system using the disk s...

Страница 125: ...ated by system using the disk s vendor model number serial number and bus connection A given disk may get a different Alt ID if it is connected to a different bus e g eSATA vs USB3 Friendly Disk Name...

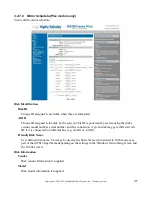
Страница 126: ...heduled Select to specify that the disk should be mirrored on the schedule specified below Every n hour s Select to schedule the disk to be mirrored every n hours starting at a specific time For examp...

Страница 127: ...eSATA vs USB3 Friendly Disk Name User defined disk name This may be used as the Share Name when shared in NAS mode or as part of the iSCSI Target Name depending on the settings in the Windows Network...

Страница 128: ...tted Alt ID Unique ID assigned to the disk by the system This ID is generated by system using the disk s vendor model number serial number and bus connection A given disk may get a different Alt ID if...

Страница 129: ...isk must not be rebuilding Illustration 106 Make Seed RAID Identification Friendly Disk Name User defined disk name UUID Universally unique identifier assigned to this RAID Set Array Size Size of the...

Страница 130: ...r Cancel to cancel the operation 3 4 8 2 Unmark Seed Disk Unmark seed disk The seed will be unmarked and can be added back to the RAID disk it was removed from by removing and reinserting the disk No...

Страница 131: ...used and restarted with the selected disk as the master disk and any other disks already in the RAID will be added to the restarted RAID disk and a rebuild will start copying the data from the seed di...

Страница 132: ...rom the selected disk or Cancel to cancel the operation 3 4 9 Create RAID Disk NetSwap RAIDFrame Plus only Create a new RAID disk from physical disks Illustration 109 Create RAID Disk Available Disks...

Страница 133: ...Clean Causes the Mirror to start in a clean state Use Write Intent Bitmap Check this to create a RAID RAID 5 or 6 only with a write intent bitmap A write intent bitmap keeps track of changes made to...

Страница 134: ...sk Name User defined disk name UUID Universally unique identifier assigned to this Mirror Array Size Size of the RAID in GB s Gigabytes or TB s Terabytes as appropriate RAID Level RAID level for RAID...

Страница 135: ...RAID and make it available for sharing This action should only be used as directed by Technical Support personnel Only displayed if the RAID has been paused Pause Pause the RAID This will disable the...

Страница 136: ...isk Max Sync Speed The maximum speed in MB s when syncing or rebuilding the RAID disk The default value is 1000 which which allows syncing at the fastest possible speed Disks in RAID Bay Bay in which...

Страница 137: ...10 2 Pause RAID Pause the RAID This will disable the RAID and make it unavailable for sharing No data or RAID configuration information will be lost This action should only be used before breaking a...

Страница 138: ...the disks that form the RAID No data will be lost Only displayed if the RAID has been paused Illustration 113 Break RAID RAID Identification Friendly Disk Name User defined disk name UUID Universally...

Страница 139: ...tifier assigned to this RAID Set Array Size Size of the RAID Set in GB s Gigabytes or TB s Terabytes as appropriate RAID Level RAID level for this RAID set Status Status of the RAID Set either Active...

Страница 140: ...endly Disk Name User defined disk name UUID Universally unique identifier assigned to this RAID Set Array Size Size of the RAID Set in GB s Gigabytes or TB s Terabytes as appropriate RAID Level RAID l...

Страница 141: ...a High Rely iSCSI Connector Service a Windows service to manage automatically connecting and reconnecting iSCSI attached NetSwap RAIDFrame Plus hard drives and the High Rely iSCSI Connector Admin pro...

Страница 142: ...able Systems Inc All rights reserved Illustration 116 High Rely iSCSI Connector Setup Wizard Click Next to begin the installation Illustration 117 High Rely iSCSI Connector Setup Wizard License Accept...

Страница 143: ...Rely iSCSI Connector Setup Wizard Destination Select a location on your hard disk to install the software or use the default Click Next to continue Illustration 119 High Rely iSCSI Connector Setup Wi...

Страница 144: ...tor Setup Wizard Install Verify the destination and Start menu folders Click Install to begin the installation The software will be installed Several windows may pop up during the installation this is...

Страница 145: ...s tab displays the current iSCSI targets what drive letter they are attached to if any and the connection status Illustration 122 iSCSI Targets From this tab you may Connect to a NetSwap RAIDFrame Plu...

Страница 146: ...prompted for CHAP name username and secret password and whether or not to make this connection persistent Making a connection persistent tells the High Rely iSCSI Connector Service to automatically c...

Страница 147: ...countered while attempting to remove the drive Note Sometimes when you attempt to safely remove the NetSwap RAIDFrame Plus drive you will be notified that it was unable to remove the drive because the...

Страница 148: ...125 Persistent Favorite Targets From this tab you may Edit to a persistent target Remove a persistent target and refresh the list of persistent favorite targets 4 2 2 1 Edit This option allows you to...

Страница 149: ...nt favorite targets from the Microsoft iSCSI Initiator This is useful if changes have been made in the Microsoft iSCSI Initiator 5 Configuration Examples 5 1 iSCSI Mode 5 1 1 Windows This walk through...

Страница 150: ...t the disk with the NTFS file system as detailed in the Disk Preparation section above Once formatted select the disk properties from the Disks screen as shown below Disk Properties Button Illustratio...

Страница 151: ...hts reserved Illustration 129 Disk Properties Then click the Save button The NetSwap RAIDFrame Plus will save the changes and begin sharing the disk in iSCSI mode The Disks screen will now show the di...

Страница 152: ...stems Inc All rights reserved Now if we look at the Disk Properties we can see the share mode set to iSCSI and see the iSCSI Target Name that the disk will be shared under in this case HR NETSWAP DISK...

Страница 153: ...uld have an iSCSI initiator in your Windows Control panel If not you will need to download the iSCSI Initiator software from the Microsoft website If you are using Windows 2003 or XP make sure you hav...

Страница 154: ...Systems Inc All rights reserved Double click iSCSI Initiator and select the Discovery tab then Discover Portal put in the Hostname or IP address of your accept the default port of 3260 and select OK...

Страница 155: ...e the name of your iSCSI Target in the list Illustration 134 iSCSI Initiator Targets Select your target server and click Connect Check to add this connection to the list of Favorite Targets so this co...

Страница 156: ...ms Inc All rights reserved If you have set the CHAP username password on the from the iSCSI menu option you will need to click the Advanced button and enter the username and password as shown below Il...

Страница 157: ...157 Copyright 2011 2019 by Highly Reliable Systems Inc All rights reserved If the connection is successful the status should change to Connected Illustration 137 iSCSI Initiator Connected...

Страница 158: ...ghly Reliable Systems Inc All rights reserved Now right click Computer on the Start Menu and select Manage and Select Disk Management Alternatively you can issue a Start Run and type diskmgmt msc Illu...

Страница 159: ...e may be restored to factory defaults using the USB Key drive included with your NetSwap RAIDFrame Plus The USB Key drive comes attached to the rear of the unit The USB Key drive will be labeled with...

Страница 160: ...e rear of the device 8 The NetSwap RAIDFrame Plus is now restored to factory defaults Consult the setup and administration sections of this manual above for information on setting up and configuring y...

Страница 161: ...tting the device s hostname and configure each installed NIC Network Interface Card If more that one NIC are installed the first one will be labeled NIC 0 the second NIC 1 and so on Illustration 141 C...

Страница 162: ...ustration 143 Configure NIC 0 IP Mode is DHCP STATIC DHCP STATIC or DISABLED If STATIC is selected the IP Netmask Gateway DNS 1 DNS 2 and MTU fields will be active otherwise they will display only Pre...

Страница 163: ...DHCP mode this will display the current secondary DNS server MTU Maximum transmission unit In DHCP mode this will display the current MTU Possible values are from 1500 to 16000 Enter the desired value...

Страница 164: ...ation 146 Select Timezone Use the Up and Down arrow keys to select a timezone and Enter to select or Esc to exit Update Method The method used to keep the date and time current Options are Ntp Windows...

Страница 165: ...me from the specified NTP server s Illustration 148 Date Time Settings NTP NTP Server 1 Primary NTP server Can be an IP or hostname NTP Server 2 Secondary NTP server Can be an IP or hostname 7 2 2 Win...

Страница 166: ...Host IP The hostname or IP of the Windows Server 7 2 3 Manual The manual method allows directly setting the date and time Date Illustration 150 Date Time Settings Manual Date in MM DD YY format Time...

Страница 167: ...e Default Configuration Use the Left and Right arrow keys to select Yes and press Enter to restore default settings or select No and press Enter or press Esc to cancel and exit 7 4 Reboot This option...

Страница 168: ...nc All rights reserved 7 5 Shutdown This option will shutdown the device Illustration 153 Shutdown Device Use the Left and Right arrow keys to select Yes and press Enter to reboot the device or select...

Страница 169: ...log files may be downloaded directly using a URL of the form http NetSwap RAIDFrame Plus ip status download_log php log X Where X is the log number as indicated above So to download the System Log fro...

Страница 170: ...pdate Time Mon Apr 23 11 33 27 2012 State clean Active Devices 2 Working Devices 2 Failed Devices 0 Spare Devices 0 Name HR NETSWAP 0 local to host HR NETSWAP UUID 0c626671 9d1981f3 4d070f49 164599e5...

Страница 171: ...been marked faulty or not spacelow notspacelow indicates if the disk is low on space or not smartna notsmartna indicates if the SMART information is not available or is available smartprefail notsmart...

Страница 172: ...s can be accessed through the HTTP protocol using the GET method using a URL of the form http NetSwap RAIDFrame Plus ip status disks file name Examples To check if DISK 3350 is shared on the NetSwap R...

Страница 173: ...plication job Job1 has succeeded on the NetSwap RAIDFrame Plus on ip 192 168 1 50 one would use the following URL to check for the existence of the flag file http 192 168 1 50 status replication Job1...

Страница 174: ...ripting and EXE execution for monitors this manual will only cover simple file existence checks using network and file based monitors In the following two sections we will setup monitors to monitor th...

Страница 175: ...ll rights reserved Next select TCP as the protocol Illustration 155 LabTech Monitor Wizard Select the Protocol Enter the IP address of the NetSwap RAIDFrame Plus in this case we enter 10 1 2 104 Illus...

Страница 176: ...can be alerted if the mirror becomes degraded because the RAID DISK 0 synced file will not exist if the RAID disk is degraded Illustration 157 LabTech Monitor Wizard Configure TCP Check Compare using...

Страница 177: ...eserved Select the Client and Computer on which to run the monitor Illustration 159 LabTech Monitor Wizard Select Where you Would Like to Run This Select how often to run the monitor Illustration 160...

Страница 178: ...Systems Inc All rights reserved Select the alert template defaults shown Illustration 161 LabTech Monitor Wizard Select an Alert Template Define the Alert Message defaults shown Illustration 162 LabTe...

Страница 179: ...liable Systems Inc All rights reserved Enter the name for the monitor we use NetSwap RAID DISK 0 Synced Review the monitor setup and click Finish if everything is set correctly Illustration 163 LabTec...

Страница 180: ...the monitor The configuration should be similar to what is shown below Illustration 164 LabTech Network Monitor Configuration Test the monitor by clicking the Test button and you should see something...

Страница 181: ...nitor Files or Directories as shown below Illustration 166 LabTech Monitor Wizard What would you like to do Enter the path to the file to be monitored 10 1 2 104 hr status disks RAID DISK 0 synced Not...

Страница 182: ...eserved Select the Client and Computer on which to run the monitor Illustration 168 LabTech Monitor Wizard Select where you would like to run this Select how often to run the monitor Illustration 169...

Страница 183: ...Systems Inc All rights reserved Select the alert template defaults shown Illustration 170 LabTech Monitor Wizard Select an Alert Template Define the Alert Message defaults shown Illustration 171 LabTe...

Страница 184: ...liable Systems Inc All rights reserved Enter the name for the monitor we use NetSwap RAID DISK 0 Synced Review the monitor setup and click Finish if everything is set correctly Illustration 172 LabTec...

Страница 185: ...ck on the monitor The configuration should be similar to what is shown below Illustration 173 LabTech File Monitor Configuration Test the monitor by clicking the Test button and you should see somethi...

Страница 186: ...aded or rebuilding etc Performance Counters Monitor Can be used to monitor the available disk space on an attached iSCSI disk and generate an alert when disk space is low Various other performance rel...

Страница 187: ...ms and Anchor Simplify Management of Cloud Storage for MSPs Site highly Reliable Systems Inc Site Management Modify Network Scan Settings Intel vProt Credentials Change Password User name Password SNM...

Страница 188: ...iption for the NetSwap RAIDFrame Plus and click Save Then click Save on the Modify Network Scan Settings to start the scan To create the monitor go to the Monitoring and Alerting Rules Configuration s...

Страница 189: ...torage for MSPs Monitoring And Alerting Rules Configuratio 0 Device rJil Policy Module Cloud Service Site ghly Reliable Systems Inc 1 1Device 110 1 1 207 Choose monitor type DeviceAvailability IAdd Mo...

Страница 190: ...Title INetSwap Availability I Checks if N J V V 9 P is available on the network Description Device Availability Rule Availability for devices monitored by Onsite1anagers is determined through IC 1P E...

Страница 191: ...2011 2017 by Highly Reliable Systems Inc All rights reserved Click on the Alerts tab and then click the Add Alert Configuration button Enter a Title and Description for the alert and click the Add Ale...

Страница 192: ...e Systems Inc All rights reserved Select the amount of time the NetSwap RAIDFrame Plus is offline to trigger the alert and click the Save button Check desired options under Alert Categories Actions an...

Страница 193: ...193 Copy igi1l 2011 JJI byHighly ReUle S m In All ighb wsetved Click Save to save the new monitor Add Device Availability Monitor Device 10 1 1 207 ISave IICancel...

Страница 194: ...We will detail setting up a monitor to detect when a Mirror disk is degraded by parsing the RAID status file for the Mirror disk looking for the keyword degraded Similarly we could look for the keywo...

Страница 195: ...k on the Add Monitor button Monitoring And Alerting Rules Configu Q Device r S Policy Module Cloud 5 ervice Site highly Reliable Systems Inc l lDevice IHR SVR2008 TEST IAdd Monitor I ICancel I lEI Log...

Страница 196: ...Search String enter degraded Leave the Options unchecked and scroll down and set the Interval as desired Monitoring And Alerting Rules Configuration Monitor IIAlerts I Monitoring Rule Add Custom Logs...

Страница 197: ...y ReUle s In All ighb wsetved Select the Alert tab and click the Add Alert Configuration button Monitoring And Alerting Rules Configurat Add Custom Logs Monitor Device HR SVR2008 TEST Add Alert Confi...

Страница 198: ...198 Copyright 2011 2017 by Highly Reliable Systems Inc All rights reserved Enter a Title and Description for the alert and click the Add Alert Rule button Click the Save button to save the Alert Rule...

Страница 199: ...ption Modification Date An alert will be triggered when the specified search condition is matched 6 12 2013 1 03 47 PM X Alert when any rule conditions are met Alert when all rule conditions are met A...

Страница 200: ...2011 2019 by Highly Reliable Systems Inc All rights reserved Click the Save button to save the new monitor Monitoring And Alerting Rules Configuration Add Custom Logs Monitor Device HR SVR2008 TEST IS...

Страница 201: ...an be monitored include disk spaced used and various disk performance metrics such as disk I O We will show setting up a monitor for low disk space using the Free Space counter To create the monitor g...

Страница 202: ...e Interval as desired Monitoring And Alerting Rules Configuration Add Performance Counters Monitor Device HR SVR2008 TEST Monitoring Rule Title IMirror Disk 0 is low on disk space Descnpt1on 0 Enabled...

Страница 203: ...able Systems Inc All rights reserved Select the Alert tab and click the Add Alert Configuration button Monitoring And Alerting Rules Configurat Add Custom Logs Monitor Device HR SVR2008 TEST Add Alert...

Страница 204: ...ghly Reliable Systems Inc All rights reserved Enter a Title and Description for the alert and click the Add Alert Rule button Enter the desired threshold percentage and data points and click the Save...

Страница 205: ...ules Rule Description Modification Date logicaiOisk E Ofo Free Space is less than 10 for 2 data points 6 12 2013 5 16 03 PM Alert when any rule conditions are met Alert when all rule conditions are me...

Страница 206: ...2019 by Highly Reliable Systems Inc All rights reserved Click the Save button to save the new monitor Monitoring And Alerting Rules Configuration Add Performance Counters Monitor Device HR SVR2008 TES...

Страница 207: ...ludes software code developed by third parties including software code subject to the GNU General Public License GPL or GNU Lesser General Public License LGPL The GPL and LGPL software included in thi...

Страница 208: ...pyright 2011 2019 by Highly Reliable Systems Inc All rights reserved Contact Information Highly Reliable Systems 1900 Vassar Street Reno Nevada 89502 2109 TEL 775 329 5139 FAX 775 322 5397 www high re...

Отзывы: