background image

en

Rev. 03 / 02.2021

AB3200

6 / 88

Introduction

Symbols on the device

Warnings/symbols on the device which are no longer rec-

ognizable should be immediately replaced by the operating

company.
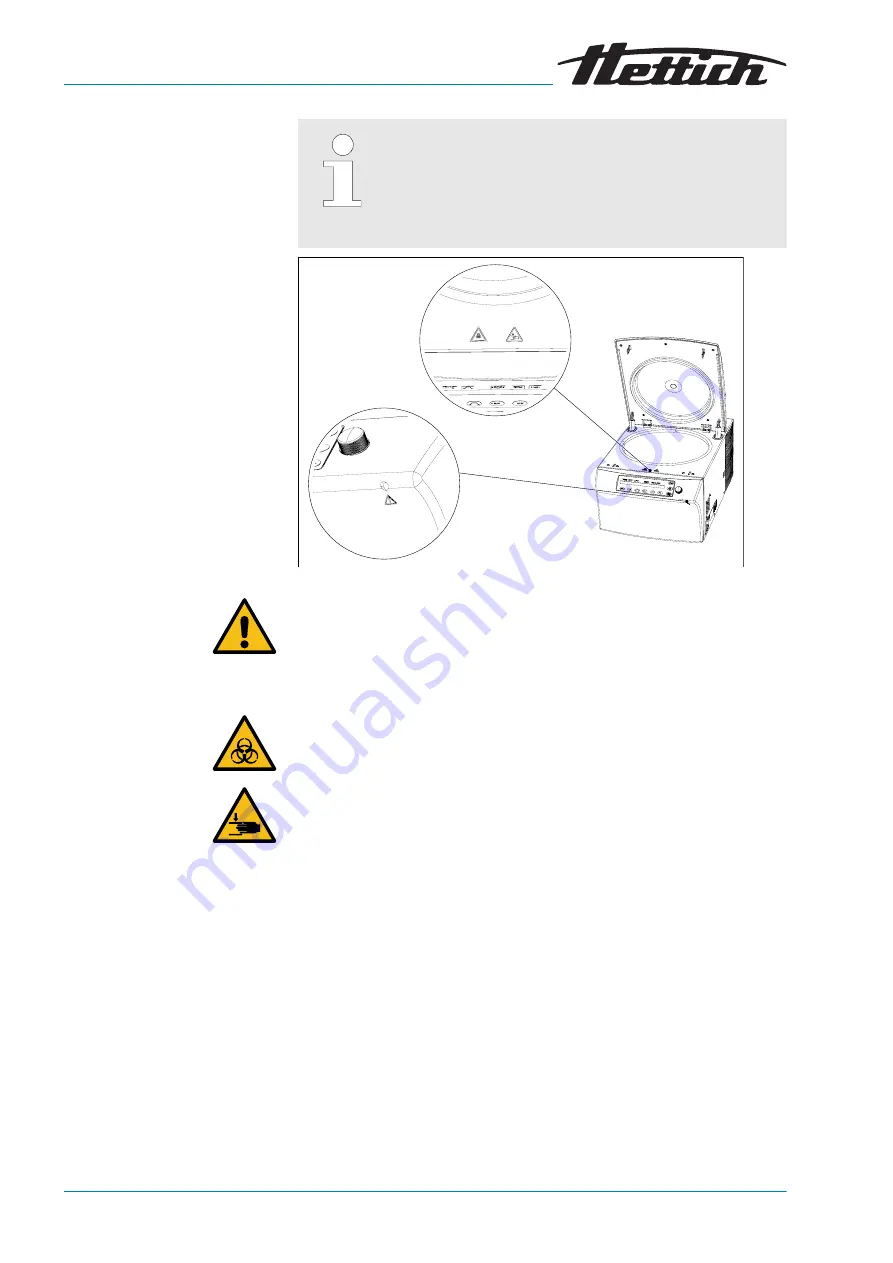
The images shown in the following depict the positions of

the warnings and symbols affixed to the device.

Fig. 1: Warnings on the device
Attention, general danger point

Nonobservance of this warning can lead to material damage and personal
injury.

Before using the device, make sure you read the operating instructions and
observe the safety information.

Warning - Biological contamination!

Before using the device, make sure you read the operating instructions and
observe the safety information.

Warning - Hand injury

Nonobservance of this warning can lead to material damage and personal
injury.

Before using the device, make sure you read the operating instructions and
observe the safety information.

Содержание ZENTRIMIX 380 R

Страница 1: ...Read the instructions prior to performing any task Translation of the original operating manual ZENTRIMIX Operating manual 1 88 en Rev 03 02 2021 AB3200...

Страница 2: ...03 02 2021 AB3200 2 88 Rev 03 02 2021 Andreas Hettich GmbH Co KG F hrenstra e 12 78532 Tuttlingen Germany 49 0 7461 705 0 49 0 7461 705 1125 info hettichlab com service hettichlab com www hettichlab c...

Страница 3: ...eration 27 6 1 Operating elements 27 6 2 Opening the lid 31 6 3 Closing the lid 31 6 4 Quick stop function 31 6 5 Loading the rotor 32 6 5 1 Loading a rotor for classical centrifugation 32 6 5 2 Loadi...

Страница 4: ...Menu 55 7 3 1 Change Lock 55 7 3 2 Change PIN 56 7 3 3 Info 58 7 3 4 Operating Time 59 7 3 5 Settings 61 8 Cleaning disinfection and maintenance 68 8 1 Cleaning 68 8 2 Disinfection 69 8 3 Maintenance...

Страница 5: ...serious injury if it is not avoided CAUTION This combination of symbol and signal word indicates a possible dangerous sit uation that can result in minor injury if it is not avoided NOTICE This combin...

Страница 6: ...danger point Nonobservance of this warning can lead to material damage and personal injury Before using the device make sure you read the operating instructions and observe the safety information War...

Страница 7: ...safety information Symbol for separate collection of electric and electronic devices Symbol according to directive 2002 96 EC WEEE Applies in the countries of the European Union as well as in Norway...

Страница 8: ...the indicated humidity range 10 80 keep dry The shipping packaging must be kept away from rain and kept in a dry environment 1 3 Personal protective equipment The assessment of the personal protective...

Страница 9: ...technician 1 5 Intended use Dual centrifugation The purpose of the ZentriMix is to process samples pre analytically in non medical laboratories This includes the extraction grinding mixing and dissolv...

Страница 10: ...t high speed and damage to the device 1 6 Replacement parts consumable material Only original replacement parts and approved original accessories of the manufacturer may be used and only original cons...

Страница 11: ...03 02 2021 AB3200 Introduction tificate and return material authorization number Devices without a signed clearance certificate will not be accepted in order to protect our employees We ask for your u...

Страница 12: ...voltage is too high the overcurrent pro tection fuse in the device switch can trip and the device electronics can be destroyed DANGER Danger due to rotor moving with high kinetic energy There is a ris...

Страница 13: ...rs There is a risk of injury to fingers by the rotor gears if this is turning Cuts with possible infections could result Do not grab between the gears of the rotating units and the rotor Avoid rotor r...

Страница 14: ...ner becoming very hot Only remove such a container after a sufficient cooling off time while wearing appropriate protective clothing ZentriMix applications are to be carried out according to the proto...

Страница 15: ...with high energy Substances which could create a hazardous explosive or flammable atmosphere in the device may not be processed The esti mation of such risks is the responsibility of the operating co...

Страница 16: ...not exposed to direct sunlight Make sure the device is not exposed to frost Maintain the minimum clearance around the device Make sure that the fan is not blocked Never operate the device in a continu...

Страница 17: ...due to improper disposal DANGER Danger of infections due to improper disposal In the event of improper disposal of samples there is a risk of injury to the user disposal personnel and the environ ment...

Страница 18: ...ontrol panel 2 Lid 1 2 Fig 5 Device interior 1 Centrifuging chamber 2 Rotor cavity 1 2 Fig 6 Right outer side 1 Device plug power supply 2 Device switch On Off 3 Device description Further information...

Страница 19: ...19 88 en Rev 03 02 2021 AB3200 Device description 1 Fig 7 Rear side 1 RS232 interface...

Страница 20: ...port and storage 4 Transport and storage Dimensions and weight with transport packaging 80 100 ca 925 ca 620 ca 630 Fig 8 Transport packaging dimensions Data Value Unit Outer dimensions L x W x H 925...

Страница 21: ...new samples if neces sary Make sure the device is not exposed to direct sunlight Make sure the device is not exposed to frost Maintain the minimum clearance around the device The device can be stored...

Страница 22: ...missioning check to make sure the mains voltage is correct according to the nameplate and that the mains cable is connected prop erly Only trained and instructed personnel may commission and use the d...

Страница 23: ...suitable number of helpers Note the weight of the device NOTICE Check the device for any transport damage before commis sioning Do not put the device into operation if there is trans port damage or i...

Страница 24: ...nterior The device must not stand in the rain Transport is only allowed with suitable transport protec tion WARNING Warning Impermissible ambient temperature If the ambient temperature is outside of t...

Страница 25: ...d personnel with special instruction 1 Switch the device on The control will start up The following information is shown on the display Device type Software version and mains voltage Rotor information...

Страница 26: ...securing device 4 The device is now prepared for rotor installation If Enter max cycles 30000 is displayed after switching on the device the maximum permissible number of running cycles specified on...

Страница 27: ...d run down parameters display segment 4 Relative centrifugal force display segment 5 Speed display segment 6 Runtime display segment 7 START key 8 Rotor precooling key only for devices with cooling 9...

Страница 28: ...counting after reaching the set speed Timing begins at Speed This is indicated on the display by the symbol to the left next to the time RPM key Speed parameter RPM Can be set from 50 RPM to the maxim...

Страница 29: ...pends on the set speed It is only possible to set run down times when these are activated Chapter 7 2 2 Start up and run down parameters on page 48 Braking switch off speed parameter N Brake Can be se...

Страница 30: ...ey Start the centrifugation run to precool the rotor The LED in the key will be illuminated during the centrifugation run as long as the rotor is turning The centrifugation run for precooling the roto...

Страница 31: ...he lid Personnel Authorized skilled personnel with special instruction WARNING Risk of crushing Do not reach with your hands between the lid and the housing To close the lid proceed as follows 1 Close...

Страница 32: ...age 86 On certain hangers the weight of the maximum load or the weight of the maximum load and the maximum weight of the completely loaded hanger is specified These weights must not be exceeded The we...

Страница 33: ...ners approved by Hettich and do not exceed their maximum rotational speeds If not all positions of the adapter are used the same numbers of sample containers must be distributed over the two adapters...

Страница 34: ...leak tightness the lid of the bio safety system must be correctly sealed Available bio safety systems can be found in the attach ment Appendix A Rotors and accessories on page 86 If in doubt you can g...

Страница 35: ...is aborted after rotor detec tion The rotor code rotor types the maximum rotor speed Nmax and a centrifuging radius R of the newly detected rotor are displayed e g Rotor 4 Nmax 2500 R 184 mm If the ma...

Страница 36: ...until the rotor is read in then the LED is illuminated The timer begins at 00 00 During the centrifugation run the rotor speed or the RCF value the temperature in the centrifuge chamber and the elaps...

Страница 37: ...ction 1 Define the starting parameters NOTICE The runtime must be selected depending on the process but should not exceed 30 minutes Very fluid samples can heat up very strongly under cer tain circums...

Страница 38: ...ncy unlocking Personnel Authorized skilled personnel with special instruction In the event of a power failure the lid of the device cannot be opened Emergency unlocking must be done by hand DANGER Dan...

Страница 39: ...etely open the lid If the left LED in the STOP OPEN flashes after switching the device on again press the STOP OPEN key until the motor driven lid lock assumes its home position again open 6 9 Removin...

Страница 40: ...k the position of the groove in the rotor The screw for fastening the rotor must be tightened suffi ciently hand tight so that the rotor does not come loose during operation 1 2 Fig 21 Installing the...

Страница 41: ...rature of the cen trifuge chamber The actual temperature of the sample can vastly differ from the displayed temperature When the rotor is at a standstill with the lid closed the centrifuge chamber is...

Страница 42: ...he software version and depending on the setting the last loaded program or program location no 1 The descriptions of the individual menu items can be found in the following chapters The chapter struc...

Страница 43: ...ogram Call up program or program link STO Store Program Save the program or program link EDIT Edit Program Edit program link 1 99 Progam A Z Program linkage Program location 0 acts as a buffer for the...

Страница 44: ...ion parameters on page 47 The changed setting is stored at program loca tion 0 Automatic buffer on page 43 The original program is not over written The program location number is displayed in parenthe...

Страница 45: ...tected In this case the write protection has be removed first before saving is possible Write protection for pro grams on page 43 3 Press the START key 4 You can now run the saved program with the lid...

Страница 46: ...nd t can be linked No centrifugation parameters can be changed in a program link A parameter modification is only possible in the indi vidual programs The total runtime of the program link and the run...

Страница 47: ...with the lid closed 7 2 Centrifugation parameters 1 0 9 9 500 1 00 Fig 25 Centrifugation parameters If no key is pressed for 8 seconds after selection or during parameter input the previous values ar...

Страница 48: ...ws 1 Press the T C key 2 Use the adjusting knob to set the desired value 3 Press the START key or T C key to accept the value 4 Save the program Chapter 7 1 2 Save programs STO 1 99 on page 44 7 2 2 S...

Страница 49: ...ice It is not pos sible to activate the B braking levels in the Settings menu parameter B Ramp off B brake stages are similar to an exponential braking curve It is only possible to set run down times...

Страница 50: ...e centrifugal force RCF the centrifuging radius RAD must be set To set the relative centrifugal force RCF and the centrifuging radius RAD proceed as follows 1 Press the RCF key The LED in the RCF key...

Страница 51: ...ral RCF only begins after the set speed is reached To query the integral RCF proceed as follows 1 Press the RCF key The LED in the RCF key is illuminated 2 Press the RCF key until the integral RCF is...

Страница 52: ...e applications depends on the samples and sample containers Every sample container is approved only up to a certain rotational speed depending on the design and application this must not be exceeded u...

Страница 53: ...tart Timing begins at Speed Timing begins at Start The runtime timer begins immediately after the centrifugation run starts Timing begins at Speed The runtime only begins counting after reaching the s...

Страница 54: ...till the LED in the START key goes out and OPEN OEFFNEN is displayed The right LED in the STOP OPEN key also goes out the left LED in the STOP OPEN key starts to flash and flashes until the lid is ope...

Страница 55: ...ce on page 23 2 Keep the PROG pressed for 8 seconds 3 Release the PROG key 4 You can scroll forward in the menu with the PROG key and scroll back with the T C key 5 You will get to the corresponding m...

Страница 56: ...irst be entered with the adjusting knob and then the START key pressed before the lock status can be set 4 Press the START key to save the setting 5 STOP OPEN key Press 1x Back to the menu Machine Men...

Страница 57: ...e valid PIN with the adjusting knob and then press START 4 Press the START key 5 Set the new PIN with the adjusting knob To deactivate the PIN 0000 must be set 6 Press the START key to save the settin...

Страница 58: ...ess 1x Back to the main display 7 3 3 Info Please observe the notice Further information on page 55 The following system information can be queried Device model Mains voltage Rotor information Program...

Страница 59: ...mation on page 55 The hours of operation are subdivided into internal and external hours of operation Internal hours of operation Total time the device was switched on External hours of operation Tota...

Страница 60: ...cycles deactivating cycle counter on page 60 The cycle counter must be deactivated for rotors and hangers which are not labelled with the maximum permissible number of running cycles Every time the li...

Страница 61: ...G key until the Cycles parameter is displayed 4 Press the RCF key 5 With the adjusting knob set the value 0 to set the number of run ning cycles to 0 If the running cycles are not reset to 0 Max cycle...

Страница 62: ...s 1x Back to the menu Machine Menu 6 STOP OPEN key Press 1x Back to the main display 7 3 5 2 Sound Bell error Please observe the notice Further information on page 55 The acoustic signal sounds at a 2...

Страница 63: ...r is displayed 3 Set First or Last using the adjusting knob First Program at storage space 1 program link at storage space A Last Last used program program link 4 Press the START key to save the setti...

Страница 64: ...vated 4 Press the START key to save the setting 5 STOP OPEN key Press 1x Back to the menu Machine Menu 6 STOP OPEN key Press 1x Back to the main display 7 3 5 6 RCF Integral Please observe the notice...

Страница 65: ...y Press 1x Back to the menu Machine Menu 6 STOP OPEN key Press 1x Back to the main display 7 3 5 9 PC Address The PC Address is the address of the device serial inter face The address is set to 29th a...

Страница 66: ...splay 7 3 5 11 Cool dec speed If required it can be set that the cooling is no longer acti vated at the end of the centrifugation run during the run down after reaching a set speed This way the stirri...

Страница 67: ...d as follows 1 Change to the menu Machine Menu Settings Further informa tion on page 55 2 Press the PROG key until the Dual time mode parameter is dis played 3 Set enabled or disabled using the adjust...

Страница 68: ...ed in autoclaves since this can destroy the electronic components Only manual cleaning may be performed To avoid signs of corrosion due to cleaning agents and disinfectants it is imperative that the s...

Страница 69: ...and a damp cloth This is for hygienic purposes and pre vents corrosion due to adhering contaminants After using cleaning agents remove any cleaning agent residue by wiping with a damp cloth After clea...

Страница 70: ...Ethanol n propanol ethyl hexanol anionic tensides corrosion inhibitors Do not use spray disinfectants Only use wipe disinfectants and thoroughly dry the disinfected areas afterwards Disinfect the cen...

Страница 71: ...reason the lifting lugs must always be lightly greased Only use the grease provided and approved by the manu facturer Authorized skilled per sonnel with special in struction Annual maintenance Check b...

Страница 72: ...OR 4 1 4 5 6 Lid lock error Perform a MAINS RESET Chapter 9 1 Performing a mains reset on page 74 If the error persists after a mains reset contact a service technician N MAX 5 0 5 1 Overspeed Perform...

Страница 73: ...chnician SENSOR ERROR 91 93 Error defective unbalance sensor Perform a MAINS RESET Chapter 9 1 Performing a mains reset on page 74 If the error persists after a mains reset contact a service technicia...

Страница 74: ...a speed up to the maximum speed of the previously used rotor Press the START key to detect the rotor Runtime 00 00 in Prog There is a continuous operation program at the displayed program location Re...

Страница 75: ...d RPM 5000 Acceleration RCF 4863 Kinetic energy 12260 Nm Mandatory testing DGUV Regeln 100 500 yes Device protection class Noise level rotor dependent 64 dB A Ambient conditions EN IEC 61010 1 Set up...

Страница 76: ...er logo 2 EAC mark CE mark 3 Country of manufacture 4 Year of manufacture 5 Mains supply frequency 6 Kinetic energy 7 Maximum permissible density of centrifuged substances 8 Symbol Observe the operati...

Страница 77: ...77 88 en Rev 03 02 2021 AB3200 Technical data 10 2 Dimensions 706 28 755 418 459 472 759 Fig 33 Dimensions...

Страница 78: ...ice the respective legal regulations must be observed According to the directive 2012 19 EU devices may no longer be dis posed of in the household waste The symbol with the crossed out trash can indic...

Страница 79: ...380 R Das Konformit tsbewertungsverfahren wurde nach Anhang IV der Richtlinie 2014 35 EU durchgef hrt Folgende weitere europ ische Richtlinien und Verordnungen wurden angewandt Maschinenrichtlinie 200...

Страница 80: ...1 2009 A2 2009 Voltage fluctuations EN 61000 3 3 2012 Immunity to Electrostatic discharge EN 61000 4 2 2009 Electromagnetic fields EN 61000 4 3 2006 A1 2008 A2 2010 Electrical fast transient burst EN...

Страница 81: ...eclaration of conformity and list of standards Environmental management system according to valid for the manufacture of all products EN ISO 14001 2004 COR 1 2009 Environmental management sys tems Req...

Страница 82: ...This special kind of centri fugation leads to a fundamentally different result than classical centrifuga tion While classical centrifugation is a separation method dual centrifugation is a method for...

Страница 83: ...tch 25 Dimensions 77 Disinfection 69 Disposal 78 Dual time mode 66 E EDIT 46 Emergency unlocking 38 Entering the maximum permissible number of running cycles 60 61 F Foreseeable misuse 10 Frequency co...

Страница 84: ...ture 16 Warning Position changed due to vibration 16 Warning of hand injury due to device lid falling closed unbraked 13 Warning of premature program abort 13 Saving a program link 47 Scope of deliver...

Страница 85: ...15 Appendix...

Страница 86: ...adius mm 3205 3211 118 3221 A 124 3236 147 3206 3211 118 3218 150 3221 A 124 3236 147 3234 1752 1738 174 1761 125 171 1762 A 167 1763 A 167 1764 167 1765 167 1766 166 1767 166 1768 166 1769 174 1771 A...

Страница 87: ...3206 3211 no 3218 3221 A 3236 3234 1752 1751 yes Tab 3 Bio seal Rotor Maximum number of running cycles Period of use years 3205 2500 3206 10000 3234 Tab 4 Maximum load maximum number of running cycle...

Страница 88: ...22 24 20 3221 A 3236 3206 3211 1500 22 24 20 3218 3221 A 3236 3234 1752 5000 42 27 0 Tab 5 Start up and run down time lowest reachable temperature in the centrifuge chamber 1 Lowest reachable temperat...

Отзывы: