EZMaster
EZMaster
User’s Guide
Page 24 of 53
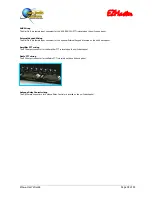
LPT Port Selection
If LPT port has been selected, the functions within this frame will become available and can be selected.
A/B
If checked, enable EZMaster to accept the RADIO A/B command selection from the parallel port.
PTT
If checked, enable EZMaster to accept the PTT command from the parallel port.
DVK
If checked, enable EZMaster to accept the Digital Voice Keyer command from the parallel port.
MAP
If checked, enable EZMaster to accept the 4 bit Antenna Switch Data from the parallel port.
DEC
If MAP has been enabled, then it will be possible to decode the 4-bit Antenna Switch Data.
−
If DEC is NOT checked then the 4 bit will not been decoded and the Data on the LPT port will be replicated at the MATRIX A
Port thus allowing the use of an external band decoding device.
−
If DEC is checked then the 4 bits will be decoded, and the first 10 lines of the Matrix A Port will reflect the result of decoding
the data from the LPT Parallel Port.
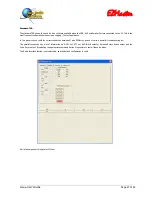
RADIOA / RADIOB
The two drop-down routing menus, RADIOA & RADIOB, allow to select where to route the corresponding radio data communication
interface. Select the relevant port and configure your application to reflect the same configuration.
RADIO A Setting / RADIO B Setting
Within these two frames it will be possible to set the communication parameters for RadioA and RadioB communication respectively.
The usual Speed, Data length, Stop bit and Parity values can be set.
Bottom Line check boxes
Bottom Line check boxes are intended for advanced purposes.
Some of these flags are automatically checked when the corresponding configurations are selected.
Please use these check flags carefully: misuse or erroneous selection can have unwanted side effects.
CONFIGURE
When finished, press the
CONFIGURE
Green
Button to transfer the configuration information to EZMaster. These information are
saved into an internal memory. You will see some acknowledgement of the commands sent to EZMaster – the LCD window on EZMaster
will report a status change.
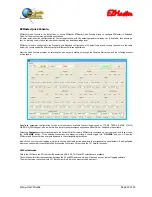
Most of the configurations are often interchangeable, so a
Writelog
configuration can be used with
N1MM Logger
, or the
CTDOS
configuration may be the same for
TRLog
or
SD
.
Содержание EZMaster
Страница 52: ...EZMaster EZMaster User s Guide Page 52 of 53 Mainboard Printed Circuit Rev 4 00...
Страница 53: ...EZMaster EZMaster User s Guide Page 53 of 53 Take your Personal Notes here...
Страница 72: ...Microphone Cable ICOM EzMaster Back Panel View IcomMic EZMaster 1 4 7 5 5 2 6 3 Cable Lenght 90 cm...
Страница 73: ...Microphone Cable YAESU EzMaster Back Panel View YaesuMic EZMaster 8 4 7 5 6 2 5 3 Cable Lenght 90 cm...
Страница 74: ...Microphone Cable Kenwood EzMaster Back Panel View Kenwood Mic EZMaster 1 4 7 5 2 2 8 3 Cable Lenght 90 cm...
Страница 75: ...Microphone Cable Orion EzMaster Back Panel View Orion Mic EZMaster 2 4 1 5 3 2 4 3 Cable Lenght 90 cm...
Страница 78: ...CW Cable RCA Connector Jack 6 3 Cable Lenght 150 cm...
Страница 81: ...Radio YAESU Cable MiniDin 6 DIN 6 Cable Length 90 cm EzMaster Back Panel View DIN 6 MiniDin 6 1 GND 2 4 3 5...
Страница 85: ...RTTY FSK AFSK ORION Cable MiniDin 8 DIN 8 Cable Length 150 cm DIN 8 MiniDin 8 7 1 2 2 3 3 2 4 1 6 2 5 4 6 7 2 8...


