EZMaster
EZMaster
User’s Guide
Page 22 of 53
You will find that the WinKey in EZMaster does not, at present, integrate with most logging programs (except Wintest). This means that
there is separate control of computer CW sending speed and paddle sending speed. Hopefully software developers will in the future
embrace the functionality of EZMaster to allow control of computer sending speed from the front panel knob on EZMaster.
Working with WinTest
WinTest is capable of much more functionality with EZMaster, and one single USB cable is all that is needed to interface the computer
to EZMaster. If you are using WinTest, proceed as follows.
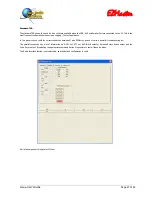
Check that you can open the USB interface to EZMaster by using the EZConsole programme. Enter the virtual COM port number in the
USB box, and press “Connect”. If the box goes green, everything is OK, and you can exit EZConsole.
Open WinTest, and in the “Setup” tab, open “Configure Ports”. Check the port that has EZMaster connected, and select the “EZMaster”
option from the drop-down menu for that port. Make sure that the LPT box is NOT ticked, and enter a PTT delay number – start with
10ms. Click OK
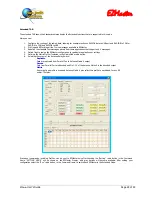
Open “Configure EZMaster” and enter the data for your transceivers – entering the speed at which communication needs to take place
with the rigs, and the other data required. Also check the “WinKey” box. Click OK
You should now check the following:
- That you can switch between radios (if you are using two) using the relevant keyboard commend
- That you can switch to transmit from the foot switch, key paddle or function keys of the computer
- That the audio for the
active
transceiver is in your ears. If the audio is reversed (i.e. you are listening to the opposite transceiver to
the one that the keyer is keying) reverse the ports for the radios in “Configure EZmaster” menu in WinTest.
- That you can “latch” the audio, if using two transceivers (i.e. when you go to transmit, you hear audio from the inactive transceiver).
Use the latch check-box on the second logging window to check this option.
- That the knob on the front of EZMaster controls the CW sending speed of the computer (unless you have checked independent control
of keying speed in the WinKey set-up box)
- That you can record and send voice messages (see EZMaster manual)
Note that there have been occasional problems with, e.g., CW sending, if the LPT cable is left attached between EZMaster and the
computer when using WinTest. It is better not to have an LPT cable connected.
If at any time during your setup process, you feel that EZMaster has become unresponsive, you should perform a hard reset of
EZMaster as described in the manual. Occasional lock-ups can occur whilst all the parameters are being changed.
If you have completed the above successfully, you can now explore the more advanced functionality of EZMaster.
The next sections of this Manual set out in greater detail some of the set-up process for EZMaster, and inevitably repeat some of the
information in the “Quick Start” guide
Содержание EZMaster
Страница 52: ...EZMaster EZMaster User s Guide Page 52 of 53 Mainboard Printed Circuit Rev 4 00...
Страница 53: ...EZMaster EZMaster User s Guide Page 53 of 53 Take your Personal Notes here...
Страница 72: ...Microphone Cable ICOM EzMaster Back Panel View IcomMic EZMaster 1 4 7 5 5 2 6 3 Cable Lenght 90 cm...
Страница 73: ...Microphone Cable YAESU EzMaster Back Panel View YaesuMic EZMaster 8 4 7 5 6 2 5 3 Cable Lenght 90 cm...
Страница 74: ...Microphone Cable Kenwood EzMaster Back Panel View Kenwood Mic EZMaster 1 4 7 5 2 2 8 3 Cable Lenght 90 cm...
Страница 75: ...Microphone Cable Orion EzMaster Back Panel View Orion Mic EZMaster 2 4 1 5 3 2 4 3 Cable Lenght 90 cm...
Страница 78: ...CW Cable RCA Connector Jack 6 3 Cable Lenght 150 cm...
Страница 81: ...Radio YAESU Cable MiniDin 6 DIN 6 Cable Length 90 cm EzMaster Back Panel View DIN 6 MiniDin 6 1 GND 2 4 3 5...
Страница 85: ...RTTY FSK AFSK ORION Cable MiniDin 8 DIN 8 Cable Length 150 cm DIN 8 MiniDin 8 7 1 2 2 3 3 2 4 1 6 2 5 4 6 7 2 8...


