EZMaster
EZMaster
User’s Guide
Page 15 of 53
Installation
Installing Your EZMaster
The goal of this chapter is to guide you, as quickly as possible, through the steps of setting up your radio station. The major steps
involved in installing (i.e., connecting the parts) your radio station are as follows: connect your EZMaster to a power source and confirm
that the unit powers on when it should, connect the “Computer” port on the EZMaster to a USB / Serial Port on your computer, install
the EZMaster Control Console connect the “Radio(s)” port(s) on your EZMaster to your(s) transceiver.
The Major Components of Your Station
This section describes the basic components needed for your radio station and the connections between components that will be
involved in the installation of your station.
The EZMaster
Your EZMaster is going to be at the centre of your radio station, so setting up your station involves connecting other units to your
EZMaster.
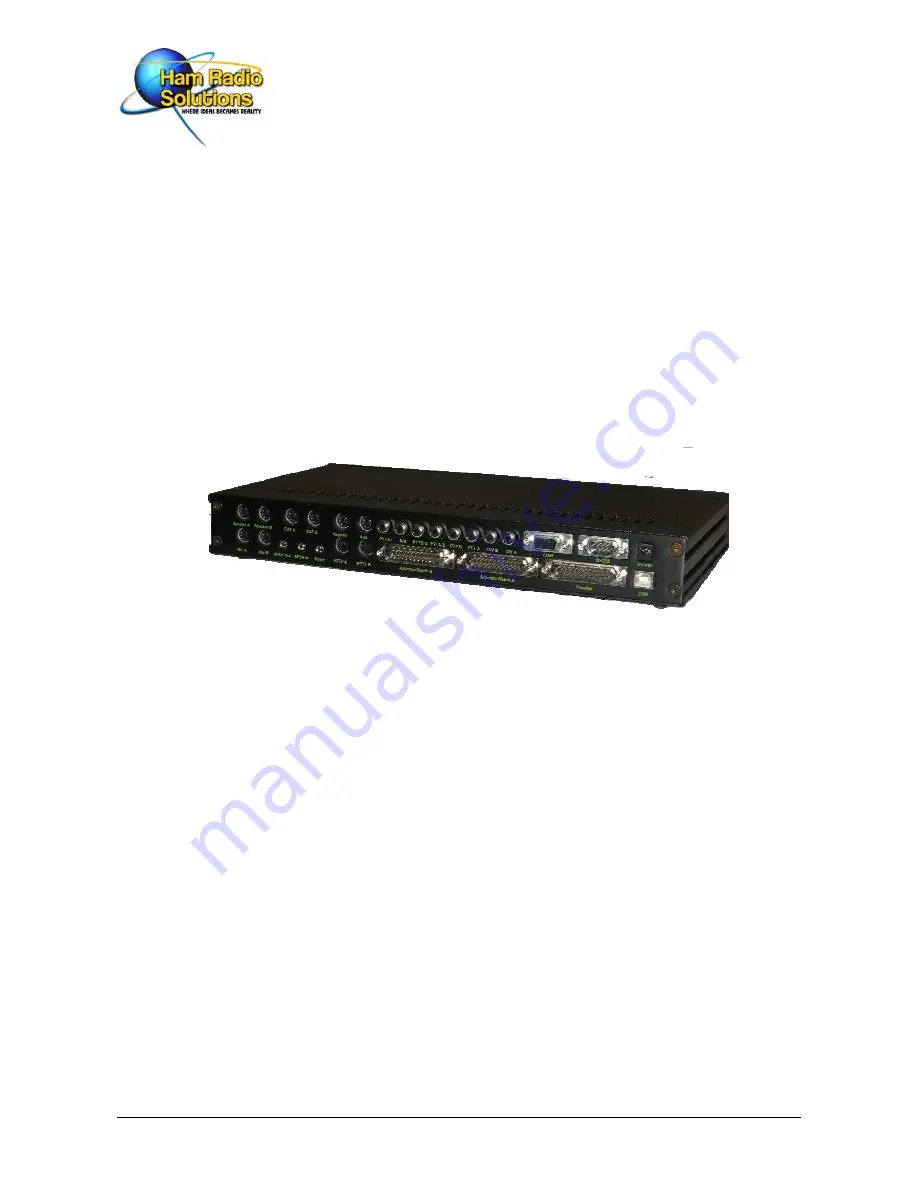
As shown below, the back of the unit has connectors to connect the EZMaster to your Transceivers, Amplifiers, Filters, Antenna Switch,
your computer and a power source:
The Transceiver
Your EZMaster will operate with most of the modern HF multimode transceivers. There are currently many models of transceivers so
you will need to refer to the documentation of your transceiver to determine how it must be connected to external devices, such as the
EZMaster.
The Computer
Your EZMaster can work with any computer, even legacy one, providing it can communicate through a USB or standard RS-232 serial
modem port(s).
The Amplifier
Your EZMaster can work in conjunction with any Amplifier with a PTT input connector.
The Antenna Relay Box
Your EZMaster can work with any Antenna Relay Box available on the market. A total maximum of 150ma can be sunk from each one of
the EZMaster output ports. If more current is needed or a heavy current drain Antenna Relay Box is used, you may want to add the
optional EZ Relay Board that allows a full 1A current drain for 5V or 12 V relays.
The Microphone
Any microphone that work with your transceiver can be connected to EZMaster. An internal Dip-switch select the correct pin-out
matching with your 8-pin Microphone connector.
The Headphones
Any mono/stereo headphones that works with your transceivers can be connected to EZMaster. Stereo Headphones allows the best
performance in conjunction with the audio split SO2R function.
Commercial or Homemade Headsets can be connected to EZMaster through the Microphone line 3.5mm mono connector and the
headphone 6.3mm stereo connector on the front panel.
Содержание EZMaster
Страница 52: ...EZMaster EZMaster User s Guide Page 52 of 53 Mainboard Printed Circuit Rev 4 00...
Страница 53: ...EZMaster EZMaster User s Guide Page 53 of 53 Take your Personal Notes here...
Страница 72: ...Microphone Cable ICOM EzMaster Back Panel View IcomMic EZMaster 1 4 7 5 5 2 6 3 Cable Lenght 90 cm...
Страница 73: ...Microphone Cable YAESU EzMaster Back Panel View YaesuMic EZMaster 8 4 7 5 6 2 5 3 Cable Lenght 90 cm...
Страница 74: ...Microphone Cable Kenwood EzMaster Back Panel View Kenwood Mic EZMaster 1 4 7 5 2 2 8 3 Cable Lenght 90 cm...
Страница 75: ...Microphone Cable Orion EzMaster Back Panel View Orion Mic EZMaster 2 4 1 5 3 2 4 3 Cable Lenght 90 cm...
Страница 78: ...CW Cable RCA Connector Jack 6 3 Cable Lenght 150 cm...
Страница 81: ...Radio YAESU Cable MiniDin 6 DIN 6 Cable Length 90 cm EzMaster Back Panel View DIN 6 MiniDin 6 1 GND 2 4 3 5...
Страница 85: ...RTTY FSK AFSK ORION Cable MiniDin 8 DIN 8 Cable Length 150 cm DIN 8 MiniDin 8 7 1 2 2 3 3 2 4 1 6 2 5 4 6 7 2 8...


