EZMaster
EZMaster
User’s Guide
Page 21 of 53
Quick Start Guide
A simple guide to setting up EZMaster
This section is written to help the first-time user to setup EZMaster and to check the basic functionality of the configuration. Further
details on many of the points are available elsewhere in the manual, but by following these simple steps you will be able to get your
EZMaster working quickly.
This guide assumes that you have one or two transceivers, a computer and an EZMaster. You will want to connect these together in
either SO1R or SO2R configuration.
Note: Antenna switching and some other advanced features are covered elsewhere in the manual, and are not covered in this section.
Connect the necessary interconnect cables
(see the diagrams for various configurations later in this Manual, or on the
www.hamradiosolutions.com
website)
Note that for transceiver CAT connections, where the manual says “Radio TX” it should be connected to the line on the radio marked
“serial in” or similar. In other words the EZMaster line shown as data TX goes to the data receiving pin on the radio. Note also that for
transceivers such as the FT1000MP with a built in RS232 interface, the pins on EZMaster for serial communication are different from
those shown in the manual. The correct wiring for these transceivers is:
Mini-Din on EZMaster DB9 on FT1000MP
Pin2 TX
Pin3 Serial In
Pin1 RX
Pin2 Serial Out
Shield GND
Pin5 GND
Note
: ALL communication between the computer and EZMaster should take place at
19200 bauds N,8,1
, when using the COM and
USB/COM ports, and
9,600 bauds N,8,1
, when using the RS232 port on EZMaster.
Ensure that any virtual Comport software which provides COM ports via the USB connector of your computer is uninstalled from your
computer BEFORE installing the EZMaster software for I/O ports. Install all software as set out on the previous chapter.
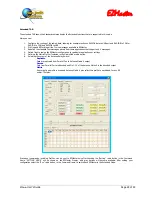
After you have connected all the cables needed, the first test is to connect to EZMaster via the USB port of your computer to configure
it. Open EZConsole, following the instructions in the manual for this program, and select the configuration needed, generally by
selecting the logging program type from the box at the top of the EZConsole screen and checking the relevant boxes in that part of the
screen. Be sure also to check the correct speed and data format for your transceiver(s) at the bottom of the screen. Once you have the
correct boxes checked, click “Configure” whilst watching the LCD screen on EZMaster. You should see some response, including
confirmation of the mode EZM is now set to (Standard, Extended or Advanced). Close EZConsole.
Once this step is complete, open your logging program. If this is NOT WinTest, proceed as follows (for WinTest, see section 8 below).
Logging Programs other than WinTest
Open the configuration box in your logging program, and set the parameters for your transceiver(s), and the ports you are using, which
will generally be the virtual COM port via USB, and the single COM port on your computer. If you have a computer with no COM port,
and want to control two transceivers, you will need to use EZMaster via a separate USB-COM port adaptor. Remember to uninstall the
EZMaster comport driver, before loading the drivers for your separate USB-COM adaptor. Set up of EZMaster is then a little more
complicated. You will need to configure it via EZConsole, using the USB port on your computer, then uninstall the EZMaster port driver
and install the drivers for your USB-COM device, then proceed.
Remember that, whatever speed your transceiver needs CAT commands at, this should be disregarded in your logging
program setup.
You have already provided that data in your EZConsole setup. In your logging program you set the speed at 19200,
N, 8, 1. Most logging programs allow the data transmission parameters to be set independently of the default speed required by the
selected transceiver, although a few do not have sufficient flexibility to operate in this way with EZMaster. This particularly applies in
the case of some non-contest logging programs.
Once configured you should see the computer polling the radio(s). If you have two radios, also check the following:
- That you can switch the choice of transceivers from the keyboard when running WinTest, and that the audio and frequency data
changes as you do so.
- That you can key the relevant rig from the foot switch, paddle or message key of the computer
- That, if you press the “speaker auto” switch on EZMaster, when you press PTT, the audio switches to the inactive transceiver
- That the voice recorder facility works correctly (see the manual)
Experiment with the PTT delay to get the optimum setting for your equipment
Содержание EZMaster
Страница 52: ...EZMaster EZMaster User s Guide Page 52 of 53 Mainboard Printed Circuit Rev 4 00...
Страница 53: ...EZMaster EZMaster User s Guide Page 53 of 53 Take your Personal Notes here...
Страница 72: ...Microphone Cable ICOM EzMaster Back Panel View IcomMic EZMaster 1 4 7 5 5 2 6 3 Cable Lenght 90 cm...
Страница 73: ...Microphone Cable YAESU EzMaster Back Panel View YaesuMic EZMaster 8 4 7 5 6 2 5 3 Cable Lenght 90 cm...
Страница 74: ...Microphone Cable Kenwood EzMaster Back Panel View Kenwood Mic EZMaster 1 4 7 5 2 2 8 3 Cable Lenght 90 cm...
Страница 75: ...Microphone Cable Orion EzMaster Back Panel View Orion Mic EZMaster 2 4 1 5 3 2 4 3 Cable Lenght 90 cm...
Страница 78: ...CW Cable RCA Connector Jack 6 3 Cable Lenght 150 cm...
Страница 81: ...Radio YAESU Cable MiniDin 6 DIN 6 Cable Length 90 cm EzMaster Back Panel View DIN 6 MiniDin 6 1 GND 2 4 3 5...
Страница 85: ...RTTY FSK AFSK ORION Cable MiniDin 8 DIN 8 Cable Length 150 cm DIN 8 MiniDin 8 7 1 2 2 3 3 2 4 1 6 2 5 4 6 7 2 8...


