


25
Section 5
Standard programs
5.1
Overview
5.1.1
Tips for using the touch screen
The entire display reacts to touch. Make selections by tapping
with a fingernail, fingertip, eraser or stylus. Do not touch the
display with sharp objects (for example a ballpoint pen tip).
•
Do not place anything on top of the screen, to prevent
damage or scratches on the screen.
•
Press buttons, words or icons to select them.
•
Use scroll bars to move up and down long lists very quickly.
Press and hold the scroll bar, then move up or down to move
through the list.
•
Highlight an item from a list by pressing it once. When the
item has been successfully selected, it will be displayed as
reversed text (light text on a dark background).
5.1.2
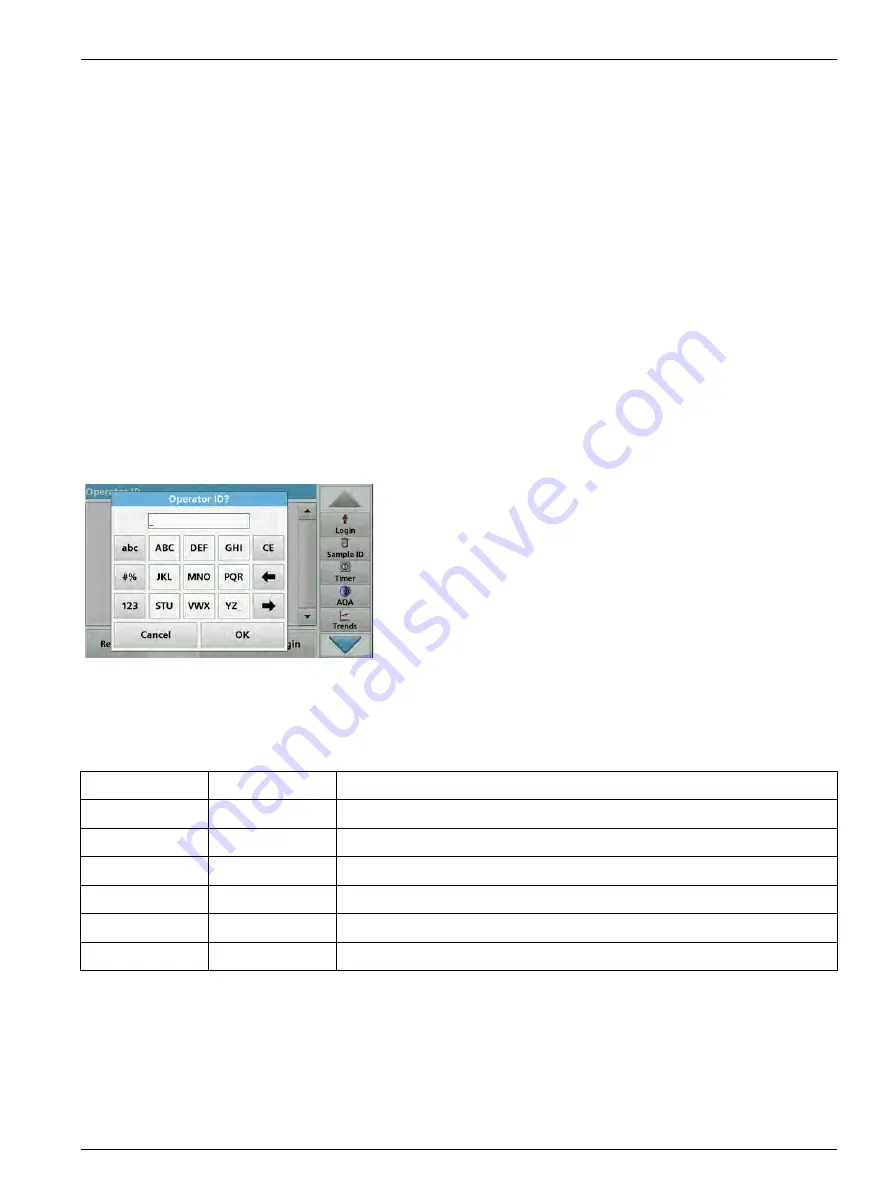
Use of the alphanumeric keypad
This display is used to enter letters, numbers and symbols as
needed when programming the instrument. Unavailable options
are disabled (grayed out). The symbols left and right on the
display are described in
Table 1
.
The designations of the center keypad change according to the
selected entry function. Touch each key repeatedly until the
required character is shown on the display. A space can be
entered by using the underscore on the
YZ_
key.
Press
Cancel
to cancel an entry, or press
OK
to confirm an entry.
Note: It is also possible to use a USB keyboard (with US keyboard
layout) or a hand-held USB barcode scanner (refer to
Table 1 Alphanumeric keypad
Icon / key
Description
Function
ABC/abc
Alphabetic
Toggles the character input mode between upper and lower case.
# %
Symbols
Punctuation, symbols and numerical sub- and superscripts may be entered.
123
Numeric
For entering regular numbers.
CE
Clear Entry
Clear the entry.
Left Arrow
Back key
Deletes the current character and goes back one position.
Right Arrow
Next
Navigates to the next space in an entry.
Содержание DR 6000
Страница 2: ......
Страница 16: ...16 General information ...
Страница 132: ...132 Expanded programs ...
Страница 138: ...138 Maintenance 7 4 Replace fuses 1 Remove the cover below the power switch containing the fuses ...
Страница 142: ...142 Troubleshooting ...
Страница 145: ...145 Section 10 Contact ...
Страница 146: ...146 Contact ...
Страница 152: ...152 Help Guide ...
Страница 156: ...156 Index ...


