Geophysical Survey Systems, Inc.
SIR® 4000
Manual
MN72-433 Rev F
64
Step 4: Set Grid Limits
Under the Grid Menu, set your grid limits, line spacing, and orientation.
Start/End Values:
Typically, the X Start Value and the Y Start Value should both be set to 0. If the grid
does not start at (0,0) put in the coordinates of the origin point. This occurs when the grid is part of a
larger site grid. If combining grids in RADAN using Super3D, you can just leave this number at (0,0) and
add real coordinates later. Enter your X End Value and Y End Value coordinates and remember that these
are not line lengths.
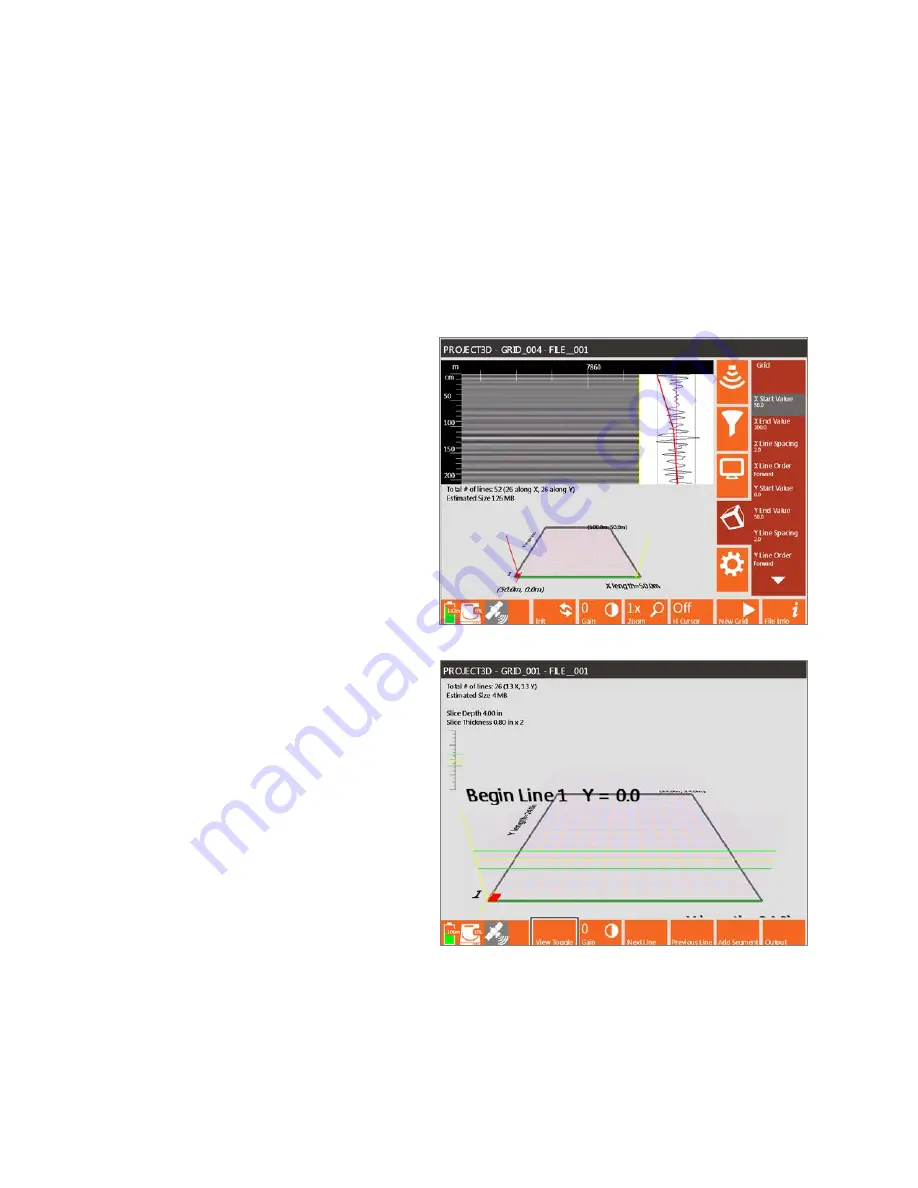
In the example below, the grid is part of a larger site and the grid measures 50x50. It’s starting
coordinates are X Start Value = 50 and Y Start Value = 0, therefore the X End Value = 100 and the Y End
Value = 50.
Line Spacing:
If collecting data in both the
X and Y direction then include line spacing in
each direction. If only collecting in one
direction, set the line spacing of the unused
direction to the value of the maximum grid
dimension.
Line Order:
Decide if you’re going to collect
the lines using Forward, Zigzag, or Reverse
Line Order. Forward and Reverse will take
longer to collect. However, these have potential
for fewer offset errors created by uneven
ground surface or a slightly misshapen grid.
Potential offset errors created by collecting in
Zigzag can be corrected in RADAN.
Step 5: Enter Collection Screen
Once you are satisfied with the grid and
settings press the green Start button on the
SIR 4000. This will open the 3D Collection
Screen. There are four different ways to view
the 2D profiles and 3D slice maps during
collection and you can toggle through them by
pressing the View Toggle control button.
Grid Display:
Shows the full 3D grid and your
current location within the grid. There are three
views in this display.
2D Profile:
Shows just the 2D profile and can
be used to perform a hyperbola fitting on the
data. This view is only available from Line 1.
The grid coordinates are displayed at the
bottom left and top right corners of the grid.
The X and Y line lengths appear on the bottom and left side of the grid.
At the top of the screen the following information appears:
•
Total number of lines
•
Number in both the X and Y directions
•
Estimated file size
•
Current Slice Depth and Slice Thickness
Содержание SIR 4000
Страница 1: ......
Страница 4: ......
Страница 116: ...Geophysical Survey Systems Inc SIR 4000 Manual MN72 433 Rev F 110 ...
Страница 140: ...Geophysical Survey Systems Inc SIR 4000 Manual MN72 433 Rev F 134 ...
Страница 150: ...Geophysical Survey Systems Inc SIR 4000 Manual MN72 433 Rev F 144 ...
Страница 156: ...Geophysical Survey Systems Inc SIR 4000 Manual MN72 433 Rev F 150 ...


