❏
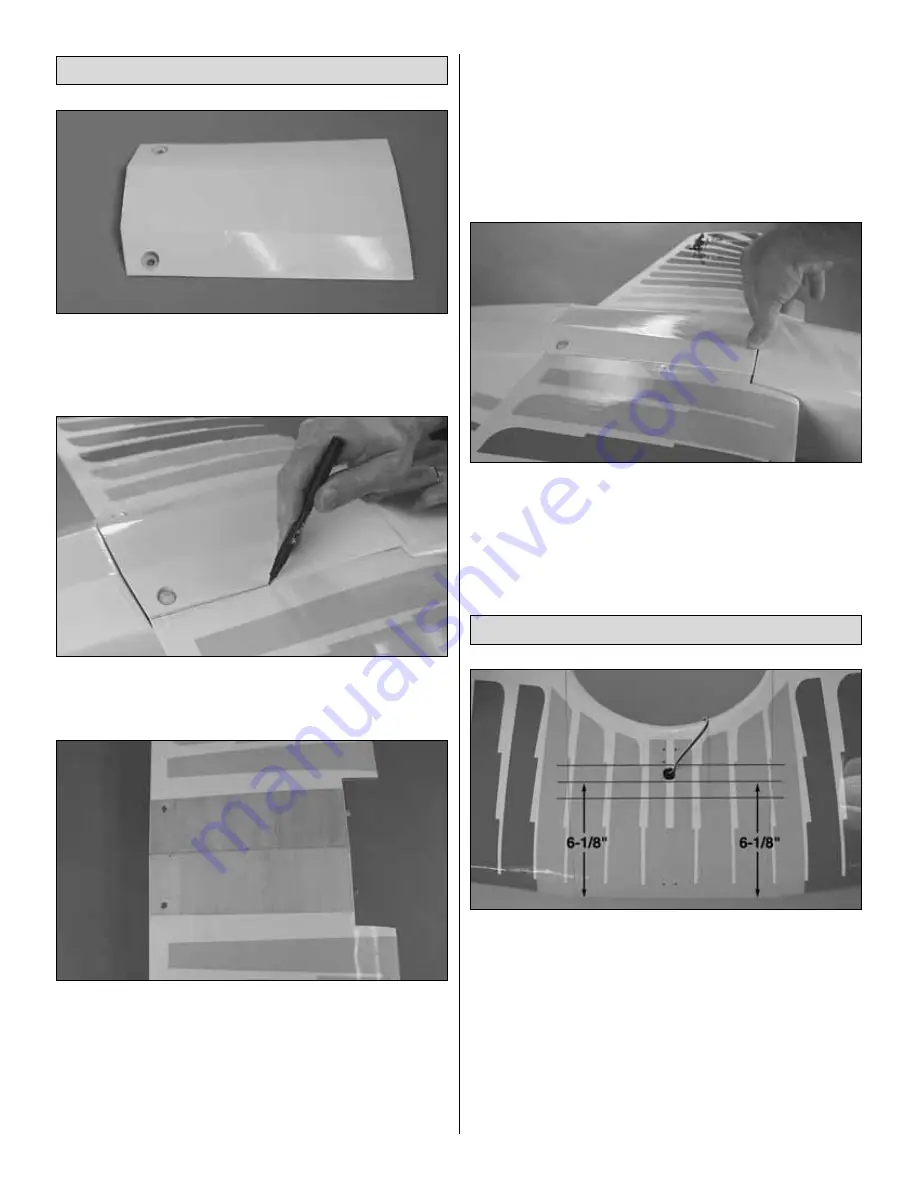
1. Cut the covering from the wing bolt holes in the rear of
the belly pan. Use a covering iron to thoroughly seal the
covering to the belly pan—especially around the holes for
the wing bolts.
❏
2. With the belly pan in position, bolt the wing to the
fuselage. Use a fine-point felt-tip pen to mark the sides of
the belly pan onto the wing.
❏
3. Remove the belly pan. CAREFULLY cut the covering
from the bottom of the wing just inside the line. Use great
care not to cut into the balsa—you could use the soldering
iron technique here too. Peel the covering from the center of
the wing.
❏
4. Test fit the belly pan to the wing once more before
permanently gluing it on. Make any adjustments necessary.
❏
5. Apply 30-minute epoxy to the bottom of the wing and
the belly pan where they contact each other—except for the
front of the belly pan—this area will be glued down with
medium CA.
❏
6. Position the belly pan on the wing and bolt it down with
the wing bolts. There should be a small gap between both
ends of the belly pan and the fuselage.
❏
7. Apply medium CA to the bottom of the wing where the
front of the belly pan comes into contact. Press the belly pan
down holding it in position until the CA hardens. Wipe away
excess epoxy and do not disturb the wing until the epoxy
has hardened.
❏
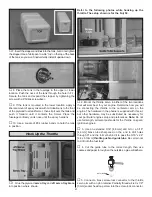
1. Mark the recommended C.G. location and the
forward and aft C.G. limits on the bottom of the top wing
where shown. The recommended C.G. location is 6-1/8"
[156mm] back from the leading edge of the center section
of the top wing. The forward recommended C.G. limit is
5-3/8" [137mm] from the leading edge and the aft
recommended C.G. limit is 6-7/8" [175mm] from the leading
edge. The best way to mark the locations is by taking
accurate measurements and drawing the lines directly on
the wing with a fine-point felt-tip pen. Apply narrow (1/16"
[1mm]) tape over the lines so you will be able to feel them
while balancing the model with your fingertips.
Mount the Wings
Glue on the Belly Pan
35


