❏
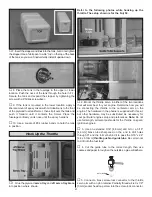
1. Determine where and how you will be mounting the
on/off ignition switch. Note: It is advisable to mount the
switch on the top or side of the fuselage where it will be
more readily accessible than it would be on the bottom of
the fuselage where shown on the model in the photos.
❏
2. If necessary, make a switch mount from scrap plywood
(not supplied). Fuelproof the mount, then fasten the switch
to the mount. Solder one end of the wires to the switch, then
securely glue the switch mount into position.
❏
3. Cut the wires to the correct length, then crimp or solder
the connectors to the wires. Mount the connectors to the
engine. Be certain the wires will not contact the muffler.
Refer to this photo while finishing the cockpit.
❏
1. Optional: Should you desire to enhance the scale
appearance of the cockpit area, an anti-glare panel could be
made by covering the fuselage inside the canopy with flat
black MonoKote. This can be done by cutting out the canopy
as shown on page 34, then placing it on the fuselage. Use a
fine-point felt-tip pen to trace around the front of the canopy,
then cut the covering from the fuselage along the lines. Use
the cut off piece of covering as a template to make another
piece of covering from flat black MonoKote. Iron the anti-
glare panel into position.
Finish the Cockpit
BOTTOM OF SWITCH
SOLDER THE
WIRES WHERE
SHOWN
33


