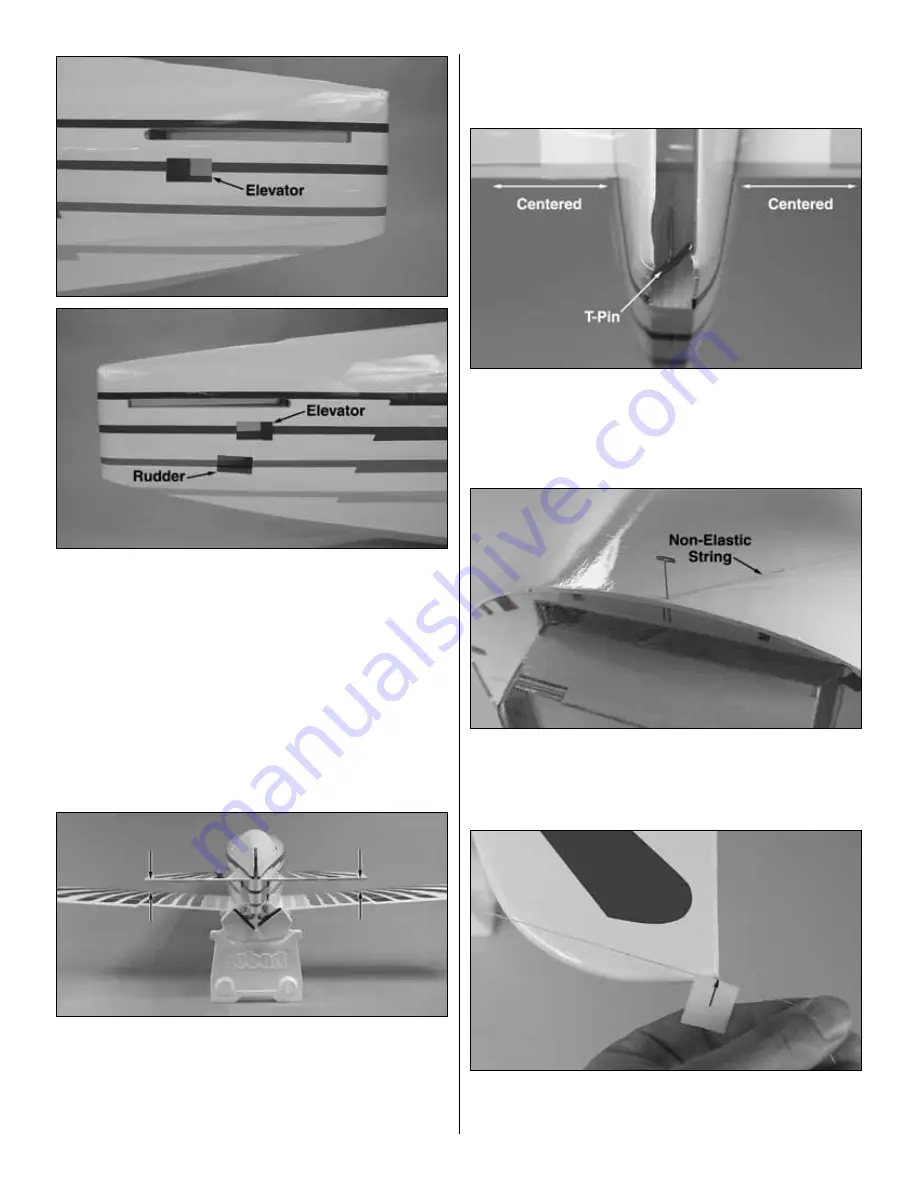
❏
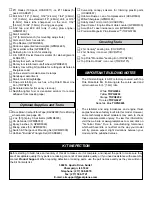
2. Cut the covering from the slots in both sides of the
fuselage for the stabilizer and cut the covering 1/8" [3mm]
inside the edges of the openings for the two elevator and
one rudder servos. Seal the covering inside the edges of the
servo openings.
❏
3. Temporarily place the rudder and elevator servos in the
servo openings (for now, it doesn’t matter which way the
servos go—this step is just for drilling the holes before the
stab is glued in). Drill 1/16" [1.6mm] holes for the servo
mounting screws. Install, then remove the screws and
servos. Add a few drops of thin CA to the screw holes. The
servos will be mounted after the stab has been glued in.
❏
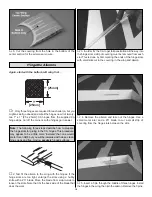
4. Bolt the bottom wing to the fuselage with two 1/4-20 x
2" [50mm] nylon bolts. Slide the stab into the fuselage and
temporarily center it as best as you can by eye. Stand
approximately ten feet behind the model and view the
alignment of the stab and wing. If the stab is not parallel with
the wing, place a small weight on the “high side” of the stab to
bring it into alignment. If weight is not enough, remove the
stab from the fuselage and lightly trim or sand the stab saddle
as necessary until you can get the stab parallel with the wing.
❏
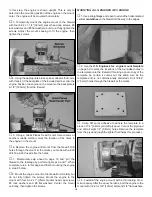
5. Once the stab and wing align, center the trailing edge
of the stab from side-to-side in the fuselage, taking accurate
measurements. Stick a T-pin through the back of the
fuselage into the stab. This will allow the front of the stab to
be shifted while keeping the trailing edge centered.
❏
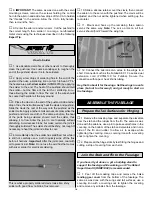
6. Stick a T-pin through the top of the fuselage over the
center stringer at F-1. Tie a loop in one end of a 50" [1270mm]
piece of non-elastic string such as monofilament or Kevlar line
(K+SR4575). Slip the loop in the string over the T-pin.
❏
7. Fold a piece of masking tape over the string near the
other end and draw an arrow on it. Slide the tape along the
string and align the arrow with one end of the stab as shown
15


