❏
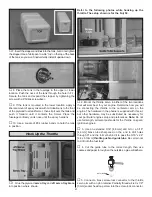
6. Drill the holes in the bottom panel and mount the A1,
C1 and B1 (for the optional flying wires) brackets as shown
in the photo. Harden the holes with thin CA.
❏
7. Drill four 3/32" [2.4mm] holes, 1/2" [13mm] deep
through the factory-drilled holes in the hardwood blocks
under the covering on the front of the fuselage. If the
covering has not been punched for locating the holes, they
can be easily located by probing with a toothpick to poke
through the covering.
❏
8. Use four #2 x 1/2" [13mm] screws to mount the pre-
bent aluminum cabanes to the fuselage as shown. Remove
the screws, harden the holes with thin CA, and then remount
the cabanes.
❏
9. Use coarse sandpaper to smooth the molded-in
parting line from both ends of both fiberglass wing struts
where they contact the top and bottom wings.
❏
10. Identify the top and bottom of the struts. The bottom
is the end with the short, straight section as indicated by
the arrow.
❏
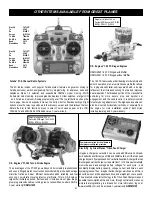
11. Bolt the bottom wing to the fuselage. Mount the top
wing to the cabanes with two 4-40 x 1/2" [13mm] socket head
cap screws and two 4-40 lock nuts. From here on out it will
be extremely helpful if you have a 1/4" wrench for tightening
the nylon lock nuts. If you don’t already own a 1/4" wrench,
run out to the hardware store at your earliest convenience
and get one!
CABANES
WING STRUTS
B1
C1
A1
37


