❏
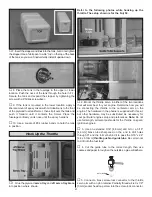
4. Mark the rear bracket on the other side of the fuselage
and both front brackets on the middle of the stab leading
edge the same way.
❏
5. Use a file or a cut-off wheel to sharpen the outside of
the included 5/32" x 4" [4 x 100mm] brass tube and a #11
blade to sharpen the inside of the tube. Now the tube can be
used to cut through balsa.
❏
6. Use the sharpened end of the tube to cut four holes in
the stab at the marks you made. Twist the brass tube as you
push it into the wood. Support the other side of the stab with
a thick piece of balsa.
❏
7. Use four 4-40 x 5/8" [16mm] Phillips-head screws and
4-40 nuts to temporarily mount the bottom B1 brackets
(already on the wires) to the bottom of the stab and four
more B1 brackets to the top of the stab at each hole.
❏
8. Turn the fuselage over. Connect the remaining four top
tail wires to the brackets on the top of the stab. The same
way the holes were marked in the bottom of the stab, mount
four B4 brackets to the clevises on the ends of the top tail
wires. Pull the brackets on one side of the stab up to the
trailing and leading edge of the fin. Mark the locations of the
holes. Cut the holes with the sharpened brass tube.
❏
9. Now there are six holes in the tail surfaces—two in both
sides of the stab and two in the fin. Roughen the brass tube
with coarse sandpaper so glue will adhere. Use a rotary tool
with a cutoff wheel to cut six 3/8" [10mm] pieces from the
tube (cut the tubes slightly long, then use a metal file to
square and debur the ends). Remove the screws and
brackets from the stab, then use epoxy to glue the tubes into
the holes (don’t try to glue the brass tubes into the holes with
CA—you’ll mess it up!). Remove any excess epoxy with a
paper towel square dampened with denatured alcohol.
❏
10. Remount all the brackets to the stab and fin. Use a
small drop of threadlocker on all the 4-40 nuts. Adjust the
length of all the flying wires to equalize the tension, then
tighten the 2mm nuts on the brass couplers.
❏
11. Return to step 19 and 20 on page 40 and test-
balance the model.
DO NOT FORGET TO DO A FINAL C.G. CHECK AFTER THE
MODEL HAS BEEN COMPLETED. REFER TO “BALANCE
THE MODEL” AFTER APPLYING THE DECALS.
B4
40


