238
Detail program description - Control adjust
Initial steps for the programming of a new model
Example: Winged model with two ailerons and – initially – without motor propulsion
In the scope of the
initial commissioning of a new
transmitter,
in the selection menu …
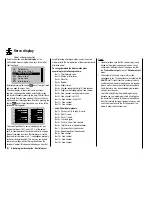
"General settings"
(page 224)
Batterie type
Batterie war ning
Touch Sense
Contrast
Ni-MH
Display light
Region
Voice volume
2
4.7V
0
Euro
3
unlim.
Beep volume
3
BASIC SETTINGS
Own
Stick mode
1
DSC Output
PPM10
Pitch min
back
Power-on beep
yes
Power on war n.
unlim
H - J S a n d b r u n n e r
… some basic information should be entered. This
serves various purposes:
In this menu the name of the owner can be entered
and defaults can be entered for new model memories
in the lines "
Stick mode
", "
DSC Output
" and
Pitch
min
". These are then adopted on the activation of a new
model memory in its basic settings, but can be changed
there at any time.
In the "
Contrast
" line, as an alternative to the line with
the same name in the "
Hidden mode
" menu, page 28,
you can adjust the display contrast by changing the
standard default "0" in a range of ±20.
The setting in the "
Display light
" line determines how
long the display lighting remains illuminated after the
transmitter is switched on or after the last key actuation.
With the selection of "yes/no" in the "
Power-on beep
"
you can determine whether the "Recognition melody",
which sounds when switching on the transmitter, is
switched on or off.
In the "
Battery type
" line you indicate to the transmitter
whether its power supply comes from a four-cell NiMH
battery or a single-cell LiPo- battery and in the "
Battery
warning
" line you can determine the corresponding
switching threshold for the battery warning on an
individual basis. Make sure that you do not enter a
value which is too low, so that you do not have suffi cient
time to safely land your model in the event of a battery
warning.
In the "
Power-on warning
" line, you can determine, as
necessary, how long the transmitter should wait after the
last actuation of an operating element until the activation
of an optical and acoustic power-on warning, whereas
the settings in the lines "
Touch sensitivity
", "
Voice
volume
" and "
Signal volume
" are provided for personal
comfort.
On the other hand, the setting in the "
Region
" is
anything but a matter of taste and is determined by
statutory regulations:
Therefore, when in France,
only commission the transmitter with the "France"
setting.
You can leave this menu after completion of your
"General settings" with the central
ESC
key of the left
touch pad to return to the multifunction list.
For the programming of a new model, now use the
arrow keys of the left or right touch pad to switch to the
menu ...
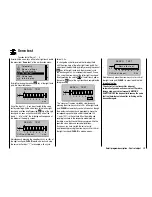
"Select model"
(page 63)
…, and with the select a free model memory location
with the arrow keys of the right or left touch pad:
03
04
05
free
02
01
06
R12
free
free
free
free
Immediately after pressing the central
SET
key of the
right touch pad for the confi rmation of this selection, the
type of model to be programmed is requested:
Select model type
Since we want to work with a winged model in this
section, the symbol for a winged model is confi rmed by
pressing the central
SET
key of the right touch pad. The
display switches back to the base screen.
Notice:
Of course, you can also use the predefi ned default
•
"winged model" supplied with the receiver as model
memory 01 for the programming of your fi rst model.
Once the "Select model type" option has been
•
opened, the process can no longer be canceled!
Even if you switch off the transmitter, this selection
must be made! In any case, you can undo this by
subsequently deleting the respective model memory.
Содержание mx-20 Hott
Страница 1: ...Programming Manual 33124 mx 20 HoTT 1 en H O P P I N G T E L E M E T R Y T R A N S M I S S I O N mx 20...
Страница 41: ...41 Your notes...
Страница 49: ...49 Your notes...
Страница 55: ...55 Your notes...
Страница 81: ...81 Your notes...
Страница 85: ...85 Your notes...
Страница 89: ...89 Your notes...
Страница 99: ...99 Detail program description Control adjust...
Страница 127: ...127 Detail program description Control adjust...
Страница 131: ...131 Detail program description Control adjust...
Страница 163: ...163 Detail program description Control adjust...
Страница 191: ...191 Detail program description Control adjust...
Страница 207: ...207 Detail program description Control adjust...
Страница 228: ...228 Detail program description Control adjust...
Страница 229: ...229 Detail program description Control adjust...
Страница 251: ...251 Detail program description Control adjust...


