22
Transmitter description
Thus the transmitter is ready for operation.
To the contrary, teacher mode for the
mx-20
HoTT
transmitter requires that the transmitter be switched
on
prior
to plugging in the respective cable.
Connect the other end of the cable to the desired unit
2.
in compliance with the given operating instructions
for that unit.
Important:
Be sure that all connectors are seated fi rmly in
their respective sockets.
Notice about fl ight simulators:
Because of the myriad of fl ight simulators available on
the market, it may be necessary to have the contact
layout of the audio plug or DSC module appropriately
modifi ed by Graupner Service.
DSC
Direct Servo Control
The acronym "DSC" is a carryover which stands for the
original "Direct Servo Control" function. However, in
HoTT systems the "direct servo control" function is no
longer available via a diagnose cable due to technical
reasons.
The standard two-pole DSC jack in the
mx-20
HoTT
transmitter is used as the teacher
or
pupil jack as well
as an interface to fl ight simulators.
To ensure a proper DSC connection, please observe:
Make any necessary menu changes.
Refer to the section beginning on page
198
to
adapt the mx-20 HoTT transmitter to a teacher/pupil
system.
When operating a fl ight simulator or when operating
1.
the
mx-20
HoTT transmitter as a pupil transmitter,
ALWAYS
leave the transmitter's ON/OFF switch
in the "
OFF
" position as only in this position does
the transmitter's RF module remain inactive after
the DSC cable is inserted. This also reduces the
transmitter's power consumption somewhat.
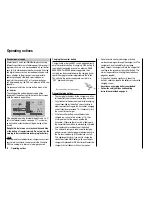
The main status LED should now constantly
illuminate red and the transmitter's basic setup
screen should show the string "DSC pupil" on the
right just below the middle timer. At the same time,
the display of telemetry indicators will be suppressed.
PUPIL
#11
0:01h
Stop
Flt
«normal »
DSC
0:00
0:00
5.9V
0.0V
HoTT
Data storage
Card slot
micro SD and micro SDHC
With the
mx-20
HoTT transmitter switched off,
removing the battery compartment cover and the
transmitter's battery will make the card slot accessible
(located in the right sidewall of the battery compartment).
This card slot is intended for micro SD and micro SDHC
type memory cards.
All conventional micro SD memory cards up to 2 GB and
micro SDHC cards up to 32 GB storage capacity can
be used. However, as a manufacturer we recommend
the use of memory cards no larger than 4 GB as this is
completely adequate for all normal situations.
The type of memory card referred to here became
known in conjunction with digital cameras and cell
phones. It is to be pushed into the slot with its contacts
upward, front facing the rear wall and latched in position
there. After re-installing the battery and closing the
battery compartment, the transmitter can be switched on
again. The stylized image of a memory card will appear
in the basic setup screen to indicate the presence of the
inserted memory card.
Содержание mx-20 Hott
Страница 1: ...Programming Manual 33124 mx 20 HoTT 1 en H O P P I N G T E L E M E T R Y T R A N S M I S S I O N mx 20...
Страница 41: ...41 Your notes...
Страница 49: ...49 Your notes...
Страница 55: ...55 Your notes...
Страница 81: ...81 Your notes...
Страница 85: ...85 Your notes...
Страница 89: ...89 Your notes...
Страница 99: ...99 Detail program description Control adjust...
Страница 127: ...127 Detail program description Control adjust...
Страница 131: ...131 Detail program description Control adjust...
Страница 163: ...163 Detail program description Control adjust...
Страница 191: ...191 Detail program description Control adjust...
Страница 207: ...207 Detail program description Control adjust...
Страница 228: ...228 Detail program description Control adjust...
Страница 229: ...229 Detail program description Control adjust...
Страница 251: ...251 Detail program description Control adjust...


