230
Detail program description - Control adjust
Servo display
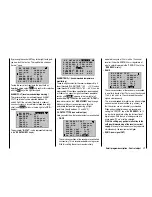
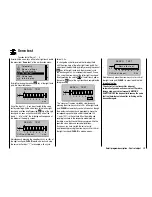
Display of the servo position
Scroll to the menu item "
Servo display
" of the
multifunction menu using the arrow keys of the left or
right touch pad:
Telemetr y
info display
Basic settings
Ser vo display
Ser vo test
Code lock
By briefl y pressing the central
SET
key of the right touch
pad, you open this menu item.
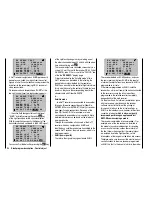
The visual display of the current servo positions,
however, can be opened both by selecting this menu
and by simultaneously pressing the keys
left touch
pad directly from the base screen of the transmitter, as
well as nearly all menu positions. By briefl y pressing the
central
ESC
key of the left touch pad, you return to the
respective starting point.
1
3
5
7
+
0%
0%
9
11
0%
0%
2
4
6
8
+
0 %
0%
0%
0%
10
12
0%
–10 0 %
+100%
+100%
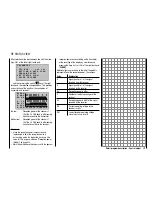
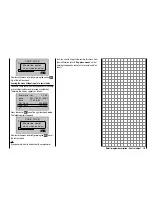
The current position of a servo is displayed in a bar
diagram between -150 % and +150 % of the normal
path, in consideration of the control and servo settings,
the dual-rate/expo functions, the interplay of all active
linear and curve mixers, etc. 0 % corresponds precisely
to the servo center position. This way, you can quickly
check your settings without having to switch on the
receiver. However, this does not absolve you from fi rst
carefully testing all program steps, as well as on the
model, prior to the fi rst operation of the model in order to
eliminate errors!
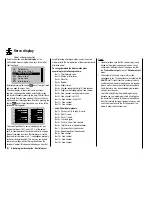
For winged models the display takes place
according to the following scheme:
Bar 1 = Throttle/brake servo
Bar 2 = Aileron or left aileron
Bar 3 = Elevator
Bar 4 = Rudder
Bar 5 = Right aileron
Bar 6 = Camber-changing fl ap (left) / free channel
Bar 7 = Right camber-changing fl ap / free channel
Bar 8 = Free channel / second elevator servo
Bar 9 = Free channel / Left FL2
Bar 10 = Free channel / Right FL2
Bar 11 = Free channel
Bar 12 = Free channel
… and with helicopter models:
Bar 1 = Pitch or roll (2) or pitch (2) servo
Bar 2 = Roll (1) servo
Bar 3 = Pitch (1) servo
Bar 4 = Tail servo (gyro)
Bar 5 = Pitch (2) servo / free channel
Bar 6 = Throttle servo or speed controller
Bar 7 = Gyro sensitivity / free channel
Bar 8 = Speed regulator / free channel
Bar 9 = Free channel
Bar 10 = Free channel
Bar 11 = Free channel
Bar 12 = Free channel
Notice:
However, please note that the servo display is only
•
based on the original sequence of servos, so any
switching of the outputs do not take place in either
the "
Transmitter output
" menu or "
Receiver output
"
menu.
The number of channels shown in this menu
•
correspond to the 12 control channels available in the
mx-20
HoTT transmitter. The number of actually
usable channels, however, depends on the receiver
type as well as the number of servos connected to
it and, therefore, may be considerably lower under
certain circumstances.
Use this display during the model programming,
•
because you can immediately check all settings on
the transmitter. However, this does not absolve you
from fi rst carefully testing all program steps, as well
as on the model, prior to the fi rst operation of the
model in order to eliminate errors!
Содержание mx-20 Hott
Страница 1: ...Programming Manual 33124 mx 20 HoTT 1 en H O P P I N G T E L E M E T R Y T R A N S M I S S I O N mx 20...
Страница 41: ...41 Your notes...
Страница 49: ...49 Your notes...
Страница 55: ...55 Your notes...
Страница 81: ...81 Your notes...
Страница 85: ...85 Your notes...
Страница 89: ...89 Your notes...
Страница 99: ...99 Detail program description Control adjust...
Страница 127: ...127 Detail program description Control adjust...
Страница 131: ...131 Detail program description Control adjust...
Страница 163: ...163 Detail program description Control adjust...
Страница 191: ...191 Detail program description Control adjust...
Страница 207: ...207 Detail program description Control adjust...
Страница 228: ...228 Detail program description Control adjust...
Страница 229: ...229 Detail program description Control adjust...
Страница 251: ...251 Detail program description Control adjust...


