28
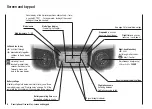
Description of transmitter
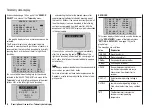
Boot Download
Success!!!
Please Wait....
… this display:
Firmware
Downloading...
Progress 023/123
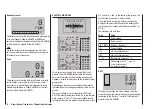
The loading process is complete when the counter to
the left of “/” reaches “Data quantity” to the right of it, and
this message appears:
Firmware Upgrade
success!!!
After a few seconds the message disappears, and the
transmitter re-starts. The system is now ready for use
again.
Notes:
If this warning message appears …
•
SD-CARD
INSERT
OK
… then there is no memory card in the card slot, or
the card cannot be read.
If the Select window is empty …
•
FILE LIST
… then the transmitter cannot find a suitable
firmware file on the SD card in the slot. If this should
happen, check the contents of the “Firmware” folder
on the SD card by inserting it into a PC or laptop.
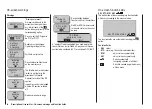
STICK CALIBRATION
HIDDEN MODE
STICK CALI.
FIRMWARE UPDATE
VOICE
If you suspect that the centre point of your self-centring
sticks (transmitter controls 1 … 4) does not correspond
exactly to 0% travel of the transmitter control, you can
check and - if necessary - correct it using the following
procedure:
Move to the “
Model select
” menu and set up a free
model memory, as described on page 66. It makes no
difference whether you select a fixed-wing or helicopter
model type.
Wait for the usual on-screen messages which appear
in the base display after switching models, then move
to the “
Servo display
” menu with, for example, a simul-
taneous brief press of the
buttons of the left-hand
touch-key, but WITHOUT moving the trims, or carrying
out any other programming procedures.
If all four of your primary stick functions are still set to
self-centring action, the screen display should look like
this:
1
3
5
7
2
4
6
8
0%
0%
0%
0%
0%
0%
0%
0%
Otherwise the bar and % figure for the non self-centring
stick function - usually that of the throttle / brake or
throttle / collective pitch stick “Ch 1” - will correspond to
the stick’s current position. For example, if the throttle /
brake stick is at the “quarter-throttle” position, then the
screen will look like this:
1
3
5
7
2
4
6
8
0%
0%
0%
– 50%
0%
0%
0%
0%
Now move each of the two primary sticks to each of the
four possible end-points in turn, but without exerting
pressure at the end-points. At each of the end-points -
eight in total - the screen should show exactly -100% or
+100%, depending on the side of centre. For example,
if transmitter control 2 is at its right-hand end-point, and
the three other stick functions are all at centre, then your
Содержание mx-12 Hott
Страница 1: ...Programming Manual 33116 mx 16 HoTT 3 en mx 16...
Страница 35: ...35 For your notes...
Страница 49: ...49 For your notes...
Страница 55: ...55 For your notes...
Страница 59: ...59 For your notes...
Страница 63: ...63 For your notes...
Страница 69: ...69 For your notes...
Страница 91: ...91 For your notes...
Страница 101: ...101 For your notes...
Страница 123: ...123 For your notes...
Страница 181: ...181 For your notes...
Страница 193: ...193 For your notes...


