


GigaBit Ethernet Switch
Company Network
NAS
3x RJ45/Standard Ethernet connections
(or Optical Ethernet connection)
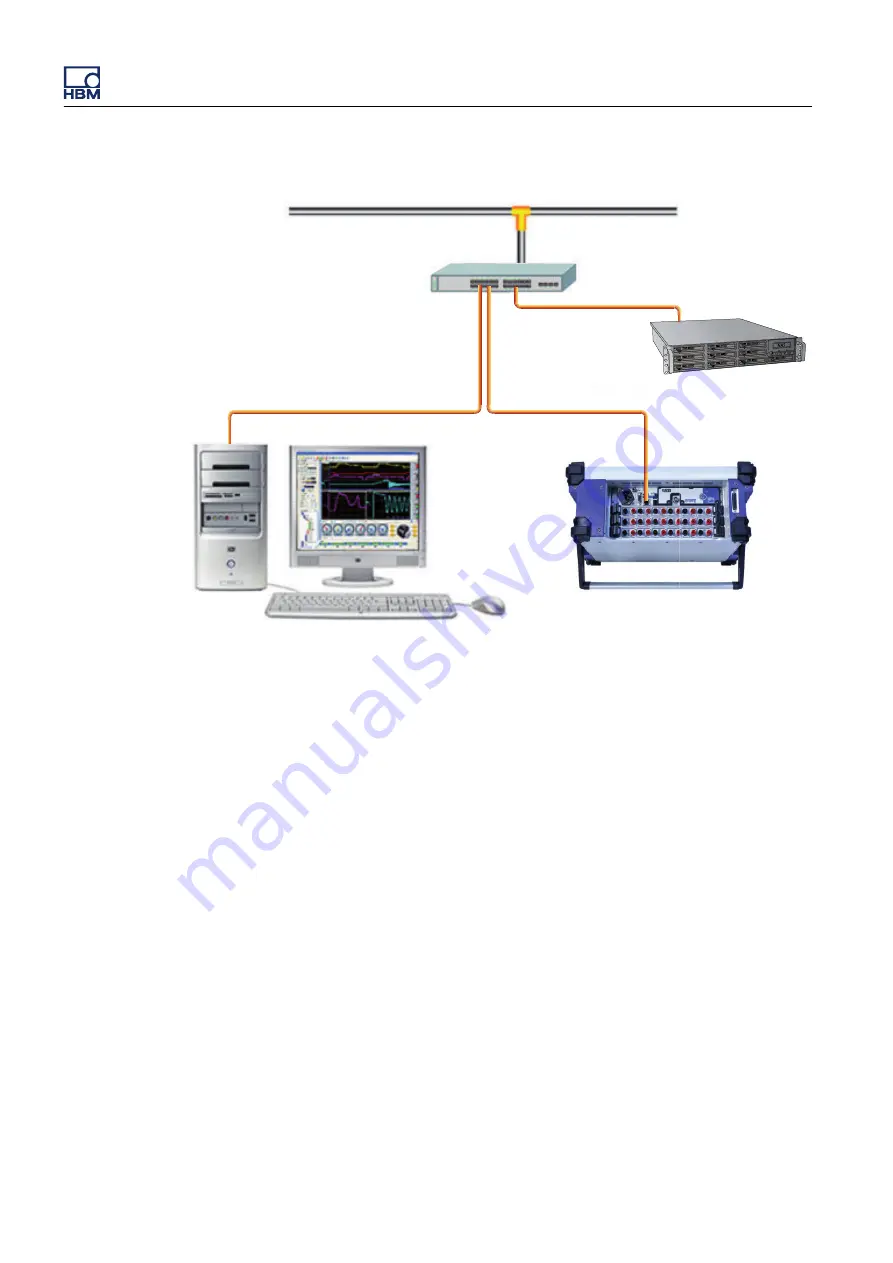
Figure 11.31:
GEN DAQ with iSCSI NAS connected through an Ethernet switch
and connected to a corporate network
1
Connect PC, NAS and GEN DAQ:
The Ethernet switch should be connected to the company network.
l
Connect the PC to the Ethernet switch via a standard RJ45 Ethernet
connection. If an optical Ethernet interface is available, use this.
l
Connect the GEN DAQ system to the Ethernet switch via a standard
RJ45 Ethernet connection. If an optical Ethernet interface is available,
use this.
l
Connect the NAS to the Ethernet switch via a standard RJ45 Ethernet
connection. Some NAS servers also support optical connections, in
which case they can be used.
For information on setting up GEN DAQ, please refer to "Connecting the
GEN series to a network" on page 88.
At this stage, make sure that all connections and configurations are correct.
The GEN DAQ should setup an auto IP address within a few moments after
being powered on. Then the NAS should be configured with Perception.
To configure the NAS, follow the manufacturer's guidelines. An IP address
for the NAS server can now be determined.
GEN3t
194
I3995-3.1 en HBM: public
Содержание GEN3t
Страница 1: ...Portable Data Recorder GEN3t English User Manual I3995 3 1 en HBM public...
Страница 4: ...4 I3995 3 1 en HBM public...
Страница 51: ...33 46 7 70 IEC 61010 1 2010 IEC EN 50110 1 EN 50110 2 50 120 GEN3t I3995 3 1 en HBM public 51...
Страница 1122: ...1122 I3995 3 1 en HBM public...
Страница 1123: ......


