Requirement:
•
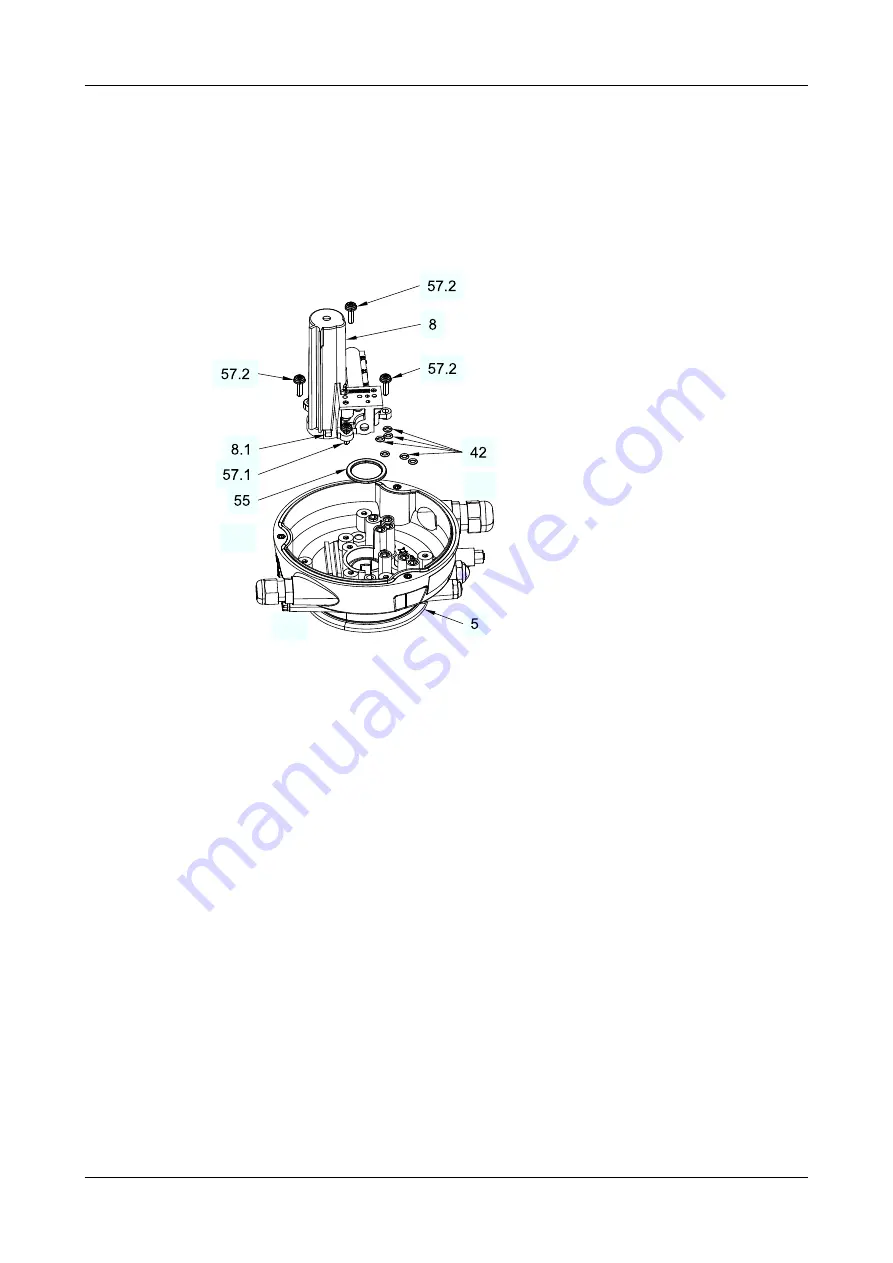
If only the O-rings (42) and (55) must be changed then the solenoid valves
(63)/control plate (65) and element NOT (64) can remain on the pneumatic
block (8).
Carry out the following steps:
1.
Undo the screws (57.1, 57.2).
Fig.70
2.
Pull off the pneumatic block (8).
3.
Change the 6 O-rings (42) of the base (5).
4.
Replace the O-ring (55).
®
Done
10.5.10 Fitting the Pneumatic Block
Requirement:
•
When fitting the pneumatic block, make sure that it is compatible!
•
Insert the journal (8.1) on the pneumatic block into the groove of the base (5)!
•
Use the following pneumatic block types on ASEPTOMAG valves:
–
Pneumatic block T.VIS-15/NOT 3PV/ASG material no. 221-646.93
–
Pneumatic block T.VIS-15/ 3PV/ASG material no. 221-646.92
Carry out the following steps:
1.
Tighten the screw (57.1): Tightening torque: 1.5 Nm (1.0 lbft).
Maintenance
Dismantling the Control Top into its Components
430BAL010699EN_6
92
17.03.2022
Содержание T.VIS A-15
Страница 6: ...430BAL010699EN_6 6 17 03 2022...
Страница 108: ...14 Spare parts list Switch bar T VIS A 15 Fig 77 Spare parts list Switch bar T VIS A 15 430BAL010699EN_6 108 17 03 2022...
Страница 116: ......


