GE H
EALTHCARE
DRAFT
V
OLUSON
E8 / V
OLUSON
E6
D
IRECTION
KTD102576, R
EVISION
7
DRAFT (A
UGUST
23, 2012)
S
ERVICE
M
ANUAL
Chapter 8 - Replacement Procedures
8-21
Section 8-13
Replacement of Key Caps (by special native language keys)
NOTE:
Please observe that Key Caps depend on installed Console (RTU).
The Console version is shown in the System Info page (see:
).
8-13-1
Manpower
One person, 30 minutes
8-13-2
Tools
small-sized slotted screwdriver or tweezers
8-13-3
Preparations
1.) Power Off/Shutdown the system; see:
8-13-4
Key Caps - Removal Procedure
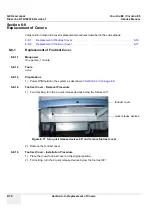
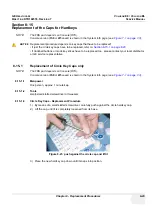
1.) Place a small flat screwdriver between the key cap to be removed and its neighboring key cap.
2.) Gently lift the key cap, until it is completely loosened from its base (see
3.) Remove the key cap.
8-13-5
Key Caps - Installation Procedure
1.) Carefully place the appropriate key cap in position on the keyboard, taking care to place the plastic
alignment pin in the correct position so that the key cap is the right way up and reads correctly.
2.) Push the key cap down until it snaps into position.
3.) Power On/Boot Up the system; see:
4.) Setup the Keyboard Language Layout as described in
and then type with
the keyboard to check the function of each key.
NOTICE
!! NOTICE:
shows the available Key Cap Kits.
Keys to be removed depend on the (special native) language kit.
Figure 8-23 Key Cap Replacement
NOTICE
!! NOTICE:
Depending on the used version, it might be possible that you have to cut off the pins
of the larger keys (such as the Shift key) before mounting them.

