D
IRECTION
5771498-100, R
EVISION
6
V
ENUE
™ S
ERVICE
M
ANUAL
4-4
Section 4-2 - General Procedures
P R E L I M I N A R Y
4-2-2-2
Connecting AC (Mains) Power to the Venue™ Ultrasound Unit
Connecting the Venue™ ultrasound unit involves preliminary checks of the power cord, voltage level
and compliance with electrical safety requirements.
1) Ensure that the wall outlet is of appropriate type.
2) Uncoil the power cable, allowing sufficient slack so that the unit can be moved slightly.
3) Verify that the power cable is without any visible scratches or any sign of damage.
4) Verify that the on-site mains voltage is within the limits indicated on the rating label on the rear of
the Venue™ ultrasound scanner.
5.) Connect the AC Power Cable female plug to the Power Inlet (AC IN) at the rear of the unit - see
6.) Screw the plastic cable clamp (into the hole provided in the support column - centrally located at
the rear of the system.
7.) Connect the other end of the AC Power Cable (male plug) to a hospital-grade mains power outlet
with the proper rated voltage.
NOTE:
The System should be connected to mains few hours to fully charge the batteries before battery
operation.
NOTE:
The LED on the Input Power Panel (IPP) is illuminated green, indicating that the system in connected
to mains. The AC power indicator on the cockpit (monitor) is illuminated green.
The unit is ready for Power On/Boot Up.
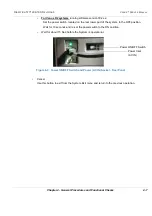
Figure 4-1 Power ON/OFF Switch and Power (AC IN) Socket - Rear Panel
(AC IN)
Power ON/OFF Switch
Power Inlet
Содержание Venue R1
Страница 477: ......

