5-20
250 Series Maternal/Fetal Monitor
Revision D
2020551-001
Troubleshooting:
FAQs
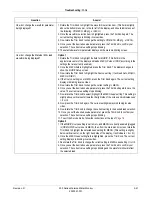
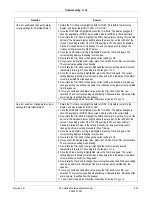
How do I change the scale of the MSpO
2
,
Maternal Blood Oxygen Saturation, trend
recorder tracing?
1. Rotate the Trim Knob to highlight the
Setup
softkey at the bottom of the screen.
2. Once
Setup
is highlighted press the Trim Knob. Press the Trim Knob.
3. In the
General Setup
screen, rotate the Trim Knob to move the highlight to the
Service
softkey at the bottom of the screen. Press the Trim Knob.
4. The
Service Lock
screen appears. In the center of the screen are four single-digit
fields below the field,
Enter Access Code.
These fields are used to enter the code to
access restricted service settings in the 250 Series Monitors. The access code is the
current date setting in the form of 'M M D D' or 'D D M M', where M M is the current
month (01 to 12), and D D is the current date (01 through 31), however your monitor
is configured.
NOTE:
The access code should reflect the
monitor‘s
date setting. If the monitor date
is not correctly set, the access code for the actual calendar date will not work.
5. Rotate the Trim Knob to highlight each of the access code fields; press the Trim
Knob, and rotate the Trim Knob to input the individual numbers that form the access
code. When the last digit is entered and the Trim Knob pressed, the monitor then
tests the access code. If valid, the screen changes to
Install Options Screen 1.
If
invalid, the Trim Knob press does nothing.
6. Now rotate the Trim Knob to highlight the
SpO
2
Scale:
setting. (It should read
Auto
or
0-100%
.) This setting affects Maternal SpO
2
trend tracing.
7. Once the
SpO
2
Scale:
setting is highlighted, press the Trim Knob again. The current
setting displays in blinking inverse video.
8. Now rotate the Trim Knob to change the current setting. Select a setting of
0-100%
or
Auto
.
9. Once you set the desired trace setting, press the Trim Knob again to confirm. The
current setting stops blinking.
10. To exit the Service mode, follow the instructions at the top of
How do I change the alarm limits for
MSpO
2
, Maternal Blood Oxygen
Saturation?
1. Rotate the Trim Knob to highlight the field for
MSpO
2
. (This field is slightly above
center, on the right side of the display.)
2. Once the
MSpO
2
field is highlighted, press the Trim Knob. The display changes to
show the
MSpO
2
Setup
screen.
3. Now rotate the Trim Knob to highlight the current
High
: saturation percentage (%)
alarm limit setting.
4. Once the
High
: saturation percentage (%) alarm limit setting is highlighted, press the
Trim Knob again. The current setting displays in blinking inverse video.
5. Now rotate the Trim Knob to change the current setting. Select from 100 to 85%.
6. Repeat Steps 3 through 6 for the
High
: saturation percentage (%) alarm limit setting.
Select a value between 9
9% and 80%
.
You may optionally change the MHR/P (Maternal Heart Rate/Pulse)
High
: select a
value between
100 bpm and 250 bpm
. (The MHR/P alarm settings are also
available through the
Pulse
field, or the
NIBP
field on the main monitoring
screen.)
You may optionally change the MHR/P
Low
: select a value between
35 bpm and
120 bpm
. (The MHR/P alarm settings are also available via the
Pulse
field, or the
NIBP
field on the main monitoring screen.)
7. Once the desired source parameter is set, press the Trim Knob to confirm your
selection. The current value setting stops blinking.
8. To exit the Service mode, follow the instructions at the top of
Question
Answer
Содержание Corometrics 250 Series
Страница 2: ......
Страница 6: ...CE CE ii 0086 ...
Страница 14: ...viii 250 Series Maternal Fetal Monitor Revision D 2020551 001 ...
Страница 16: ...1 2 250 Series Maternal Fetal Monitor Revision D 2020551 001 For your notes ...
Страница 28: ...1 14 250 Series Maternal Fetal Monitor Revision D 2020551 001 Introduction Service Requirements ...
Страница 29: ...Revision D 250 Series Maternal Fetal Monitor 2 1 2020551 001 2 Equipment Overview ...
Страница 30: ...2 2 250 Series Maternal Fetal Monitor Revision D 2020551 001 For your notes ...
Страница 54: ...2 26 250 Series Maternal Fetal Monitor Revision D 2020551 001 Equipment Overview Theory of Operation ...
Страница 55: ...3 1 250 Series Maternal Fetal Monitor Revision D 2020551 001 3 Installation ...
Страница 56: ...3 2 250 Series Maternal Fetal Monitor Revision D 2020551 001 For your notes ...
Страница 81: ...Revision D 250 Series Maternal Fetal Monitor 4 1 2020551 001 4 Maintenance ...
Страница 82: ...4 2 250 Series Maternal Fetal Monitor Revision D 2020551 001 For your notes ...
Страница 142: ...4 62 250 Series Maternal Fetal Monitor Revision D 2020551 001 Maintenance Preventative Maintenance Inspection Report ...
Страница 143: ...Revision D 250 Series Maternal Fetal Monitor 5 1 2020551 001 5 Troubleshooting ...
Страница 144: ...5 2 250 Series Maternal Fetal Monitor Revision D 2020551 001 For your notes ...
Страница 194: ...5 52 250 Series Maternal Fetal Monitor Revision D 2020551 001 Troubleshooting General Troubleshooting ...
Страница 195: ...Revision D 250 Series Maternal Fetal Monitor 6 1 2020551 001 6 Parts List Drawings and Replacement ...
Страница 196: ...6 2 250 Series Maternal Fetal Monitor Revision D 2020551 001 For your notes ...
Страница 228: ...A 2 250 Series Maternal Fetal Monitor Revision D 2020551 001 Technical Specifications For your notes ...
Страница 238: ...A 12 250 Series Maternal Fetal Monitor Revision D 2020551 001 Technical Specifications Strip Chart Recorder ...
Страница 239: ...Revision D 250 Series Maternal Fetal Monitor B 1 2020551 001 B Alarms Summary ...
Страница 240: ...B 2 250 Series Maternal Fetal Monitor Revision D 2020551 001 Alarms Summary For your notes ...
Страница 243: ...Revision D 250 Series Maternal Fetal Monitor C 1 2020551 001 C Electromagnetic Compatibility ...
Страница 244: ...C 2 250 Series Maternal Fetal Monitor Revision D 2020551 001 Electromagnetic Compatibility For your notes ...
Страница 251: ......


