IDEA Auto-SYNC with RGB/VGA/DVI Analog Video
TIMS MVP
™
Setup and Configuration Guide 131
Position the mouse over the blackest part of the image. Adjust the Brightness value in the
standard way. Shifting the Brightness changes the pixel values; these changes are visible either
in the pixel value reader (in the lower right of Auto-
SYNC’s status bar) or in the histogram. The
goal is to have the black pixels correspond to pixel values near 1.
Once the Brightness is set, move the mouse to the whitest part of the image. Adjust the
Contrast value until the white pixels correspond to values near 254.
Changing the Contrast may affect the results of the Brightness adjustment, so this process must
be repeated iteratively until the desired brightness and contrast are achieved. Watch the
histogram to be sure that the range of pixel values extends from 0 to 254 and that not too many
pixels are being mapped to these extremes (i.e., near-black is mapped to total black).
Examples
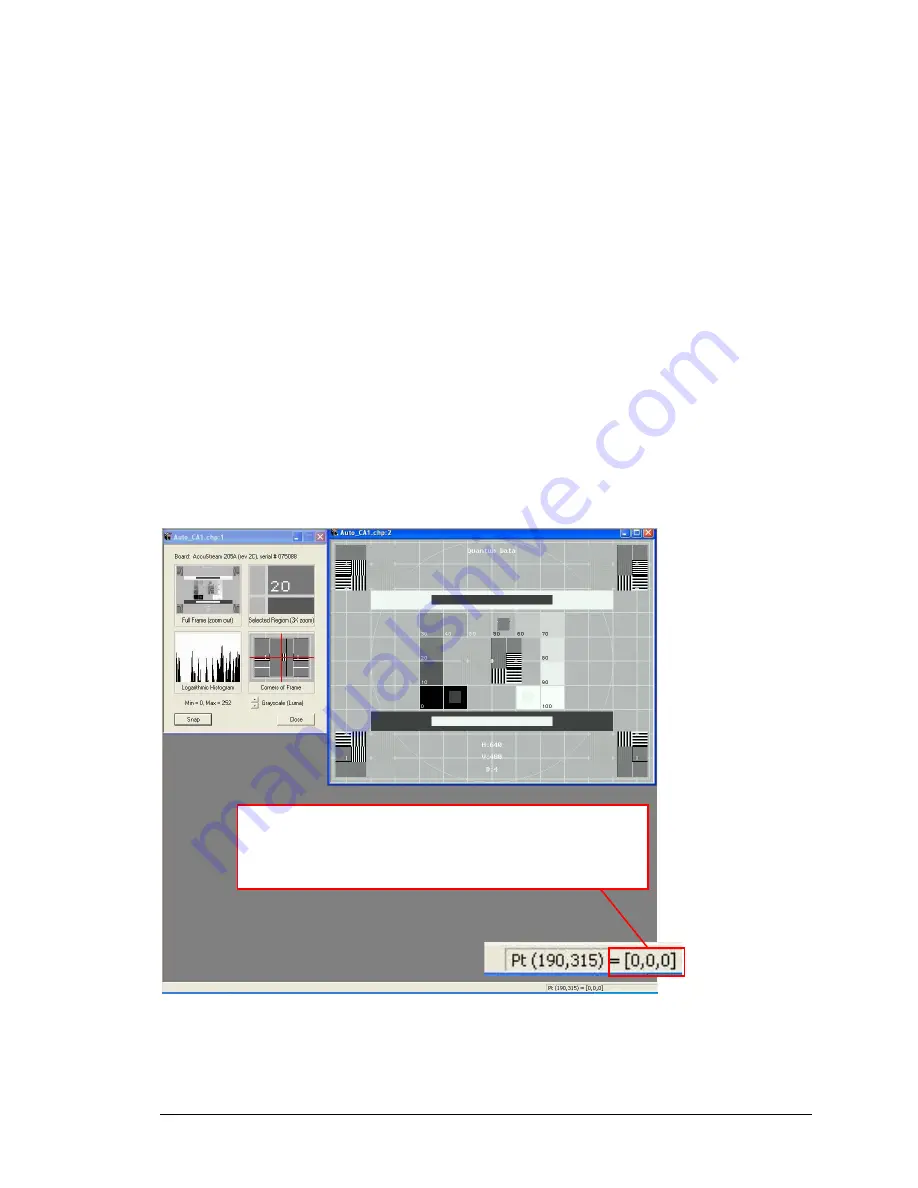
In this first example, the video image has the correct settings for the brightness and
contrast. In this image, the mouse is moved to the black part image to show the value
is correct at the 0,0,0 setting. For contrast, you would move the cursor over the white
part of the image where the correct setting would be 255,255,255.
Figure 39: Example of video image with proper settings for brightness and contrast
This image has the proper settings for brightness and contrast. To
determine if your settings are correct, move the mouse over the
blackest part of the video image. It should display as shown below
where black is indicated by a 0,0,0 setting.


