User’s Manual
26
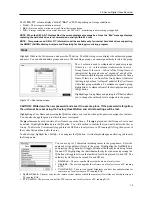
You can assign IDs to each camera by highlighting the box under the
ID
heading and pressing the button. Change
the number by highlighting it and using the
Up
and
Down
arrow buttons to increase and decrease the number. The
PTZ ID number can be set from 0 to 256.
Highlight the
Setup…
box and press the button. The Port Setup window appears.
Audio
Highlight
Audio
in the Devices menu and press the button. The
Audio
setup screen appears.
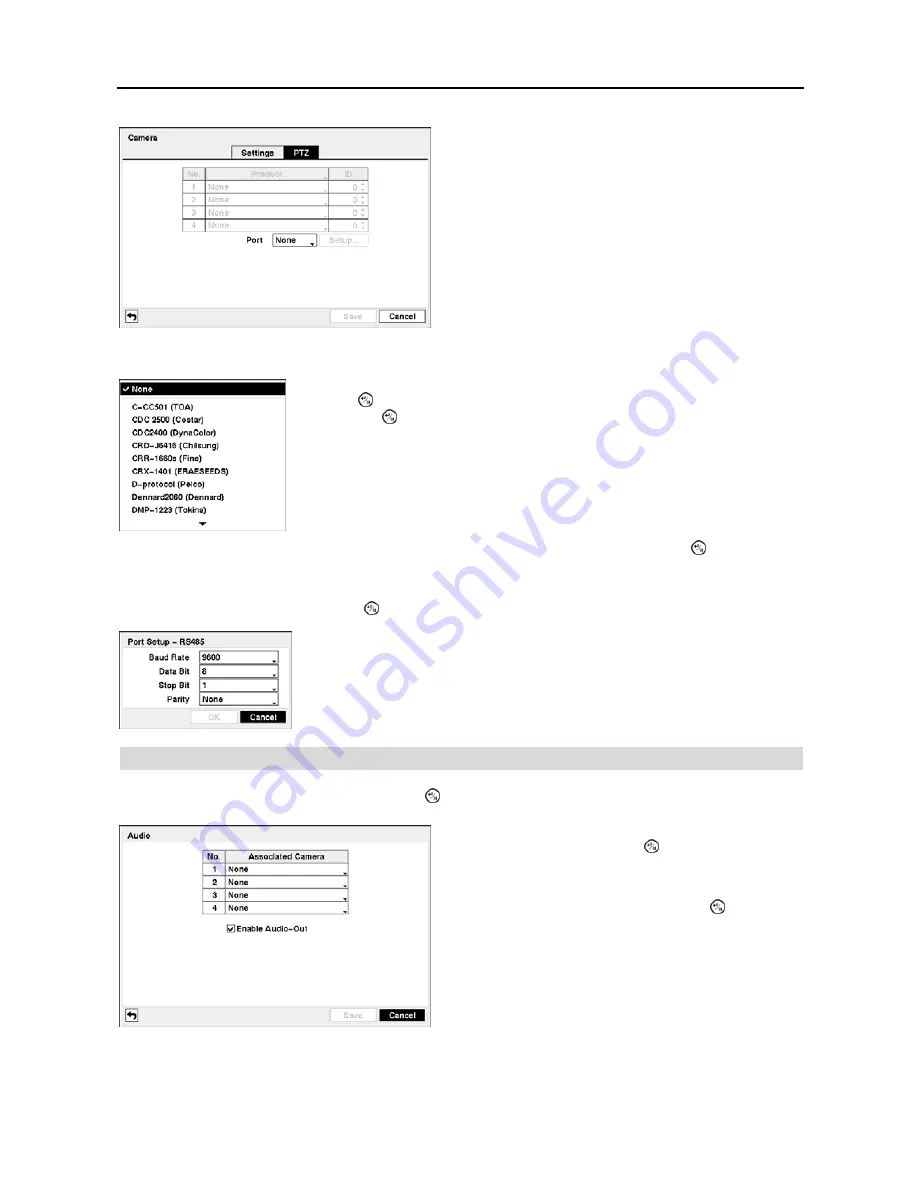
Figure 30
─
Camera PTZ setup screen.
NOTE: You will only be able to set up PTZ devices if the
PTZ port is set to RS232 or RS485.
Highlight the box in the
Product
column for the PTZ camera you wish to configure and
press the button. A list of PTZ devices appears. Select your camera from the list
and press the button. You will need to connect the camera to the RS232 or RS485
connector on the back of the DVR following the camera manufacturer’s instructions.
Configure the port’s setting based on the PTZ camera manufacturer’s instructions.
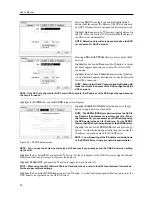
Figure 31
─
Audio setup screen.
The DVR can record up to four audio inputs. Highlight the
box beside the input and press the button. A list of cameras
appears, and you can select which camera you want associated
with that audio input.
Highlight
Enable Audio-Out
and press the button. This
toggles between enabling and disabling audio out.
NOTE: The DVR will NOT record audio when the recording
speed is set to less than 1 ips.
Содержание 4-Channel
Страница 1: ......
Страница 2: ......
Страница 10: ...User s Manual 2 Figure 1 Typical DVR installation...
Страница 14: ...User s Manual 6...
Страница 50: ...User s Manual 42...
Страница 72: ...User s Manual 64 Map of Screens...


