b.
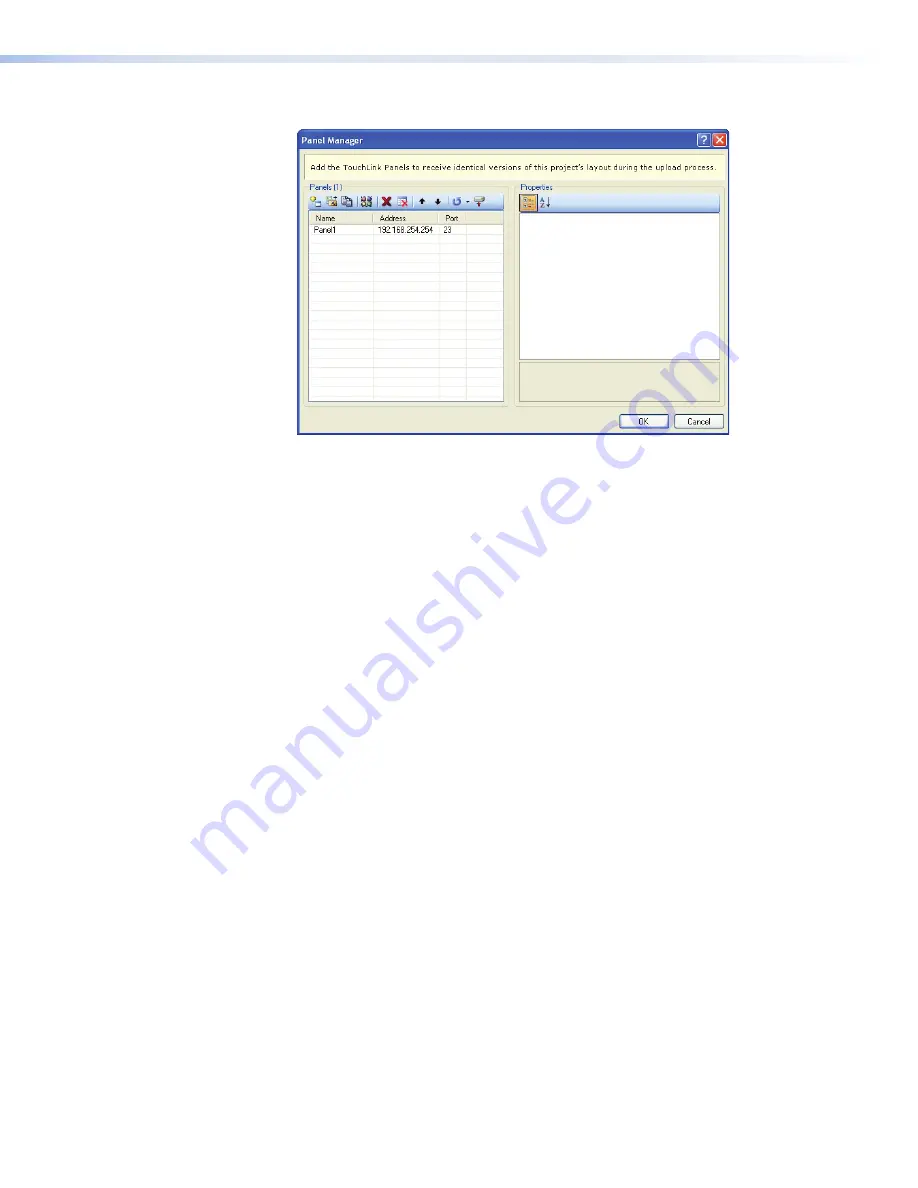
The Panel Manager dialog box opens:
Figure 18.
Add a TouchLink panel (5b)
c.
Click on the Add Panel Icon to add a new panel to the list in the left pane.
d.
Highlight the name of the panel in the left pane to display the properties of that
panel in the right pane.
e.
when a new panel is added, it has the default IP address (192.168.254.254). To
change the IP address, highlight the address property in the right pane and type in
the correct IP address. Update any other properties, as required.
f.
Repeat steps
a - e
to add further panels, if required.
6.
To upload a project to a TouchLink panel:
a.
From the Project menu, select
Upload to Selected Panels
. The build Manager
dialog box opens, showing the build progress. Once the build is complete, this
dialog box closes and the File Upload Manager screen opens. The upload begins
automatically.
b.
Select
Close this dialog when upload completes
checkbox in the Automatic
Settings section so that the File Upload Manager screen closes automatically once
the upload completes. This option can be set before or during the upload.
If this project has been uploaded to the TouchLink panel before, you can choose to
upload the changes that have been made to the previous upload. you can also choose
to upload to certain TouchPanels from the list of TouchLink panels found within the
Devices section of the File Upload Manager screen during the upload process.
TLP 350CV • Configuration Software
26
Содержание TouchLink TLP 350CV
Страница 4: ......
Страница 6: ...TLP 350CV Contents vi ...
Страница 27: ...Figure 10 Touchpanel Configuration TLP 350CV Configuration Software 21 ...


