58
HPS-III-Heißkanalsystem_Inbetriebnahme-System-Einzeldüsen-L2X-NV_BA_V-2-0_EN
Start-up of a HPS III hot runner system
1.
Precondition: the hot runner system is already filled with
the new material!
2.
Switch off the hot runner. Let the mould cooling stay
switched on.
3. Dismantle the contour plate in cold condition.
By doing this the nozzle tips become accessible.
4. Switch the hot runner on again.
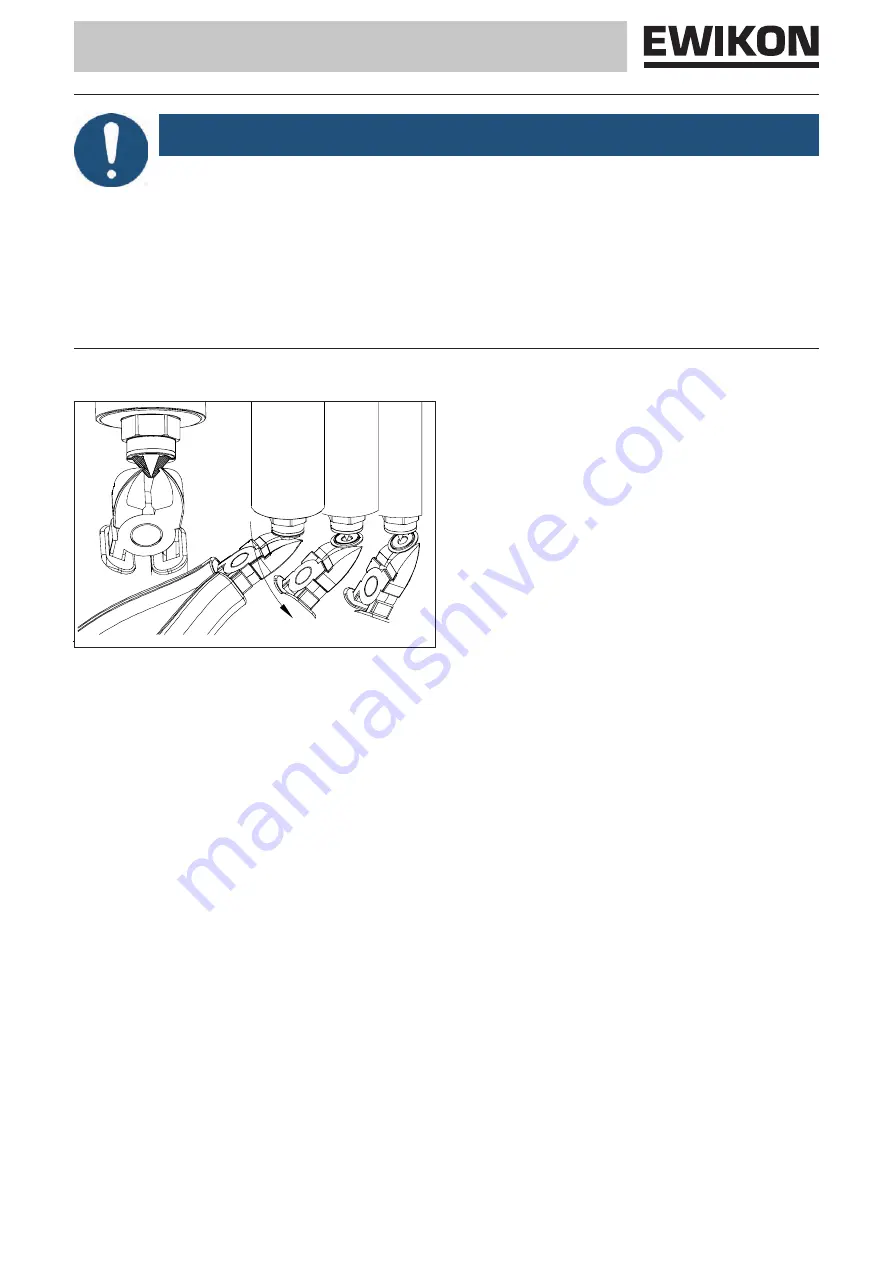
5. As soon as the cap, the area of frozen plastic between
nozzle tip and gate, starts to melt partially around the tip
it can be removed by using a side cutter.
Close the side cutter only so far that the cap can be
pulled off. Closing it too far and with too much
pressure can damage the heat conductive tip or the
valve pin if a valve gate system is used.
6. Remaining material residues at the nozzle tip can be
removed by using a wire brush (soft wire, see chapter
„5.3.1 Tools and operating materials“).
7.
Switch off the hot runner. Let the mould cooling stay
switched on.
8. Install the contour plate in cold condition.
9. Switch on the hot runner.
10. After processing temperature is reached start moulding.
Picture 40: Removal of cap
z321-11
Removal of „cap“
NOTE!
If despite of intensive purging old material still remains visible in the moulded part (visible flow marks on the
surface or inside transparent parts) the so called „cap“ the area of frozen plastic between nozzle tip and gate
must be removed.
Recommended tools for the following installation steps
The use of non-approved assembly tools may result in damage to the HPS III nozzles.
•
Wire brush, soft (
preferably brass wire, do not use brass-coated wire
).
•
Side cutter (preferably side cutter for electronics)
Содержание L2X
Страница 2: ......
Страница 6: ...6 HPS III L2X Hei kanalsystem_Inhalt_BA_V 2 0_EN...
Страница 36: ...36 HPS III L2X Hei kanalsystem_Montage_BA_V 2 0_EN...


