


Otherwise, start edging the second lens. Select the lens directly on screen, on the left or right of the
work area.
The edging screen for the second lens is displayed. All finishes chosen and the modifications made
are kept.
b. Customized groove menu screen
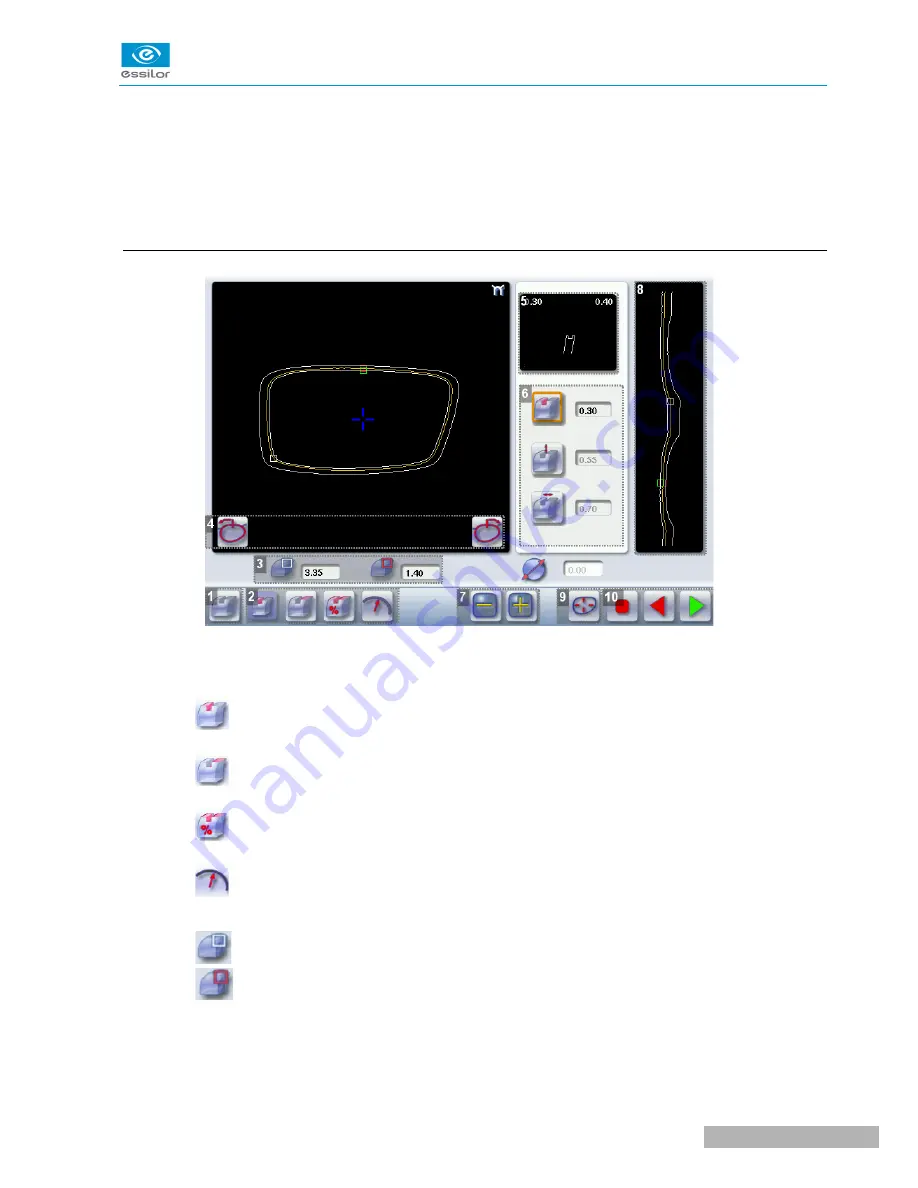
1.
Automatic groove
2.
Customized grooves
◦
Front surface tracking: the middle of the groove is positioned at a constant distance from
the front surface.
◦
Rear surface tracking: the middle of the groove is positioned at a constant distance from
the rear surface.
◦
Distributed groove: the middle of the groove is positioned in proportion to the thickness of
the lens, with respect to the front surface.
◦
Lens curve tracking: the camber of the groove is adjustable.
3.
Lens thickness
◦
Maximum lens thickness - represented by the white square along the shape
◦
Minimum lens thickness - represented by the red square along the shape
4.
Cursor movement
U
SER
M
ANUAL
> II. E
DGING
A
LENS
29
Neksia > v1.0 - 02.14
>
Содержание Neksia
Страница 1: ...User Manual...
Страница 2: ......
Страница 6: ......
Страница 7: ...I FIRST STEPS...
Страница 14: ...Neksia v1 0 02 14 14 USER MANUAL I FIRST STEPS...
Страница 15: ...II EDGING A LENS...
Страница 45: ...USER MANUAL II EDGING A LENS 45 Neksia v1 0 02 14...
Страница 46: ......
Страница 47: ...III CONFIGURING THE EDGER...
Страница 55: ...IV MAINTENANCE SERVICING...
Страница 72: ...Neksia v1 0 02 14 72 USER MANUAL IV MAINTENANCE SERVICING...
Страница 73: ...TECHNICAL DATA...
Страница 76: ...Neksia v1 0 02 14 76 USER MANUAL TECHNICAL DATA...
Страница 77: ...GENERAL INFORMATION...
Страница 81: ...GLOSSARY...
Страница 83: ......


