•
OS X
: You can manually update the software by opening the
Applications
>
Epson Software
folder
and selecting
EPSON Software Updater
.
Parent topic:
Solving Problems
Product Status Messages
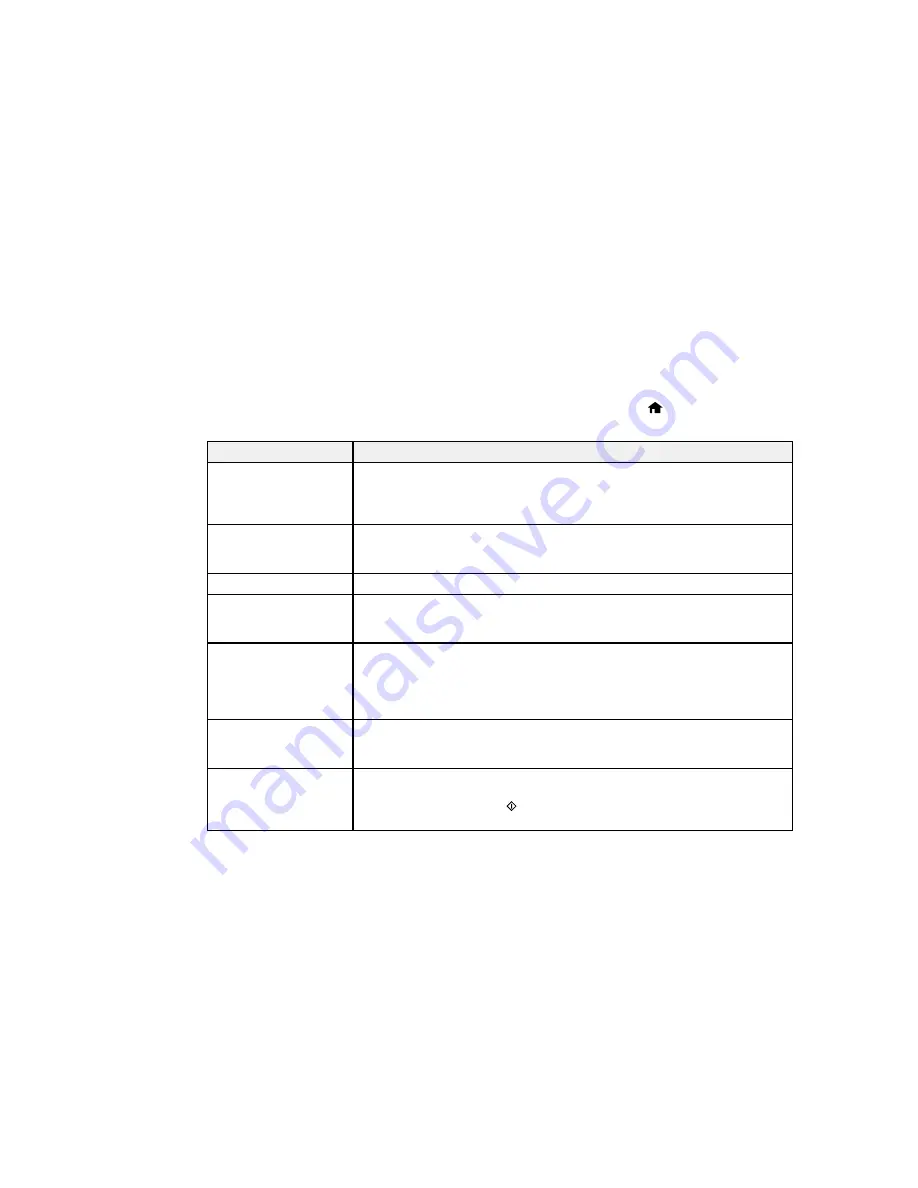
You can often diagnose problems with your product by checking the messages on its LCD screen. You
can also see help information and how-to instructions on the screen. Press the
home button, if
necessary, press the left or right arrow button, and then select
Help
.
LCD screen message
Condition/solution
Printer error. Turn the
A fatal error has occurred. Turn the product off and then back on again. If the
power off and on again.
error continues, check for a paper jam. If there is no paper jam, contact
For details, see your
Epson for support.
documentation.
Operation canceled. An
The memory card or external device may be damaged. Check the device and
error occurred while
replace it if necessary.
saving.
Ink is low.
Ink in a cartridge is low. You can continue printing or replace the cartridge.
You need to replace the
Replace the ink cartridge indicated on the LCD screen.
following ink
cartridge(s).
Paper Configuration is
If Paper Configuration is disabled, you cannot use AirPrint. Also, you will not
disabled. Some features see warnings about paper size or type mismatches. Keep Paper
may not be available.
Configuration enabled unless you always use the same size and type of
For details, see your
paper.
documentation.
Communication error.
Make sure the computer is connected to your product and your software is
Check if a computer is
installed correctly.
connected.
A printer's ink pad is
The ink pads are near the end of their service life and the message will be
nearing the end of its
displayed until the ink pad is replaced. Contact Epson for support. (To
service life. Please
resume printing, press the
start button.)
contact Epson Support.
321
Содержание XP-860
Страница 1: ...XP 860 User s Guide ...
Страница 2: ......
Страница 15: ...XP 860 User s Guide Welcome to the XP 860 User s Guide For a printable PDF copy of this guide click here 15 ...
Страница 27: ...Product Parts Back 1 AC inlet 2 Rear cover duplexer 3 Vents 4 LINE port 27 ...
Страница 61: ...4 Slide out the paper support 5 Slide the edge guides outward 61 ...
Страница 136: ...You see this window 2 Select the Image Type setting that matches your original 136 ...
Страница 151: ...1 Start Epson Scan and select Professional Mode as the Mode setting 151 ...
Страница 152: ...You see this window 152 ...
Страница 210: ...You see this window 3 Select Fax Settings for Printer Select your product if prompted 210 ...
Страница 339: ...4 Leave the ADF cover open then raise the scanner unit 5 Press the tabs and remove the document mat 339 ...
Страница 387: ...7 14 CPD 41233 Parent topic Copyright Notice 387 ...


