


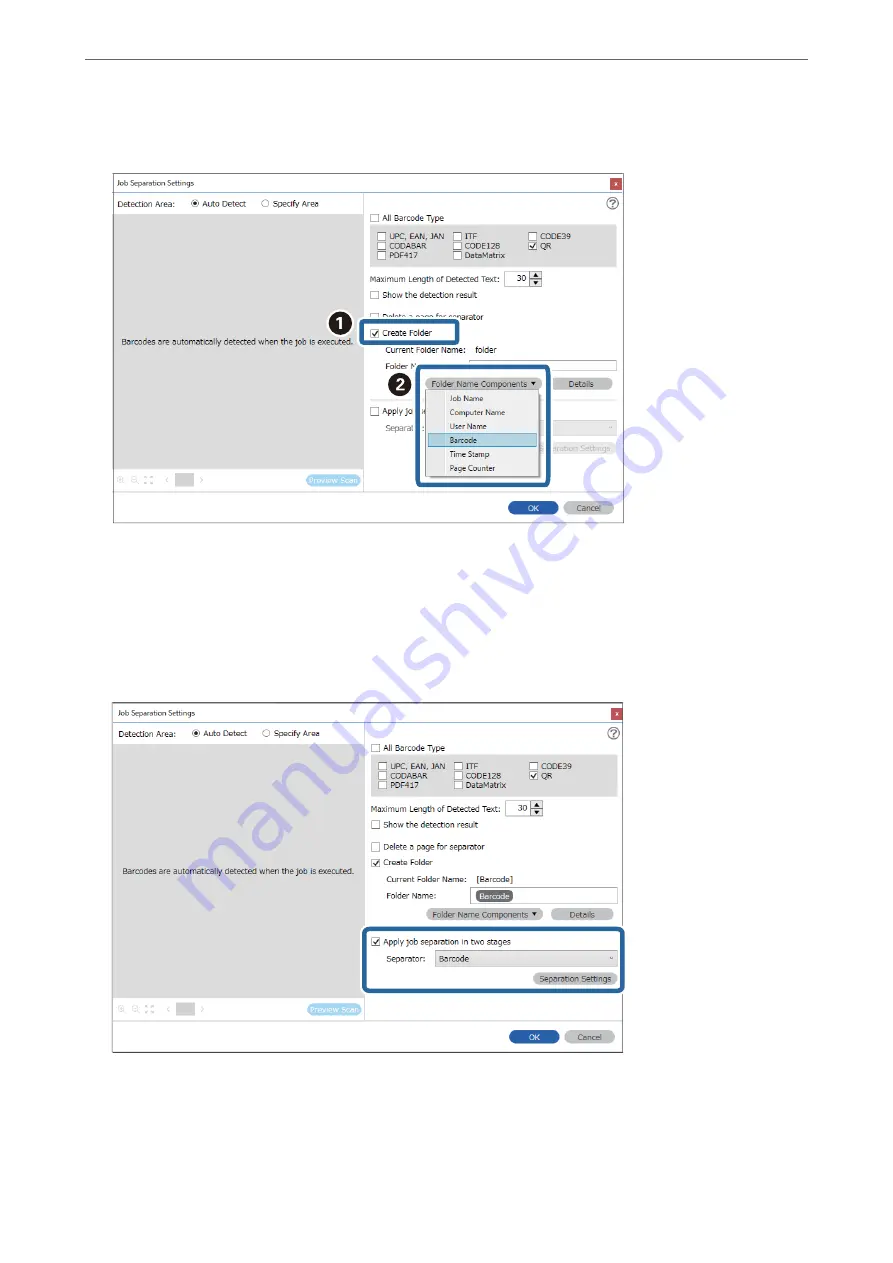
4.
Check
Create Folder
, select
Barcode
from
Folder Name Components
.
Note:
You can specify the point at which the
Folder Name Components
will be inserted with your cursor.
You can also drag and drop added items to change the order.
To delete added items, select the added item and delete it using the Delete key on your keyboard.
5.
Select
Apply job separation in two stages
, set
Separator
to
Barcode
, and then click
Separation Settings
.
6.
Additionally, on the
Job Separation Settings
screen, select the type of barcode you want to use for the second
folder, select
Create Folder
, and then select
Barcode
from
Folder Name Components
and add to
Folder
Name
.
To select individual barcode types, clear
All Barcode Type
.
>
Various Scanning Settings for Document Capture Pro (for Windows Only)
>
140
Содержание DS-730
Страница 10: ...Important Instructions Safety Instructions 11 Restrictions on Copying 12 ...
Страница 27: ...Specifications of Originals and Placing Originals Specifications of Originals 28 Placing Originals 33 ...
Страница 78: ...3 Click Edit Preparing to Scan over a Network Setting a Shared Network Folder Creating the Shared Folder 78 ...
Страница 91: ...Basic Scanning Scanning Using the Scanner s Control Panel 92 Scanning from a Computer 96 ...
Страница 255: ...Standards and Approvals Standards and Approvals for European Models 256 Standards and Approvals for U S Models 256 ...
Страница 257: ...Where to Get Help Technical Support Web Site 258 Contacting Epson Support 258 ...


