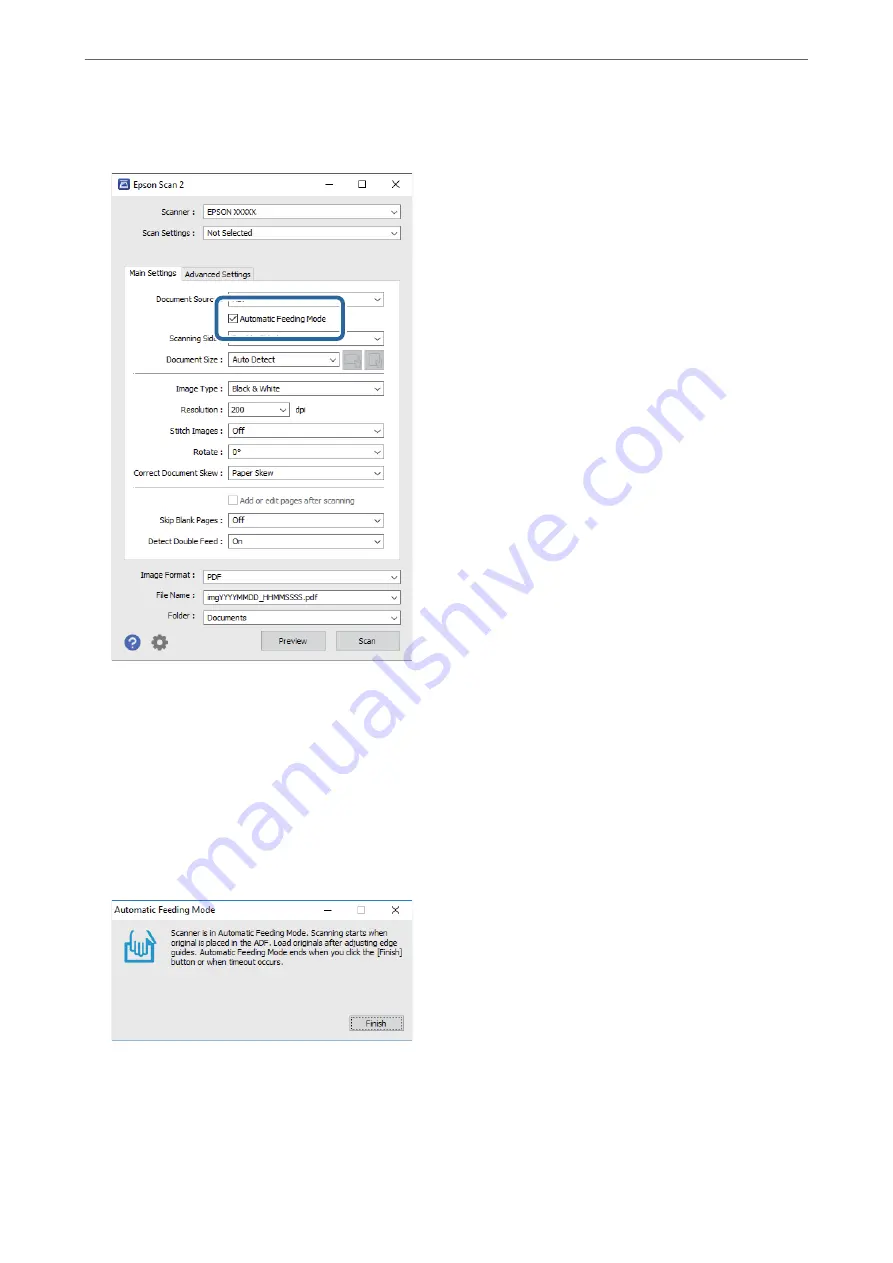
2.
Select
Automatic Feeding Mode
on the
Main Settings
tab.
3.
Make other settings for scanning in the Epson Scan 2 main window.
4.
Click
Scan
.
Note:
When you are using Document Capture Pro, click
Save
to save the scan settings. When you start scanning, Automatic
Feeding Mode starts.
Automatic Feeding Mode starts.
The
Automatic Feeding Mode
window is displayed on your computer and the scanner.
5.
Adjust the edge guides, and then place the original in the ADF.
Scanning starts automatically.
>
Scanning Different Sizes or Types of Originals One by One (Automatic Feeding Mode)
125
Содержание DS-730
Страница 10: ...Important Instructions Safety Instructions 11 Restrictions on Copying 12 ...
Страница 27: ...Specifications of Originals and Placing Originals Specifications of Originals 28 Placing Originals 33 ...
Страница 78: ...3 Click Edit Preparing to Scan over a Network Setting a Shared Network Folder Creating the Shared Folder 78 ...
Страница 91: ...Basic Scanning Scanning Using the Scanner s Control Panel 92 Scanning from a Computer 96 ...
Страница 255: ...Standards and Approvals Standards and Approvals for European Models 256 Standards and Approvals for U S Models 256 ...
Страница 257: ...Where to Get Help Technical Support Web Site 258 Contacting Epson Support 258 ...


