187
Note:
Make sure the product's date and time settings are correct. You can only send faxes in black-and-
white when you use this option.
1.
Place your original on the product for faxing.
2.
Press the
home button, if necessary.
3.
Select
Fax
.
4.
Enter a fax number or select a number from the Contacts or Recent lists.
5.
Select
Fax Settings
.
6.
Select
Send Fax Later
.
7.
Select
On
.
8.
Select
Time
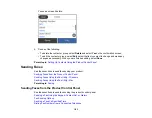
, use the displayed keypad on the LCD screen to enter your desired time, and select
OK
.
9.
Select
Done
.
10. Press the
start button to send the fax.
Note:
To cancel faxing, press the
cancel button.
After scanning your originals, your product dials the number and sends the fax at the specified time.
Note:
You cannot send another fax until the fax has been sent at the specified time. If you want to send
a fax before then, cancel the scheduled fax by selecting Fax on the home screen and then deleting it. If
the product is turned off at the specified time, the fax is sent when it is powered on.
Parent topic:
Sending Faxes from the Product Control Panel
Related tasks
Related topics
Setting Up Contacts Using the Product Control Panel
Placing Originals on the Product
Dialing Fax Numbers from a Connected Telephone
If you connected a telephone to the
EXT
port on your product, you can send a fax by dialing the fax
number from the connected telephone. If the recipient's phone number and fax number are the same,
you can speak to the recipient before sending the fax.
Содержание C11CK62201
Страница 1: ...WF 2950 User s Guide ...
Страница 2: ......
Страница 13: ...13 WF 2950 User s Guide Welcome to the WF 2950 User s Guide For a printable PDF copy of this guide click here ...
Страница 111: ...111 10 Select the Layout tab 11 Select the orientation of your document as the Orientation setting ...
Страница 136: ...136 You see an Epson Scan 2 window like this ...
Страница 138: ...138 You see an Epson Scan 2 window like this ...
Страница 152: ...152 You see a screen like this 2 Click the Save Settings tab ...
Страница 157: ...157 You see this window ...
Страница 269: ...269 3 Open the ADF cover 4 Carefully remove any jammed pages from beneath the ADF ...
Страница 271: ...271 6 Remove the jammed paper 7 Lower the ADF input tray ...
Страница 330: ...330 Copyright Attribution 2022 Epson America Inc 8 22 CPD 62194 Parent topic Copyright Notice ...

