Note:
❏
Before you use this feature, make sure the printer's
Date/Time
and
Time Difference
settings are correct. Access the menus
from
Settings
>
General Settings
>
Basic Settings
>
Date/Time Settings
.
❏
You can check destination before scanning. Select
Settings
>
General Settings
>
Scan Settings
, and then enable
Confirm
Recipient
.
1.
Place the originals.
Note:
If you want to scan multiple originals or make a 2-sided scan, place all of the originals on the ADF.
2.
Select
Scan
on the home screen.
3.
Select
Network Folder/FTP
.
4.
Specify the folder.
❏
To select from frequently used addresses: Select the icons displayed on the screen.
❏
To enter the folder path directly: Select
Keyboard
. Select
Communication Mode
, enter the folder path as
the
Location (Required)
, and then make other folder settings.
Enter the folder path in the following format.
When using SMB as the communication mode: \\host name\folder name
When using FTP as the communication mode: ftp://host name/folder name
❏
To select from the contacts list: Select
Contacts
, select a contact, and then select
Close
.
You can search for a folder from the contacts list. Enter the search keyword into the box at the top of the
screen.
Note:
You can print the history of the folder in which documents are saved, by selecting
.
5.
Select
Scan Settings
, and then check settings such as the save format, and change them if necessary.
Note:
Select
to save your settings as a preset.
6.
Tap
x
.
Related Information
&
“Managing Contacts” on page 44
&
“Placing Originals” on page 37
&
“Registering Your Favorite Settings as a Preset” on page 46
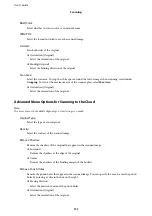
Destination Menu Options for Scanning to a Folder
Keyboard:
Open the
Edit Location
screen. Enter the folder path and set each item on the screen.
❏
Communication Mode
Select the communication mode.
User's Guide
Scanning
99
Содержание C11CG69401
Страница 1: ...User s Guide NPD5896 02 EN ...


