


U-Boot
ATCA-8310 Installation and Use (6806800M72D
)
194
6.2.1.13.2 Real-time Clock
The real-time clock can be read and/or set using the "rtc" command. At boot time the "seconds"
counter is read and stored.
z
In the varibale v_boottime
z
Transferred to the counter register in the FPGA. The FPGA will continue counting the
seconds and provides a means for the GPP to obtain the correct time.
6.2.1.13.3 fri File Decoding
The "fri" command can be used to check and decode the contents of a fri file into memory.
z
"fri info" displays the data encoded in the header
z
"fri decode" decodes a fri image at $loadaddr to address $loadaddr and sets the $filesize to
the number of decoded bytes. Optionally, a dedicated source and destination address can
be specified.
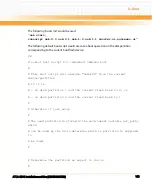
6.2.1.13.4 USB
On ATCA-8310, both USB interfaces provided by the P4080 are used. The default
implementation of u-boot supports only one.
To support both, the "usb start" command is enhanced so that it accepts an optional
parameter:
usb start <controller-num>
where <controller-num> is 0 (default) or 1.
The implementation remembers the current interface. If usb start is called and a different
interface is selected than the current one, an implicit "usb stop" operation is performed.
USB controller 0 connects to the onboard USB flash disk, USB controller 1 to the front-plate USB
port.
6.2.1.14 Power-on Self Test (POST)
POST is executed at power-on only. There are two versions of the POST: long post and short
POST. The decision which one is to be executed is done via the IPMI POST sensor ("IPMI
bootparameter" command, OEM extension 97).
Содержание ATCA-8310
Страница 12: ...ATCA 8310 Installation and Use 6806800M72D Contents 12 Contents Contents ...
Страница 26: ...ATCA 8310 Installation and Use 6806800M72D 26 List of Figures ...
Страница 34: ...ATCA 8310 Installation and Use 6806800M72D About this Manual 34 About this Manual ...
Страница 38: ...Introduction ATCA 8310 Installation and Use 6806800M72D 38 Figure 1 1 Declaration of Conformity ...
Страница 54: ...Hardware Preparation and Installation ATCA 8310 Installation and Use 6806800M72D 54 ...
Страница 70: ...Controls Indicators and Connectors ATCA 8310 Installation and Use 6806800M72D 70 ...
Страница 146: ...BIOS ATCA 8310 Installation and Use 6806800M72D 146 5 3 3 2 3 SATA Configuration Figure 5 32 SATA Configuration ...
Страница 162: ...BIOS ATCA 8310 Installation and Use 6806800M72D 162 ...
Страница 200: ...U Boot ATCA 8310 Installation and Use 6806800M72D 200 ...
Страница 244: ...Intelligent Peripheral Management Controller ATCA 8310 Installation and Use 6806800M72D 244 ...
Страница 438: ...CPLD and FPGA ATCA 8310 Installation and Use 6806800M72D 438 ...
Страница 442: ...Replacing the Battery ATCA 8310 Installation and Use 6806800M72D 442 ...
Страница 444: ...Related Documentation ATCA 8310 Installation and Use 6806800M72D 444 ...
Страница 454: ...ATCA 8310 Installation and Use 6806800M72D Sicherheitshinweise 454 ...
Страница 456: ...Index ATCA 8310 Installation and Use 6806800M72D 456 ...
Страница 457: ...Index ATCA 8310 Installation and Use 6806800M72D 457 ...
Страница 458: ...Index ATCA 8310 Installation and Use 6806800M72D 458 ...
Страница 459: ......


