GB
35
1
3
4
5
6
8
7
9
2
1
3
4
5
6
8
7
9
2
1
3
4
5
6
8
7
9
2
1. Temperature regulator and LED light part
2. Storage shelf.
3. Crisper cover
4. Crisper
5. Upper drawer in freezer
6. Lower drawer in freezer
7. Adjustable feet
8. Egg tray
9. Door shellves
View of the appliance
Changing the light bulb
Warning!
If the LED light bulb is damaged, only a qualified
electrician or competent person may replace it!
If the light bulb is replaced by an unqualified person it may
cause injury or serious malfunction. It must be replaced by
a qualified person in order to avoid a hazard. Contact your
local service centre for help. Before changing the light bulb,
switch off the appliance and unplug it, or remove the fuse or
circuit breaker.
Description of the appliance
Reversing the door
Note!
Due to continuous development of our products your
refrigerator may appear slightly different to the illustrations
in this user manual, but its operation remains the same.
The side at which the door opens can be changed from the
right side (as supplied) to the left side, if the installation site
requires.
Tools you will need:
1. 8mm socket driver
2. Cross-head screwdriver
3. Putty knife or thin-bladed screwdriver
Before you start lay the refrigerator on it’s back in order to
gain access to the base. You should rest it on soft foam
packaging or similar material to avoid damaging the cooling
pipes at the rear of the refrigerator
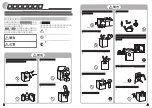
1. Stand up the refrigerator, open the upper door, remove
the door shelves and close the door (to protect the other
shelves from damage).
2. Remove the screw with a cross-head screwdriver, then
use a putty knife or thin-bladed screwdriver to prise off the
screw hole cover at the top left corner of the refrigerator,
and unscrew the upper hinge cover, which is at the top right
corner of the refrigerator.
LED light bulb data: 220-240 V. To switch off the appliance,
set the temperature regulator to position “0”.
Unplug the appliance.
Press the centre of the bulb with a finger.
Remove the bulb cover with a #1 screwdriver, replace the
bulb, and then refit the cover.
Reconnect and turn on the appliance.
1
3
4
5
6
8
7
9
2
Door shelves
Screw
Upper hinge
cover (right)
Screw hole cover


