Modules
7 - 4 Setting Up SATA RAID or AHCI Modes
7
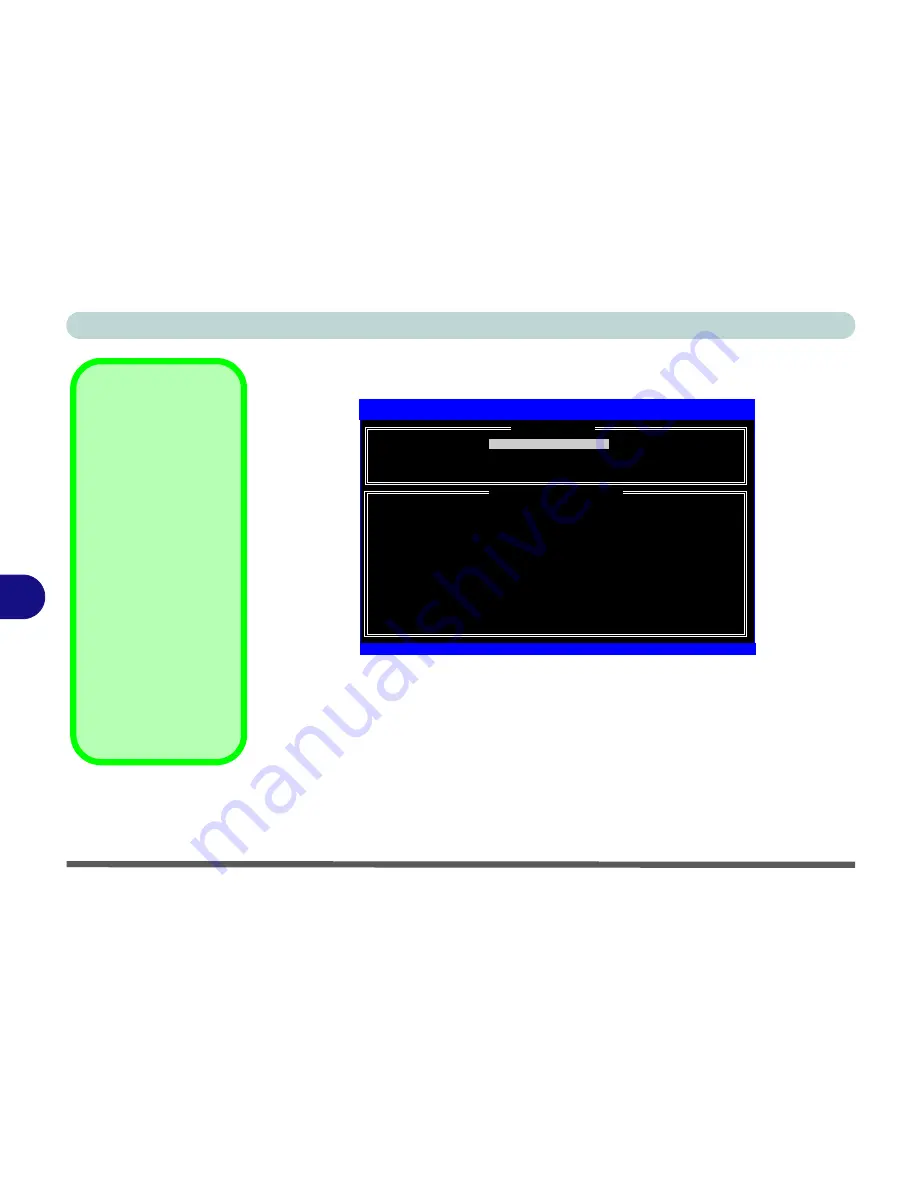
For RAID Only (for AHCI Mode go to
“Intel Matrix” on page 7 - 6
)
1.
Press
Ctrl + i
to enter RAID configuration menu.
2.
Select
1.Create RAID Volume
and press Enter.
3.
Specify the
RAID volume name
and then press Tab or Enter to advance to the
next field.
4.
Specify the
RAID level
(
RAID 0 or RAID 1
- see
Table 7 - 1, on page 7 - 2
and
sidebar) and then press Tab or Enter to advance to the next field.
5.
Press Enter and the system will select the physical disks to use.
6.
Press Enter and select (if applicable) the Strip Size (best set to default).
7.
Press Enter and select the Capacity size (best set to default).
8.
Press Enter to
Create Volume
.
1.
Create RAID Volume
2.
Delete RAID Volume
3.
Reset Disks to Non-RAID
4.
Exit
RAID Volumes:
None Defined
Physical Disks:
Port Drive Model
Serial
#
Size
Type/Status(Vol ID)
1
HDT722516DLA380
VDK71GTE17AH6K
153.4GB
Non-RAID Disk
4
ST380811AS
5PS196TS
74.5GB
Non-RAID Disk
Intel(R) Matrix Storage Manager option ROM v6.0.0.1022 ICH8R wRAID5
Copyright (C) 2003-06 Intel Corporation. All Rights Reserved.
[
MAIN MENU
]
[ DISK/VOLUME INFORMATION ]
[
]-Select
[ESC]-Exit
[ENTER]-Select Menu
Array Types
A
Mirrored Array
(
RAID 1
) provides full
data protection, as
data can simply be
copied from a healthy
disk to a replacement
for any failed disk.
A
Striped Array
(
RAID 0
) is
NOT
fault-
tolerant. The failure of
one drive will result in
the loss of all data in
the array. It is de-
signed to increase disk
performance by
spreading the I/O load
across the channels
and drives.
Figure 7 - 1
Intel(R) Matrix
Storage Manager
Содержание eXentia Pro 2208
Страница 1: ...User Manual eXentia Pro 2208...
Страница 9: ...VIII Preface...
Страница 34: ...Video Features 1 19 Quick Start Guide 1 Figure 1 10 Display Settings 2 3 1 4 5 2 3 1 4...
Страница 47: ...Features Components 2 12 2...
Страница 55: ...Power Management 3 8 3...
Страница 63: ...Drivers Utilities 4 8 4...
Страница 77: ...BIOS Utilities 5 14 5...
Страница 107: ...Modules 7 20 PC Camera Module 7 Figure 7 12 Audio Setup for PC Camera Right click...
Страница 127: ...Interface Ports Jacks A 6 A...
Страница 141: ...Specifications D 6 Specifications D...
Страница 149: ...Windows XP Information E 8 Video Features E Figure E 7 Display Properties 2 3 1 5 7 2 3 1 8 9 4 6...
Страница 181: ...Windows XP Information E 40 PC Camera Module E Figure E 24 Audio Setup Windows XP...


